Order of Installation Steps
Enterasys D-Series Hardware Installation Guide 2-3
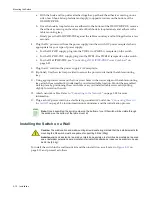
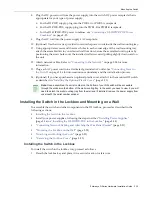
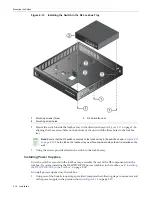
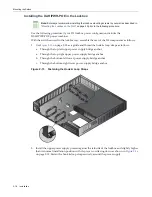
Order of Installation Steps
Once
you
have
chosen
a
suitable
site,
you
can
proceed
to
install
the
D2
switch
components.
Depending
on
the
mounting
option
you
choose,
and
whether
you
decide
to
use
the
switch
as
a
freestanding
device,
the
order
in
which
you
complete
the
installation
may
vary.
Use
the
following
steps
as
a
guideline:
1.
Attach
an
antistatic
wrist
strap
to
your
wrist.
2.
Determine
a
suitable
location
for
the
D2
installation
and
proceed
with
one
of
the
following
options:
a.
Using
the
Switch
as
a
Freestanding
Device
b. “
Installing
the
Switch
into
a
Rack
”
(page 2
‐
4)
c.
“
Installing
the
Switch
Under
a
Table
”
(page 2
‐
10)
d. “
Installing
the
Switch
on
a
Wall
”
(page 2
‐
12)
e.
“
Installing
the
Switch
in
the
Lockbox
and
Mounting
on
a
Wall
”
(page 2
‐
15)
3.
Connect
power
to
the
switch.
Refer
to
“
Connecting
Power
to
the
Switch
”
on
page 2
‐
26.
4.
Connect
to
the
console
port.
Refer
to
“
Connecting
to
the
Console
Port
”
on
page 2
‐
27.
5.
Connect
to
the
network
(including
installing
optional
SFPs).
Refer
to
“
Connecting
to
the
Network
”
on
page 2
‐
28.
6.
Install
the
optional
plastic
cover.
Refer
to
“
Installing
the
Optional
Plastic
Cover
”
on
page 2
‐
33.
7.
Complete
the
installation.
Refer
to
“
Completing
the
Installation
”
on
page 2
‐
35.
Using the Switch as a Freestanding Device
If
you
are
installing
the
D2
switch
as
a
freestanding
device,
choose
an
appropriate
flat,
secure
location,
such
as
a
desk
top,
and:
1.
If
desired,
install
the
optional
rubber
feet
underneath
the
switch
by
affixing
one
securely
in
each
of
the
four
corners.
2.
(Optional)
Connect
the
D2
‐
HIPWR
‐
POE
power
combiner
as
described
in
“
Connecting
a
D2
‐
HIPWR
‐
POE
Power
Combiner
”
on
page 2
‐
25.
3.
Proceed
to
connect
power
to
the
switch
as
described
in
“
Connecting
Power
to
the
Switch
”
on
page 2
‐
26.
Summary of Contents for D2G124-12
Page 2: ......
Page 12: ...x ...
Page 16: ...xiv ...
Page 20: ...Getting Help xviii About This Guide ...
Page 26: ...PoE Power over Ethernet Support 1 6 Introduction ...
Page 66: ...Resetting the D2 HIPWR POE 3 4 Troubleshooting ...
Page 74: ...Regulatory Compliance A 8 Specifications ...
Page 76: ...Index 2 ...


