14
15
C
hapter
6
H
ardware
i
nStallation
C
hapter
7
u
Sing
tHe
uSB B
ridge
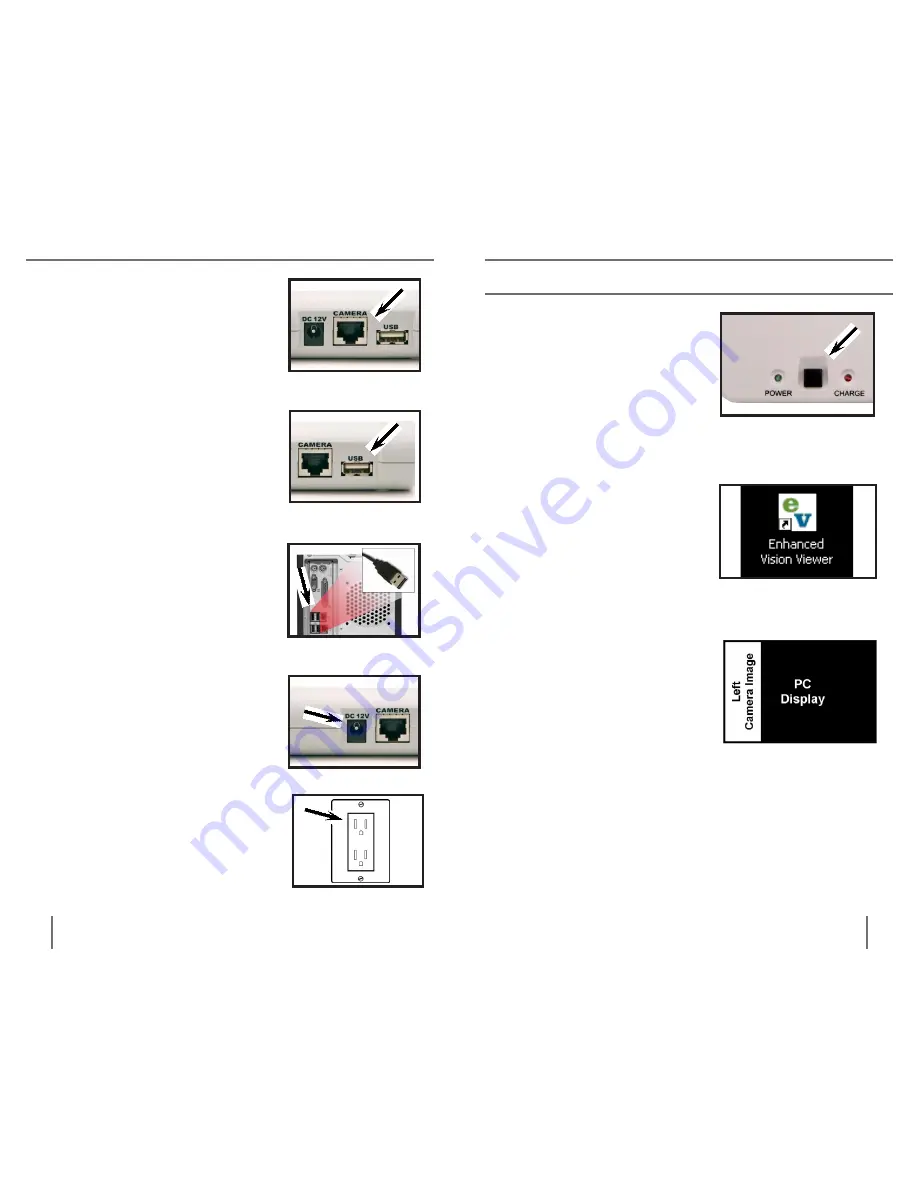
Figure 3
Figure 4
Figure 5
Figure 6
Figure 2
2. Connect the camera output
cable of your compatible En-
hanced Vision product to the
“CAMERA” input port on the
rear of the USB Bridge.
(See Figure 2)
.
3. Connect one end of the in-
cluded USB cable to the “USB”
port on the rear of the USB
Bridge
(See Figure 3)
.
4. Connect the remaining end of
the included USB cable to an
available high-speed USB 2.0
port on the front, side or rear of
your PC
(See Figure 4)
.
5. Connect the tip of the included
power supply to the “DC 12V”
input port on the rear of the
USB Bridge
(See Figure 5)
.
6. Plug in the remaining end of
the power supply to an avail-
able AC/mains outlet.
(See Figure 6)
.
1. Press the POWER button
on the front of the USB
Bridge. When the power
is turned on, the green
“POWER” indicator will
illuminate
(See Figure 1).
2. Start the viewer applica-
tion by double-clicking on
the “
eV
” icon, located on
your Windows desktop
(See Figure 2).
3. Momentarily, the camera
image should appear on
your PC screen
(See Figure 3).
Once the camera image appears on your PC,
adjust the zoom and color mode settings on your
camera as desired. Refer to the manual included
with your Enhanced Vision product for more
information on adjusting these settings.
Figure 3
Figure 1
Figure 2
USing tHe USB BRiDge
Summary of Contents for USB Bridge
Page 1: ...Users Manual ...


