background image


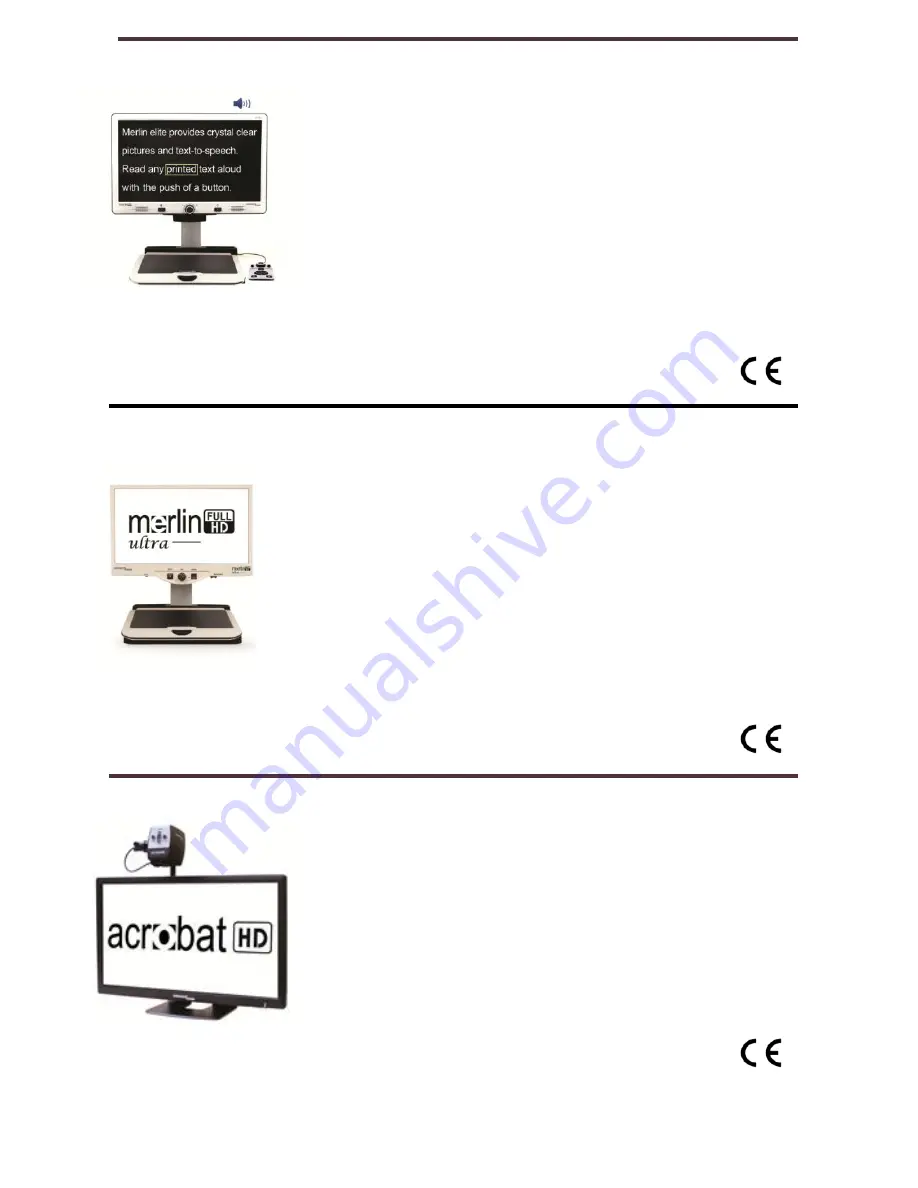
Merlin elite                                       
See and hear the difference! 

Merlin elite is a high performance desktop 
video magnifier (CCTV), featuring HD and 
text-to-speech (OCR). High definition color 
and contrast provides a beautiful, crystal clear 
picture and vibrant colors. Merlin elite’s unique 
design allows for a wide field of view, 
displaying more text on the screen. 

Magnification: 2.4x - 70x 

Merlin Ultra HD 

Merlin ultra HD’s camera technology produces 
an even truer, more natural image. Easily read 
books and magazines, read and write letters, 
manage your financial records, view color 
photos, do crossword puzzles, and even 
pursue a favorite hobby. 

 Magnification:  
20” LCD: 1.9x (min) to 51.2x (max) 
22” LCD: 2.1x (min) to 55.9x (max) 
24” LCD: 2.3x (min) to 61.2x (max) 
 

Chapter 10 Other Enhanced Vision Products


42 

Acrobat HD 

ACROBAT HD LCD is a complete system 
featuring a 3-in-

1 Sony HD camera witha 22”, 

24”, or 27” high resolution HD LCD producing 
maximum picture detail for clear, vivid color 
display. The adjustable arm, tilting screen, and 
rotating capability allows the camera to be 
positioned at any angle for optimal viewing. A 
built in handle allows for easy transport. 

Magnification 1.7x to 95x 


Summary of Contents for transformer USB

Page 1: ...by VGA USB Users Manual ...

Page 2: ... with low vision to read write and to see objects at any distance The unique design of this product provides the ultimate in flexibility and offers a large range of magnification with multiple viewing options that make reading easier than ever Simply connect the Transformer to any laptop or computer Prior to using this system please carefully read and follow the instructions provided within this b...

Page 3: ...rference will not occur in a particular installation If this equipment does cause harmful interference to radio or television reception which can be determined by turning the equipment off and on the user is encouraged to try to correct the interference by one or more of the following measures Reorient or relocate the receiving antenna Increase the separation between the equipment and receiver Con...

Page 4: ...d Setting up your Transformer 10 11 Software installation 12 13 Charging 14 Keyboard Controls 15 Chapter 4 Package Contents Controls Package Contents Controls 16 17 Chapter 5 Using the Transformer Viewing Modes 19 21 Adjusting window divider 22 23 Capturing a still image 24 Viewing a stored image 25 Using 3rd party software 25 Using the Find 26 Table of Contents ...

Page 5: ...e Position of Selected marker 31 Adjusting the Color Balance 32 Changing Favorite color modes 33 Changing View Modes 34 Changing Languages 35 Chapter 7 Troubleshooting Troubleshooting 36 Chapter 8 Specifications Specifications 37 38 Chapter 9 Warranty information Warranty information 39 40 Chapter 10 Other Enhanced Vision Products Other Enhanced Vision Products 41 43 Table of Contents ...

Page 6: ...idity Do not place the Transformer near a radiator heater or areas exposed to long hours of direct sunlight Prevent the risk of electrical shock by NOT attempting to disassemble the unit Please refer all service to an authorized repair facility Do not use the Transformer in near or around water The Transformer is not designed to offer protection against contact with liquids of any kind Do not use ...

Page 7: ...d to be used as a portable device Please use care when connecting disconnecting cables and accessories Care Maintenance Always turn the power OFF on the Transformer when the system is not in use To prolong battery life remove the battery from the Transformer if the system is not being used for one week or more If needed clean the surface of the Transformer with a soft damp cloth or an electrostati...

Page 8: ...y cause image distortion If this happens switch the unit off and try moving the unit to a different location This product contains moving parts Please use caution when moving the adjustable arm or when transporting the Transformer to avoid possible injury to hands and fingers To avoid personal injury or damage to the Transformer do not make any other type of connections to the camera input jacks o...

Page 9: ...disk 100 MB of free space available In the interest of continuous improvement product specifications and or minimum system requirements are subject to change without prior notice Recommended system OS Windows 7 Processor Intel Core2Duo Memory 2GB USB 2 0 high speed 1 available port required Graphics NVidia or ATI graphics card Hard Disk 100MB of free space available Windows is a registered tradema...

Page 10: ... surge protector may also be used and is recommended 3a Connecting USB to Computer Connect USB cable that was provided to the back of your Transformer Plug in the opposite end to your desktop or laptop computer If this is your first time using this product refer to page 8 for software installation 3b Connecting VGA to Monitor Connect VGA cable that was provided to the back of your Transformer Plug...

Page 11: ...s open grasp the feet and move them away from each other Next rotate the camera head toward the object you wish to magnify See Figure 4 To fold back to starting position repeat steps in reverse 5 Turning the power on and off The Transformer will always be off in the closed position Upon unfolding the Transformer the LED light and unit should automatically turn on in reading mode If you wish to tur...

Page 12: ...posite end into your transformer 2 A pop up window appears if you are operating on Windows 7 select open files from the pop up menu See figure 1 go to step 3c 3 If a pop up doesn t appear a Navigate to your start menu and go to My Computer See figure 2 b Once the My Computer is open double click on the EV icon c Double click the setup exe to start the installer See figure 3 12 Chapter 3 Getting St...

Page 13: ... to install the software and click on the Next button to continue the installation process See figure 5 6 A ready to install screen will appear click Install to continue the installation 7 The software will start installing this should take aprox 1 min 8 Once the installation has fully completed the viewer application will automatically open 13 Chapter 3 Getting Started Figure 3 Figure 5 Figure 4 ...

Page 14: ... USB Cable DOES NOT charge the Transformer The battery will take approximately 4 hours to fully charge The Transformer Magnifier will provide up to 4 hours of usage when fully charged When plugged in powered on and charging the charge indicator light page 17 of the Transformer will flash RED and will stay solid RED when fully charged Note When the Transformer is in the folded position and is plugg...

Page 15: ...al V Markers Vertical Escape Enter menu MODE M Next color Mode Enter Select menu item LED On Off L Light On Off FIND Space Bar Find Rotate R Rotate F5 Save image F6 View saved image F7 Full screen hide F8 Change window position Shift Arrow Window size F1 Lists all available shortcuts Ctrl Up Down Marker Size Ctrl Alt G Go to EV Viewer Chapter 3 Getting Started 15 ...

Page 16: ...de I Zoom Wheel Magnifies image and navigates menu J Freeze Button Freezes image on screen K USB Input L Power Supply Input Port DC IN M Battery Charge Indicator Light N AC Adaptor Indicator Light O VGA Input Model TRVEA Only Please refer to the illustrations on the next page to identify the package contents and controls of your Transformer In addition to this users guide you ll find the following...

Page 17: ...B C D E F G I H M J N L 3 1 2 K O 4 5 Chapter 4 Package Contents Controls 17 A ...

Page 18: ...ply turn the position of the camera by rotating it on the arm Your Transformer has a memory feature that allows each viewing mode to be remembered by the 3 different viewing angles The three viewing angles are Distance Viewing Reading and Writing Self Viewing Camera pointed away from Self w lens open Camera pointed down at reading material w lens closed Camera pointed towards Self w lens open 18 C...

Page 19: ...te forward to capture people objects and scenery Be sure to open the Reading Lens for Distance Viewing See Figure 1 The LED light should automatically turn off in this position However if you prefer for it to be on simply press the Green power button Figure 1 Chapter 5 Using the Transformer 19 330 NOTE For the Transformer to be able to focus at all levels of magnification in distance mode the obje...

Page 20: ...ing clarity Viewing Position While in Reading and Writing mode the Transformer has the flexibility to be used in three different positions Right For ward and Left For each different position simply press the rotate button See Figure 2 until the image is displayed correctly on screen NOTE The default viewing position is Right The rotation cycle is as follows Right Forward Left Right 20 Chapter 5 Us...

Page 21: ...matically turn off in this position However if you prefer for it to be on simply press the Green power button Adjusting Magnification The Transformer offers a large range of magnification capabilities The following directions can be used with the Zoom wheel See Figure 2 To adjust the magnification scroll the Zoom wheel or until you reach your desired magnification Figure 2 NOTE The extent of the m...

Page 22: ...will rotate the camera window position clockwise left top right or bottom or full screen After cycling through all five camera window positions pressing the F8 key a sixth time will exit the camera viewing window returning you to your full screen PC desktop Pressing F8 again will repeat all six screen rotation cycles in sequence See Figure 1 22 Chapter 5 Using the Transformer Figure 1 ...

Page 23: ...r PC keyboard to increase or display decrease the width of the video divider window This adjustment is useful when viewing magnified documents side by side with your PC display If the on screen camera image is positioned to the top or bottom of your display hold down the SHIFT button while pressing either the up or down arrow keys on your PC keyboard to increase or decrease the height of the video...

Page 24: ... Use the following procedure to use the Image Capture feature 1 Focus on either a near or distant object The object viewed on the display will be captured as shown 2 Press the F5 function key on your PC keyboard to capture the still image A standard Save As dialog box will appear on screen 3 Select the directory in which you wish to store the file If desired give the snapshot a descriptive file na...

Page 25: ... software products Dolphin SuperNova Version 11 5 to 12 AISquared ZoomText Version 9 xx Issist iZoom Version 3 X After starting the Transformer Viewer application you may open up your third party magnification software to simultaneously run the software and the viewer application Refer to the manual of your magnification software for detailed instructions on its usage In the interest of continuous...

Page 26: ... down the Find button on the camera head See Figure 1 1 The Transformer will automatically zoom out to the widest field of view and a target as shown in Figure 2 will appear in the center of the monitor screen 2 Move your work or reading material until you have located the desired item within the target area See figure 2 3 Release the Find button and it will magnify the item you located within the...

Page 27: ... the Freeze button to activate Freeze mode See Figure 1 2 To release the Freeze mode press any key or change the viewing angle Using the Rotate Function The Rotate function allows you to rotate an image on screen 180 or 90 You can use this function at any time Simply flip the image by pressing the Rotate button located on the underside of the arm See Figure 2 To rotate the image back to original p...

Page 28: ...he 28 color select options by following the instructions provided on page 33 NOTE You are only allowed up to 6 favorites at any one time However you have the flexibility to change them at any time Upgrading Your Software In the interest of continuous product improvement updates to the Viewer software will be made available on the Enhanced Vision website at http www enhancedvision com support softw...

Page 29: ... or to scroll through the functions To activate one of the functions press Mode while it is highlighted To exit at any time press Freeze button while setup menu is on screen USING VGA Model TRVEA Only USING USB Brightness Line Marker Window Marker Marker Position Marker Size Color Normal Color Warm Color Cold Color Mode Selection Display Normal Display Mode Wide Product Information Chapter 6 Using...

Page 30: ...used to Enable Disable Line Window Markers 1 Press and hold the Freeze button for at least 3 seconds or until setup menu shows on screen 2 Scroll with the Zoom wheel or to Line Marker See Figure 1 or Window marker See Figure 2 and press Mode to Enable 3 See page 32 for instructions on how to adjust the size and position or your Markers 4 To Disable Line or Window marker scroll with the Zoom wheel ...

Page 31: ...ess the Mode button 3 Use the Zoom wheel or to increase or decrease the size of the Line Window marker To exit back to menu press the Mode button 4 To move your Line Window marker up and down scroll with the Zoom wheel or to the Marker position See Figure 2 and press the Mode button 5 You can now scroll with the Zoom wheel or to move the Line Window marker up and down Press Mode button to exit out...

Page 32: ... to adjust the Color Balance 1 Press and hold the Freeze button for 3 seconds until setup menu shows on screen 2 Scroll with the Zoom wheel or and press Mode on the desired Color button See Figure 1 Color Normal automatically adjusts to the lighting in the room Color Warm casts a brighter yellow tone Color Cold casts a blue tone 3 To exit press Freeze button Figure 1 32 Chapter 6 Using the Menu ...

Page 33: ...n and press the Mode button See Figure 1 3 You will see a sub menu showing the current color modes with a check box See Figure 2 4 To change your color modes highlight one with a current check box and deselect it by pressing Mode See Figure 3 Choose an alternative color mode You are only allowed up to 6 5 Use the Next and Previous menu items to view more available color modes See Figure 3 6 To exi...

Page 34: ...ug in the included VGA cable to the dongle labeled VGA and to the VGA monitor 3 Press the Power Button on the Transformer see page 12 The Transformer will not power off when the VGA monitor is powered off or when the VGA Cable is unplugged Press and Hold the Green power button on the Transformer for about 3 seconds or until the Battery Charge Indicator Light turns off The USB port on the Transform...

Page 35: ... Information Sub Menu 4 Using the Scroll Wheel select Language and press the Mode button once 5 Using the Scroll Wheel select the desired language and press the Mode button once USB Mode The Transformer while in USB mode will automatically detect the language that is set on your Microsoft Windows PC These settings can be changed in the Language settings located in the Control Panel 35 ...

Page 36: ... Try selecting different color modes to improve image quality See Page 29 Video image on LCD display is too bright dark The Transformer is designed to be used in moderate lighting conditions preferably indoors Bright lighting or direct sunlight may produce shadows and or reduce visibility Try moving to a more shaded area to improve image quality Adjust the distance of the Transformer from your rea...

Page 37: ...ed 13 L x 10 5 W x 9 25 H fully extended in reading view Weight 2 5 lbs with batteries installed Magnification Ranges 2 45X up to 30X 17 LCD 2 4 minimum 30 0 maximum 19 LCD 2 7 minimum 33 5 maximum 17 19 Field of View Near Mode 13 7 cm min 1 12 max 17 19 Working Distance Near Mode 17 5 cm Warranty 2 years Indicator lights Refer to Page 14 if needed Amber LED Green LED Meaning Solid Power Supply At...

Page 38: ...rating of batteries used LCD brightness setting LED Mode and other variable factors Wall adapter UL CE rated Input 100 240VAC 50 60Hz 0 8A Max Output 9V DC 2 5A Operation Temperature 0 C 40 C Relative Humidity 10 95 Image 28 Enhanced Contrast Modes Black and White Color Page Locator To prevent condensation do not use the unit for 1 hour after transporting the unit from extreme cold to room tempera...

Page 39: ...r the product or replace it during the warranty period There are no other expressed or implied warranties accompanying this product This warranty policy does not cover a Defects or damage from misuse use in other than normal and customary manner accident or neglect b Defects or damage from improper operation maintenance installation adjustment alterations or modification c Defects or damage from s...

Page 40: ...d Vision warranty service center If warranty service is required please contact Enhanced Vision at 800 440 9476 Monday through Friday between 8 a m and 5 p m Pacific Standard Time PST to request a return authorization number Warranty repairs will not be accepted without a valid return authorization number You may wish to keep the original product packaging in case warranty service is required The ...

Page 41: ... use Smart Reader boasts a lightweight portable sleek design with a user friendly console Position your document and press a button in seconds Smart Reader begins reading aloud Connect Smart Reader to a T V or monitor and enlarge your captured image to follow along as it reads Perfect for work home school vacation and on the go DaVinci DaVinci is a high performance desktop video magnifier CCTV fea...

Page 42: ...ks and magazines read and write letters manage your financial records view color photos do crossword puzzles and even pursue a favorite hobby Magnification 20 LCD 1 9x min to 51 2x max 22 LCD 2 1x min to 55 9x max 24 LCD 2 3x min to 61 2x max Chapter 10 Other Enhanced Vision Products 42 Acrobat HD ACROBAT HD LCD is a complete system featuring a 3 in 1 Sony HD camera witha 22 24 or 27 high resoluti...

Page 43: ...ini table Place underneath your Transformer and make reading even easier Contact Information US Office Phone 714 465 3400 Fax 714 374 1821 UK Office Phone 44 0 115 9442317 Fax 44 0 115 9440720 DE Office Phone 49 0 6078 969827 0 Fax 49 0 6078 969827 33 Technical Support Main Toll Free 800 440 9476 ext 3 Local Phone 714 465 3400 ext 3 E mail TechSupport enhancedvision com ...

Page 44: ...____________________________ ______________________________________________ ______________________________________________ ______________________________________________ ______________________________________________ ______________________________________________ ______________________________________________ ______________________________________________ __________________________________________...

Page 45: ...to enlarge and enhance images to improve the lives of people who have low vision The extent to which Transformer can improve the ability to see images and text depends on a person s individual condition and level of visual impairment The Transformer is not designed to restore vision correct eye conditions or have degenerative vision loss An eye care professional can best determine the suitability ...

Reviews: