


11
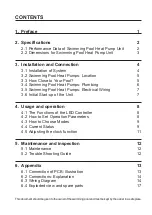
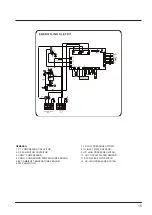
4. USAGE AND OPERATION
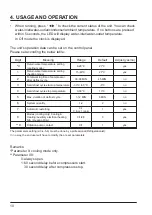
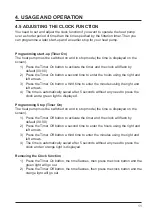
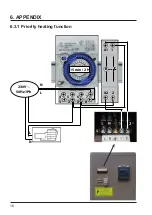
4.5 ADJUSTING THE CLOCK FUNCTION
You need to set and adjust the clock function if you want to operate the heat pump
over a shorter period of time than the time specified by the filtration timer. Then you
can programme a later start-up and an earlier stop for your heat pump.
Programming start-up (Timer On)
The heat pump must be switched on and in stop mode (the time is displayed on the
screen).
1) Press the Timer On button to activate the timer and the clock will flash by
default (00:00)
2) Press the Timer On button a second time to enter the hours using the right and
left arrows.
3) Press the Timer On button a third time to enter the minutes using the right and
left arrows.
4) The time is automatically saved after 5 seconds without any need to press the
clock and a green light is displayed.
Programming Stop (Timer On)
The heat pump must be switched on and in stop mode (the time is displayed on the
screen).
1) Press the Timer Off button to activate the timer and the clock will flash by
default (00:00)
2) Press the Timer Off button a second time to enter the hours using the right and
left arrows.
3) Press the Timer Off button a third time to enter the minutes using the right and
left arrows.
4) The time is automatically saved after 5 seconds without any need to press the
clock and an orange light is displayed.
Removing the Clock function
1) Press the Timer On button, the time flashes, then press the clock button and the
green light will go out
2) Press the Timer Off button, the time flashes, then press the clock button and the
orange light will go out
Summary of Contents for ELE01101
Page 19: ...17 6 ANNEXE 6 4 Vue éclatée et pièces détachées ...
Page 22: ...SWIMMING POOL HEAT PUMP UNIT Installation Instruction Manual ENERGYLINE ...
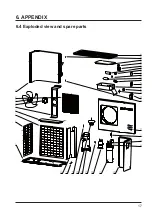
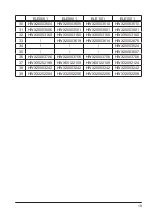
Page 40: ...17 6 APPENDIX 6 4 Exploded view and spare parts ...
Page 43: ...UNIDAD DE BOMBA DE CALOR PARA PISCINAS Manual de Instalación e Instrucciones ENERGYLINE ...
Page 61: ...17 6 APÉNDICE 6 4 Vista fragmentada y piezas sueltas ...
Page 64: ...BOMBA DE AQUECIMENTO PARA PISCINAS Manual de instalação e de instruções ENERGYLINE ...
Page 82: ...17 6 ANEXO 6 4 Perspectiva de explosão e peças de substituição ...
Page 85: ...HEIZPUMPENANLAGE FÜR EIN SCHWIMMBECKEN Einbau Anleitungshandbuch ENERGYLINE ...
Page 103: ...17 6 ANHANG 6 4 Explodierte Ansicht und Ersatzteile ...
Page 106: ...ZWEMBAD WARMTEPOMP Installatie en bedieningshandleiding ENERGYLINE ...
Page 124: ...17 6 AANHANGSEL 6 4 Opengewerkte tekening en wisselstukken ...
Page 145: ...17 6 APPENDICE 6 4 Esploso e parti di ricambio ...
Page 148: ...Varmepumpe til svømmebasseng Installerings og brukerveiledning ENERGYLINE ...
Page 166: ...17 6 Vedlegg 6 4 Sprengskisse og reservedeler ...
Page 169: ...ТЕПЛОВОЙ НАСОС ДЛЯ ПЛАВАТЕЛЬНОГО БАССЕЙНА Руководство по монтажу и эксплуатации ENERGYLINE ...
Page 187: ...17 6 ПРИЛОЖЕНИЕ 6 4 Вид в разрезе и запасные части ...
Page 190: ......


