Page 43
Operation of the DMC-1 using the Remote
Turning on the MAIN Zone
1) Press the remote’s MAIN button to make sure the dis-
play is on the main display menu.
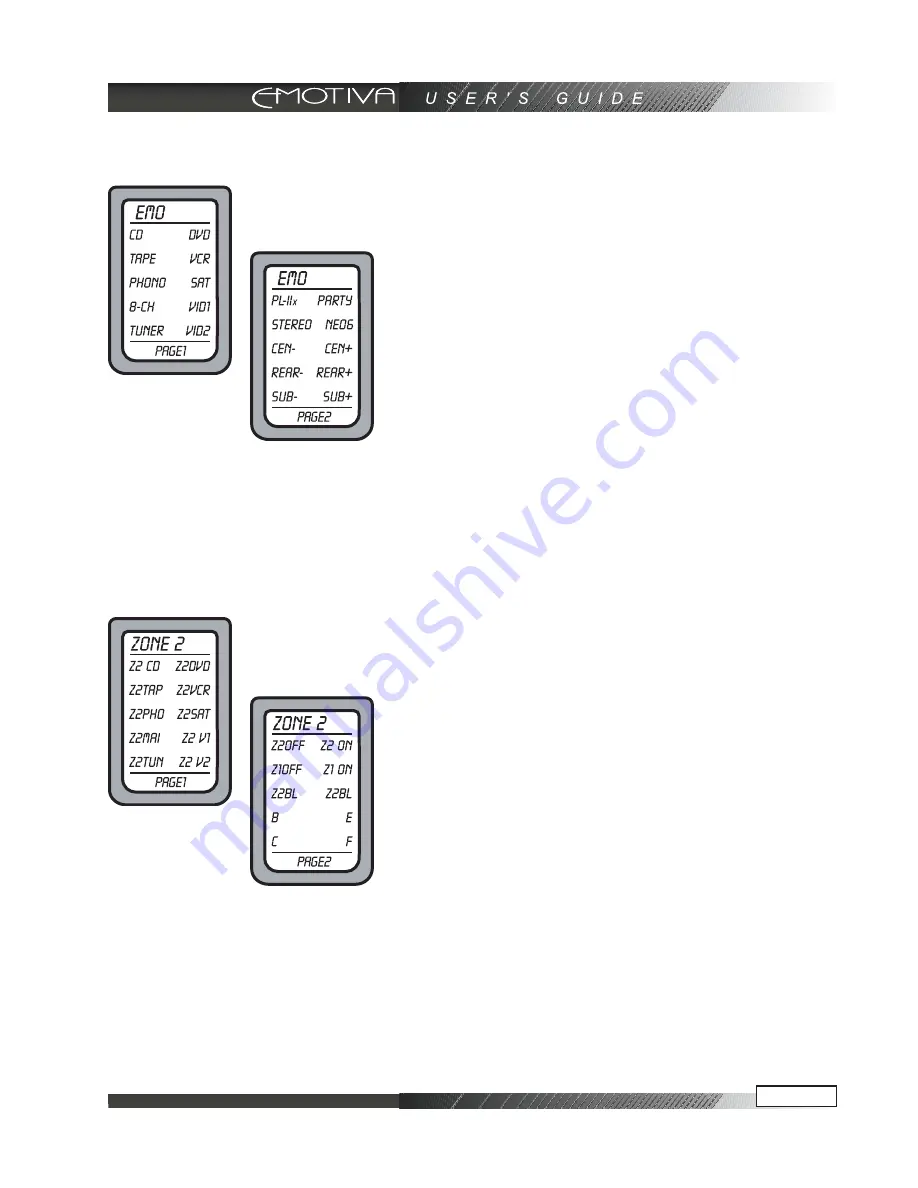
2) Press the EMO device button to set the remote to op-
erate the DMC-1. The display changes to show the DMC-
1 input selections.
3) Press PAGE to reach page 2, which shows the PRO
LOGIC-II, PARTY, STEREO, and the trims for center,
surrounds, and sub. On the right is ‘+’ (increase level)
and on the left is ‘-’ (decrease level).
4) The following buttons with fixed labels are also pro-
grammed: Power, Volume Up, Volume Down, and Mute.
The number pad accesses the tuner presets directly, and
CH+/- steps through them. DIS is the +10 function, and
ENT is station enter. The MODE buttons either side of
the Joystick, allow you to select the different surround
modes.
Turning on ZONE 2
1) Press the remote’s MAIN button to make sure the dis-
play is on the main display menu.
2) Press the ZONE 2 device button to set the remote to
operate the Zone 2 of the DMC-1. The display changes
to show the PAGE 1 of the ZONE 2 input selections.
3) The hard buttons operate Zone 2 controls such as
Power, Volume, Mute, Tuner Controls, and Presets.
4) Press PAGE to reach page 2, which shows Zone 2 on/
off, Zone 1 on/off, and balance left/ right
Note: Zone 2 must first be enabled using the OSD (see
page 55), or these controls will have no effect. Zone 2 is
disabled by default as it is shipped from the factory. When
enabled, Zone 2 can be turned on even if the Main Zone
is off. See page 55 for more Zone 2 details.
After pressing EMO, you will enter PAGE
1 and PAGE 2 screens for commanding the
DMC-1 by remote. These functions allow
source selection and individual level
control of specific speakers as labeled
After pressing ZONE2, you will enter
PAGE 1 and PAGE 2 screens for
commanding Zone 2 of the DMC-1 by
remote. These functions allow source
selection as well as control of turning on/
off of both zones 1 & 2
Summary of Contents for DMC-1
Page 1: ...professional AV Processor USER S GUIDE...
Page 2: ......


