Transferring disks and disk filler modules
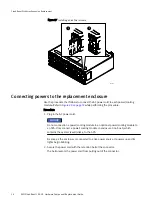
Starting with the disk or disk filler module in slot 0, transfer disks and any disk filler
modules one at a time from the faulted enclosure to the replacement enclosure.
NOTICE
Make sure to transfer the disks and any disk filler modules to the same slots in the
replacement enclosure that they occupied in the faulted enclosure. Installing disks out of
their original order results in data unavailability, and possible data loss.
Removing a disk
Refer to
while performing the procedure that follows.
Procedure
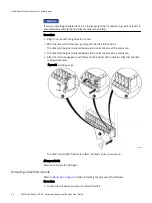
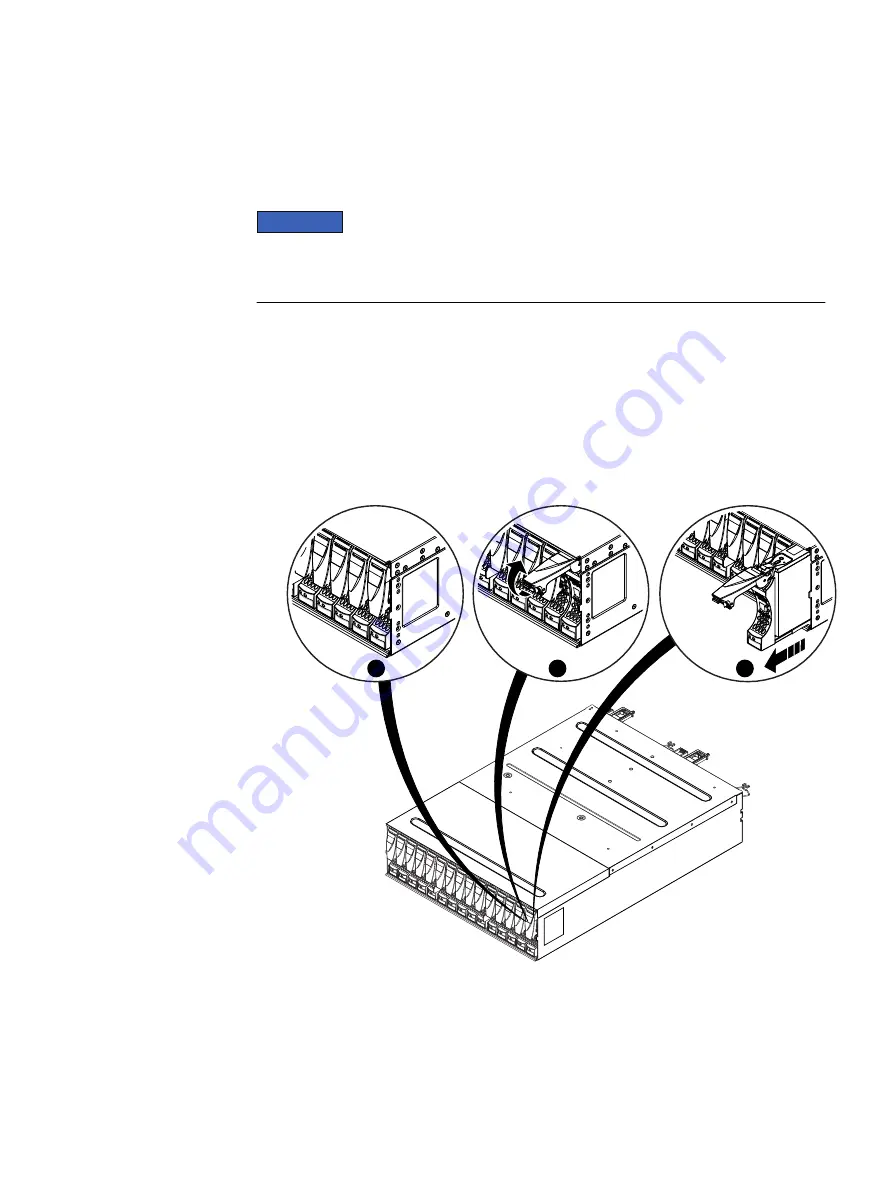
1. Pull the latch on the disk up.
2. Slowly pull the disks from its slot.
3. Place the disk on a static-free surface.
Figure 24 Removing a disk
CL4563
2
3
1
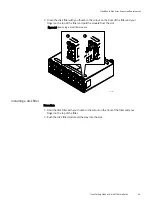
Installing a new or replacement disk
Before you begin
Use ESD gloves or attach an ESD wristband to your wrist and the enclosure in which you
are installing the disk.
Refer to
while performing the procedure that follows.
CloudBoost Disk Array Expansion Replacement
Transferring disks and disk filler modules
47
Summary of Contents for CloudBoost 100
Page 1: ...EMC CloudBoost 100 Version 2 0 Hardware Component Replacement Guide P N 302 002 471 REV 02 ...
Page 6: ...FIGURES 6 EMC CloudBoost 100 2 0 Hardware Component Replacement Guide ...
Page 8: ...TABLES 8 EMC CloudBoost 100 2 0 Hardware Component Replacement Guide ...
Page 14: ...CloudBoost 100 Overview 14 EMC CloudBoost 100 2 0 Hardware Component Replacement Guide ...
Page 20: ...Disk Drive Replacement 20 EMC CloudBoost 100 2 0 Hardware Component Replacement Guide ...


