NOTICE
If you are installing multiple disks in a storage system that is powered up, wait at least 10
seconds before sliding the next disk module into position.
Procedure
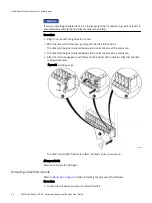
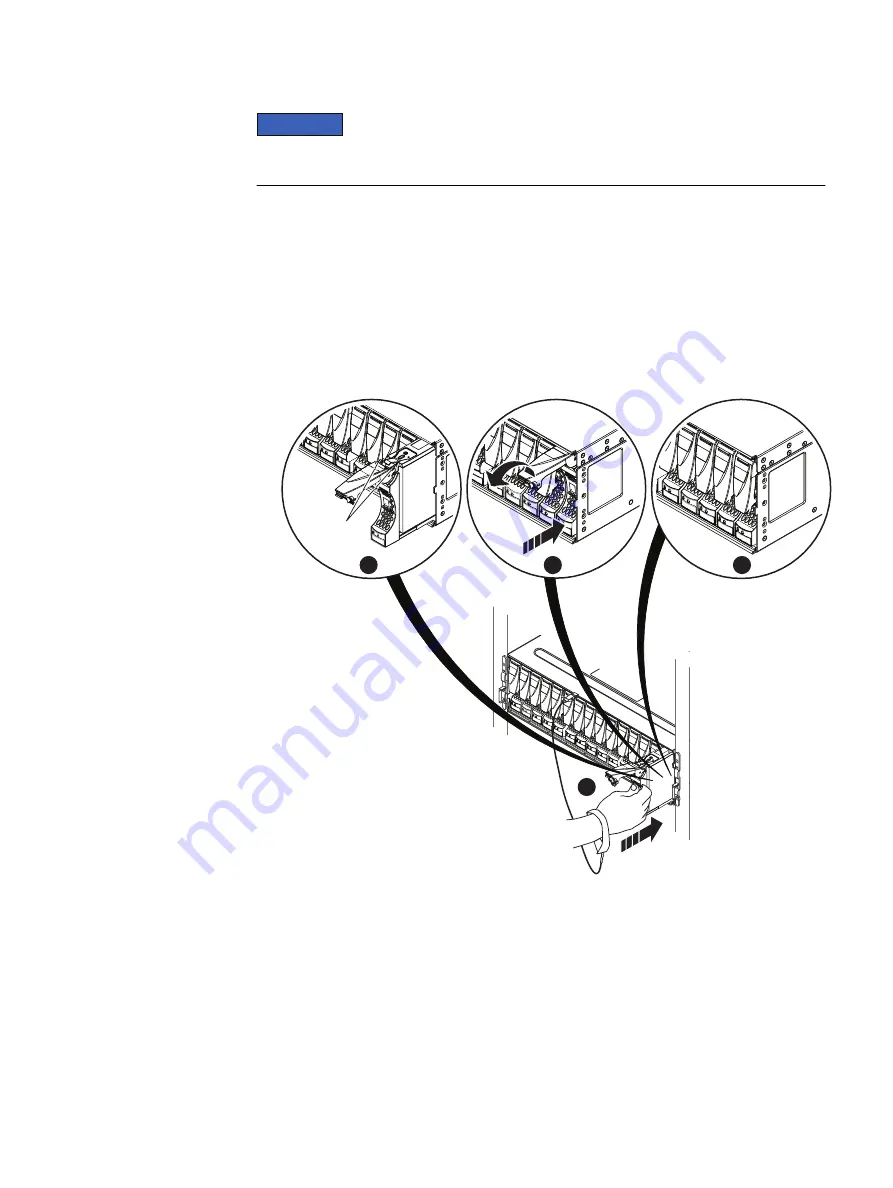
1. Align the disk with the guides in the slot.
2. With the disk latch fully open, gently push the disk into the slot.
The disk latch begins to rotate downward when its tabs meet the enclosure.
3. The disk latch begins to rotate downward when its tabs meet the enclosure.
4. After the latch is engaged, push firmly on the bottom of the disk to verify that the disk
is properly seated.
Figure 25 Installing a disk
1
2
Tabs
CL4645
4
3
The disk's active light flashes to reflect the disk’s spin-up sequence.
After you finish
Remove and store the ESD gear.
Removing a disk filler module
Refer to
while performing the procedure that follows.
Procedure
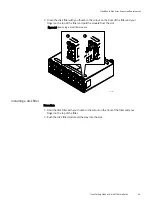
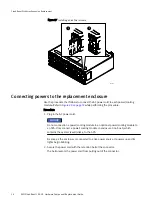
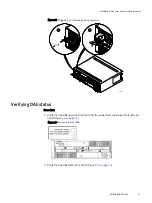
1. Locate the slot where you want to install the disk.
CloudBoost Disk Array Expansion Replacement
48
EMC CloudBoost 100
2.0
Hardware Component Replacement Guide
Summary of Contents for CloudBoost 100
Page 1: ...EMC CloudBoost 100 Version 2 0 Hardware Component Replacement Guide P N 302 002 471 REV 02 ...
Page 6: ...FIGURES 6 EMC CloudBoost 100 2 0 Hardware Component Replacement Guide ...
Page 8: ...TABLES 8 EMC CloudBoost 100 2 0 Hardware Component Replacement Guide ...
Page 14: ...CloudBoost 100 Overview 14 EMC CloudBoost 100 2 0 Hardware Component Replacement Guide ...
Page 20: ...Disk Drive Replacement 20 EMC CloudBoost 100 2 0 Hardware Component Replacement Guide ...


