5b
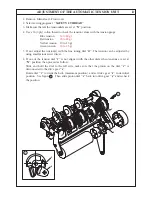
HEIGHT AND ORIENTATION OF NEEDLE BAR IN RELATION
TO THE NEEDLE PLATE HOLES
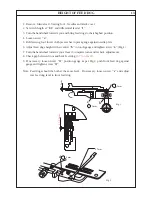
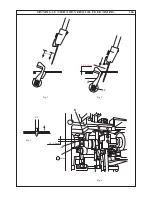
1. Remove: Mains lead - Sewing foot.
2. Insert a new needle (No.90) in
"R1"
.
3. With needle bar at its highest position, loosen screws
"a"
just enough so that needle bar
slides with friction.(Fig.1)
4. Place gauge on needle plate and adjust height of needle bar so that needle
"R1"
grazes the
gauge.(Fig.2)
5. For the orientation of needle bar or needle holder, insert new needles in
"L0 , L1
and
L2"
,
orientate needle bar so that the needles are centered in the needle plate holes. Make sure
that neither needle
"L0 , L1
nor
L2"
is touching the inside of the needle plate holes.
Tighten screw
"a"
and recheck the height.(Fig.3)
6. Remove needle plate and check the clearance between the chain and lower looper and
needle(s). If necessary, adjust clearance of chain looper (see page 11) and clearnace of
lower looper (see page 6).
Summary of Contents for 745 -
Page 1: ...745 845 SERVICE MANUAL 2 2 5 5 1 3 5 NA 6 0 B 1 2 1 T P T P...
Page 18: ...a HEIGHT AND ALIGNMENT OF CLOTH PRESSER BAR 4a 5 b c 4 7mm...
Page 24: ...TIMING OF LOWER LOOPER 8a A B C D b a 5 2mm R1 Fig 1 Fig 2 Fig 3...
Page 51: ...ANNEX SETTING POSITIONS OF SL DF DIALS b c f d g e 2 1 C B A...
Page 61: ...M E M O...

