Elma 1352C
29
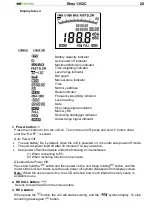
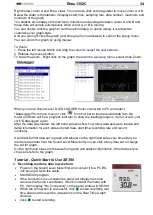
DC Signal
AC Signal
Ground
4. MEM button:
Press to store measurement data using manual store.
5.
/
button:
Press
or
to increase or decrease number.
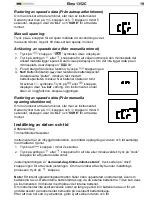
6. CLOCK button:
(1) Press the
button to turn Date and Time display ON or OFF.
(2) Press and hold
button at least 2 seconds Setting the Date and Time.
7. INTV button:
Adjust auto store Interval time.
8.
MAX/MIN
button:
Press button to enter the maximum and minimum recording mode. Under this mode, the
maximum value and minimum value will be stored and automatically updated in the
memory simultaneously.
Pressing the
button will display the “
” symbol and the Maximum value on the
display. Pressing
button again will display the “
” symbol indicator and the
Minimum value on the display.
Pressing
button again will cause the maximum and minimum indicators to blink
together. Which means the meter is under maximum and minimum recording mode. The
value displays on the screen is the present value.
To exit the maximum and minimum mode, press and hold
button down until
the “
” symbol is disappears.
9. Back light button:
Press it to turn on the LCD backlight, making it easier to read in dark environment.
Press it again to turn OFF backlight. The backlight will turn itself off automatically after 30
seconds.
10. A/C button:
Sets frequency weighting to A or C.
11. FAST/SLOW button:
Sets the time weighting to Fast or Slow.
12. Microphone:
1/2 inch Electret Condenser microphone.
13. .CAL potentiometer:
Calibration control, for level calibration adjustment.
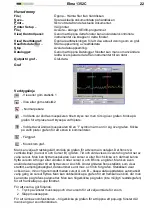
14. Connection to a Computer:
The PC jack signal output is a 9600 bps N 8 1 serial interface. Using the accessory RS-
232/USB interface cable.
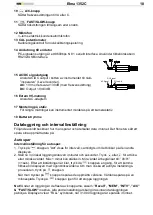
15. AC/DC signal output jack:
Connect the AC/DC output on the bottom of the unit to
the level recorder.
AC:
1 Vrms Corresponding to 130dB.(with frequency
weighting)
DC:
Output: 10mV/dB
16. External DC 9V power supply jack:
Connect the AC adapter.
17. Tripod mounting thread:
For long-term measurements, the unit can be mounted on a camera tripod. Proceed
carefully, to avoid dropping the unit
18. Battery Compartment


