

3
2 www.electrolux.com
CONTENTS
Visit our website to:
Warning / Caution-Safety information.
General information and tips
Environmental information.
Subject to change without notice.
WE’RE THINKING OF YOU
CUSTOMER CARE AND SERVICE
Thank you for purchasing an Electrolux appliance. You’ve chosen a product that brings
with it decades of professional experience and innovation. Ingenious and stylish, it has
been designed with you in mind. So whenever you use it, you can be safe in the
knowledge that you’ll get great results every time. Welcome to Electrolux.
We recommend the use of original spare parts.When contacting Service, ensure that
you have the following data available. The information can be found on the rating plate.
Model, PNC, Serial Number.
Get usage advice, brochures, trouble shooter, service information, buy accessories
& spare parts, online product registration :
www.electrolux.com
Adherence to the directions for use in this manual is extremely important for health and
safety. Failure to strictly adhere to the requirements in this manual may result in personal
injury, property damage and affect your ability to make a claim under the Electrolux
manufacturer’s warranty provided with your product. Products must be used, installed
and operated in accordance with this manual. You may not be able to claim on the
Electrolux manufacturer’s warranty in the event that your product fault is due to failure to
adhere to this manual.
CONTENTS
1.
SAFETY INFORMATION ...............4
1.1 Conditions Of Use ............................4
1.2 Child Safety ......................................5
1.3 General Safety..................................5
1.4 Installation ........................................6
1.5 Use ...................................................6
2. PRODUCT DESCRIPTION ..................8
2.1 Parts .................................................8
2.2 Accessories ......................................9
3. CONTROL PANEL ..............................10
3.1 Control Panel Description ...............10
3.2 Program Chart ................................11
3.3 Program Options Compatibility .......13
3.4 Options ...........................................13
3.5 Settings...........................................16
3.6 Start/Pause (
) and
Add Clothes (
) Touchpad ...........17
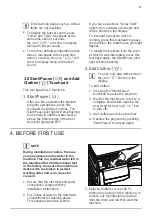
4. BEFORE FIRST USE .........................17
5. DAILY USE - WASHING (Only) ..........18
5.1 Loading The Laundry ......................18
5.2 Using Detergent And Additives .......18
5.3 Options Setting ...............................19
5.4 Starting A Cycle (
) .....................20
5.5 Interruption Of A Program ...............20
5.6 Changing A Program ......................20
5.7 Changing The Options ....................20
5.8 Opening The Door ..........................20
5.9 At The End Of The Program ...........20
5.10 When The Washing Program Is
Completed, But There Is Water
In The Drum .................................21
5.11 AUTO Off Mode ............................21
6. DAILY USE - DRYING (Only) .............22
7. DAILY USE - WASHING & DRYING
(Non-Stop Program) ...........................22
7.1 Washing P
“Dryness Level” Option ...................22
7.2 Washing P
“Time Dry
” Option .....................23
8. WASHING HINTS ...............................24
8.1 Sorting The Laundry .......................24
8.2 Temperatures ..................................24
8.3 Before Loading The Laundry ..........24
8.4 Maximum Loads .............................24
8.5 Removing Stains ............................24
8.6 Detergents Type And Quantity
Of Detergent ...................................25
9. DRYING HINTS ..................................26
9.1 Preparing The Drying Cycle ...........26
9.2 Laundry Not Suitable For Drying ....26
9.3 Garment Labels ..............................26
9.4 Drying Cycle Duration.....................26
9.5 Additional Drying.............................27
10. INTERNATIONAL WASH CODE
SYMBOLS ........................................27
11. CARE AND CLEANING ....................28
11.1 External Cleaning .........................28
11.2 Descaling ......................................28
11.3 After Each Wash ...........................28
11.4 Maintenance Wash With
“Tub Clean” Program ...................28
11.5 Cleaning The Dispenser Drawer ...28
11.6 Cleaning The Drawer Recess .......29
11.7 Cleaning The Pump ......................29
11.8 Cleaning The Water Inlet Filter .....31
11.9 Frost Precautions ..........................32
12. TROUBLESHOOTING .....................33
12.1 Possible Failures ..........................33
12.2 Emergency Door Opening ............37
13. TECHNICAL DATA ...........................38
14. INSTALLATION ................................38
14.1 Unpacking.....................................38
14.2 Positioning ....................................40
14.3 Water Inlet ....................................41
14.4 Water Drainage ............................41
14.5 Electrical Connection ....................43
15. ENVIRONMENT CONCERNS .........43
15.1 Packaging Materials .....................43
15.2 Old Machine .................................43
15.3 Ecological Hints ............................43
Summary of Contents for EWW1044ADWA
Page 1: ...EWW1044ADWA Washer Dryer 洗脫烘滾筒洗衣機 EN ZH 2 44 User Manual 使用者手冊 ...
Page 51: ...51 當卸下時 當打開時 洗滌劑 柔順劑盛載格 參考第 60 70 頁 洗衣機門 當打開時 參考第 60 頁 2 2 附件 ...
Page 56: ...56 蒸氣 洗清 蒸氣 蒸氣 蒸氣 蒸氣 蒸氣 蒸氣 蒸氣 蒸氣 蒸氣 蒸氣洗滌 觸控按鈕Ƌ ƌ 選擇此選項可在漂洗週期後增加約 30 分鐘 的蒸汽翻滾時間ˤ 㬌怠枭䘬㧁娴 Ṗ崟ˤ ...
Page 61: ...61 Spin Temp Delay Start 1 2 MAX 2 5 3 選項設定 注意 ...
Page 78: ...78 1 On Off 2 3 5 6 4 12 2 緊急開門 確保洗衣機滾筒內的水位不會太高 進 行緊急排水 如有必要 參考第 74 頁 緊急排水 注意 警告 ...
Page 80: ...80 4 5 6 2 3 7 A ...
Page 81: ...81 水平尺 8 9 10 A 1st 2nd 3rd 14 2 洗衣機放置 ...
Page 84: ...84 14 5 電氣連接 120 V 60 Hz 請檢查並確保您的家電設施可以承受所 需的最大負載 參見第 79 頁 同時 要考慮正在使用的其他任何電器 ...
Page 85: ...85 PE polyethylene PS polystyrene PP polypropylene 15 1 包裝材料 15 2 報廢舊的洗衣機 15 3 環保提示 15 注意環保 ...
Page 86: ...G0030936 001 A21791304 ...