background image

03/2011 - Art. Nr. 4200 1016 4000C

25

Service

Maintenance frequency indicator
Fuel oil stock indicator

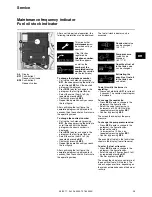
After a certain period of operation, the 
following information may be displayed:

This means that 

maintenance

 must 

be carried out by a 
specialist.

If the fitter has 
registered his

telephone number

then this appears,

as well as the 

number of the 
completed service 
contract 

(accessible 

via the fault menu)

To change the telephone number

•  Call up the fault menu by pressing 

BP1

, then keep pressing the button to 

scroll through 

BP1 

until the desired 

pictogram is displayed.

•  Press 

BP2

 to enter a change in the 

pictogram: the first figure flashes.

•  Select the value (from 0 to 9) by 

repeatedly pressing 

BP1

.

•  Confirm by pressing 

BP2

.

•  Repeat the operation until you reach 

the last figure.

After confirming the last figure, the 
complete pictogram is displayed for 5 
seconds, then the control unit returns to 
the operating screen.

To change the contract number

•  Call up the fault menu by pressing 

BP1

, then keep pressing the button to 

scroll through until the desired 
pictogram «contract number» is 
displayed.

•  Press 

BP2

 to enter a change in the 

pictogram: the first figure flashes.

•  Select the value (from 0 to 9) by 

repeatedly pressing 

BP1

.

•  Confirm by pressing 

BP2

.

•  Repeat the operation until you reach 

the last figure.

After confirming the last figure, the 
complete pictogram is displayed for 5 
seconds, then the control unit returns to 
the operating screen.

The fuel oil stock indicator can be 
accessed: 

Nozzle size 

(value 

can be changed)
(0.5 - 1.5)

Pump pressure 

(value can be 
changed)
(8.0 - 17.0)

Quantity of fuel oil 
in the tank 

(value 

can be changed)

Estimating the 
quantity of fuel oil 
in the tank 

(value 

calculated)

To do this while the burner is 
operating:

•  Press and hold button 

BP1

 for at least 

5 seconds: The nozzle size pictogram 
is displayed.

To change the nozzle size:

•  Press 

BP2

 to enter a change in the 

pictogram: the figure flashes.

•  Select the value (nozzle size, in 

increments of 0.05 US GAL/h) by 
repeatedly pressing button 

BP1

.

•  Confirm by pressing 

BP2

.

The screen then displays the pump 
pressure.

To change the pump pressure value:

•  Press 

BP2

 to enter a change in the 

pictogram: the figure flashes.

•  Increase the value

(in increments of 0.5 bar) by 
repeatedly pressing button 

BP1

.

•  Confirm by pressing 

BP2

.

The quantity of fuel oil in the tank is then 
shown in the display (fuel oil reserve).

To enter the 

fuel


oil reserve:

•  Press 

BP2

 to enter a change in the 

pictogram: the figure flashes.

•  Enter the value (4 figures from 0 to 9) 

by repeatedly pressing 

BP1

.

•  Confirm by pressing 

BP2

.

The screen then displays an estimate of 
the quantity of fuel oil in the tank. The 
value changes over time, depending on 
the values entered above and the burner 
runtime.

A4

Display

BP1

Push-button 1
Request: fault code

BP2

Push-button 2
Request: values

en

Summary of Contents for VL 1.40

Page 1: ...42 VL 1 55 VL 1 55P VL 1 95 Bedieningshandleiding Voor de gespecialiseerde vakman Aangeblazen oliebrander 2 13 Operating instructions For authorised specialists Forced draught fuel oil burners 14 25...

Page 2: ...stuiving en aangeblazen gasbranders aan warmteproducerende uitrusting EN 60335 2 Veiligheid van elektrische apparaten voor huishoudelijk gebruik Plaats van opstelling De brander mag niet worden opgest...

Page 3: ...Luchtdruknippel T1 Ontstekingstransformator Y Instelschaal Y1 Magneetventiel 3 Luchtregeling in de branderkop 5 Bevestigingsschroeven voor basisplaat 7 Ophangsteun 8 Behuizing 9 7 polige contrastekke...

Page 4: ...en de voorventilatietijd van 15 sec loopt Tijdens de voorventilatie wordt de branderkamer bewaakt op vlamsignalen Na afloop van de voorventilatie opent het oliemagneetventiel en de brander start De o...

Page 5: ...n uiterst stabiele tijden bereikt die onafhankelijk zijn van schommelingen in netspanning en omgevingstemperatuur De branderautomaat is niet gevoelig voor onderspanning Als de netspanning onder de ver...

Page 6: ...ngesloten In de pomp zijn aanzuigfilters en oliedrukregelaars ingebouwd V r de inbedrijfstelling moeten manometers voor druk 4 en onderdrukmetingen 5 worden gemonteerd 1 Aanzuigaansluiting 2 Retouraan...

Page 7: ...ming Stekker nr Klem Benaming Stekker nr 1 Aarde 11 14 Fase brandermotor 4 2 Signaal vlamdoofveiligheid 15 Aarde 3 Fase 16 Neutraal 4 Signaal afstandsontgrendeling 20 17 L1 Magneetventiel netaansluiti...

Page 8: ...mensionering van installaties met zuiginrichting Deze richtlijn is onderdeel van de ontwerpbeginselen van ELCO De zuigleiding wordt bij vierkante tanks tot 5 cm en bij cilindrische tanks tot 10 cm ove...

Page 9: ...haalverdeling Y kan de stand van de stuwschijf worden gecontroleerd De stand van de stuwschijf maat C komt overeen met de waarde op de schaal Y Het justeren op 0 wordt in de fabriek uitgevoerd Als bij...

Page 10: ...ikant en overeenkomstig eisen rookgaswegen ter voorkoming van condensatie Werkingscontrole Een veiligheidstechnische controle van de vlambewaking moet zowel bij de eerste inbedrijfstelling als ook na...

Page 11: ...rbindingen controleren op lekkages en tekenen van slijtage Eventueel vervangen De elektrische aansluitingen en verbindingskabels controleren op beschadigingen Eventueel vervangen Pompfilter controlere...

Page 12: ...ld thermostaten instellen of vervangen Brander start niet na thermostaatuitschakeling Er is geen storingsmelding op de branderautomaat Geen of te lage netspanning Storing van de automaat Oorzaak van t...

Page 13: ...gram gedurende 5 sec weergegeven Daarna verschijnt opnieuw de werkingsuitlezing De aanduiding van de olievoorraad is eveneens toegankelijk Sproeiergrootte veranderbare waarde 0 5 1 5 Pompdruk verander...

Page 14: ...ng oil and forced draught gas burners to the heat generator EN 60335 2 Safety of electrical equipment for domestic use Place of installation The burner must not be used in rooms exposed to aggressive...

Page 15: ...ressure nipple T1 Ignition transformer Y Graduated scale Y1 Solenoid valve 3 Air regulation in the burner head 5 Fastening screws for equipment plate 7 Mounting bracket 8 Housing 9 7 pin connecting so...

Page 16: ...15 seconds commences During the preventilation period the furnace is monitored for flame signals At the end of the preventilation period the fuel oil solenoid valve opens and the burner starts The ign...

Page 17: ...ions in the power supply or ambient temperature The design of the automatic combustion control unit protects it from the effects of brownouts Whenever the supply voltage drops below its rated minimum...

Page 18: ...e regulator integrated in the pump Pressure gauges for pressure measurements 4 and negative pressure measurements 5 must be connected before the equipment is commissioned 1 Suction intake connection 2...

Page 19: ...Terminal Designation Connector no Terminal Designation Connector no 1 Earth 11 14 Burner motor phase 4 2 Flame monitor signal 15 Earth 3 Live 16 Neutral 4 Remote release signal 20 17 L1 solenoid valve...

Page 20: ...83 For threshold values for suction line lengths and suction heights see the guideline for planning and dimensioning plants with suction installations This guideline is an integral part of the ELCO pl...

Page 21: ...an be controlled on dial Y The baffle plate position dimension C corresponds to the value on the Y scale It is adjusted to 0 in the factory If readjustment is required proceed as follows Remove the co...

Page 22: ...equirements demanded of flue gas ducts for avoiding condensation Operating check Flame monitoring must be checked for safety as part of initial commissioning and also after servicing or if the system...

Page 23: ...pumps oil feed tube and their con nections for leaks or signs of wear replace if necessary Check electrical connections and con nection cables for damage replace if necessary Check pump filter and cle...

Page 24: ...ssary Burner does not start after thermostat shutdown No malfunction indicated on the automatic combustion control unit Drop in supply voltage or power failure Control unit malfunction Check the cause...

Page 25: ...er confirming the last figure the complete pictogram is displayed for 5 seconds then the control unit returns to the operating screen The fuel oil stock indicator can be accessed Nozzle size value can...

Page 26: ...03 2011 Art Nr 4200 1016 4000C 26...

Page 27: ...03 2011 Art Nr 4200 1016 4000C 27...

Page 28: ...0 400010 ELCO Belgium nv sa Z 1 Researchpark 60 1731 Zellik 02 4631902 ELCOTHERM AG Sarganserstrasse 100 7324 Vilters 0848 808 808 ELCO GmbH Dreieichstr 10 64546 M rfelden Walldorf 0180 3526180 ELCO I...

Reviews: