/ 17 /
INSTALLING THE RADIATOR AND FANS
OPTION #1:
INSTALLING THE RADIATOR AND
FANS
STEP 1
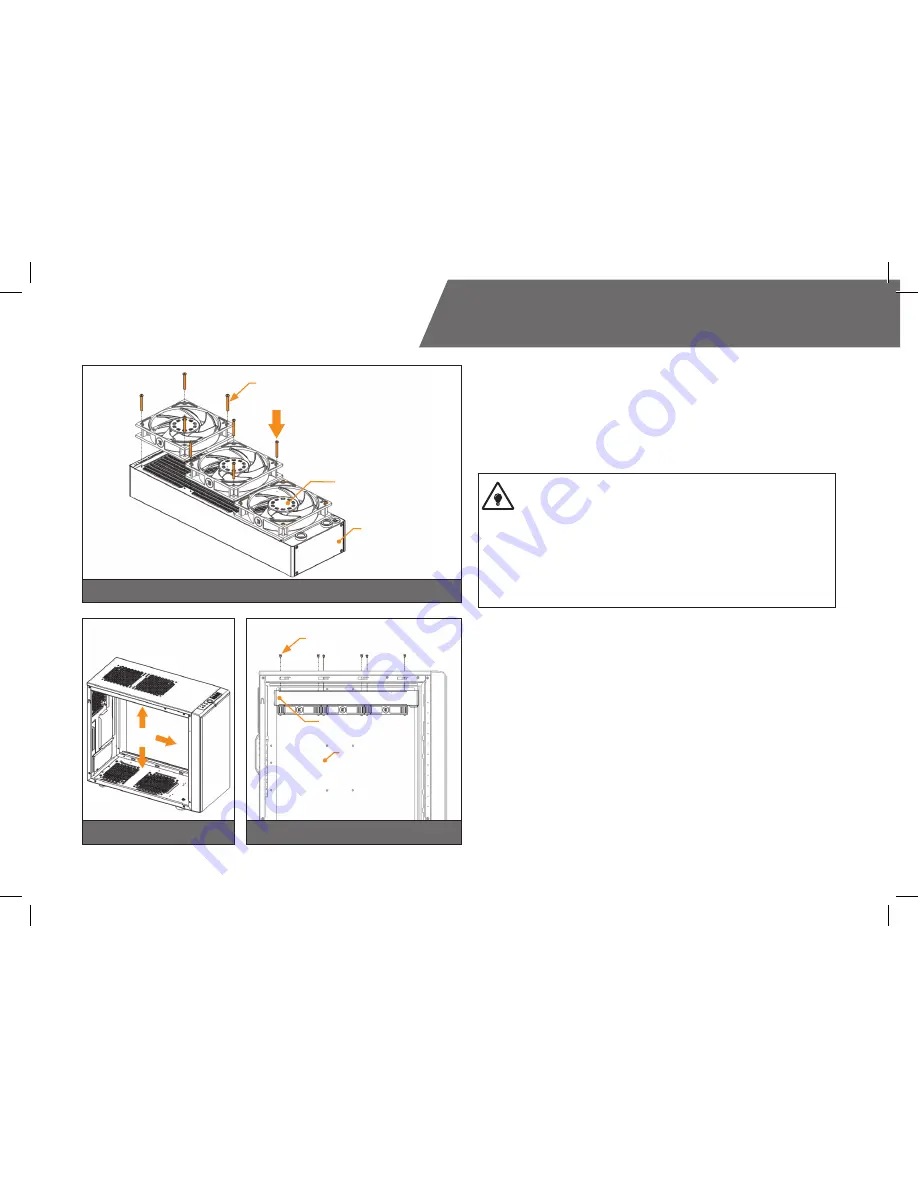
Install the fans on the radiator.
Ideally, the radiator should either:
A)
receive the coldest air possible
(by placing the radiator on
the air inlet) or
B)
serve as an overall hot air exhaust
(by placing the radiator
on the exhaust).
The latter results in overal decrease of temperature throughout the
entire computer chassis but also leads to slightly higher liquid tem-
peratures. A reversed air flow is viable option but one should always
strive to achieve unidirectional flow of air throughout the chassis.
Take the four UNC 6-32x30mm screws for each fan and screw them in. Use
enclosed Allen key to tighten the screws in clockwise direction.
STEP 2
Prepare your suitably-sized PC chassis for installation of radiator unit. The
position of the unit in the chassis depends on the size, fan mounting holes
and the hardware you have installed. You must make sure that the unit fits
into the chassis. Usually the chassis have standard fan mounting holes
pre-drilled so you should look for holes with spacing of 105mm. (A standard
computer cooling 120mm fan)
STEP 3
Align the holes on the radiator with the ones on the PC chassis.
Take the four UNC 6-32x5mm screws for each fan and guide them through
the holes on the chassis to screw them into the threaded holes on the radia-
tor. Tighten them in clockwise direction using Allen key.
STEP 2
STEP 1
STEP 3
Fan
UNC 6-32 x 30 screw
Radiator
PC Chassis
Radiator/fan unit
UNC 6-32 x 5
screw


