background image

   
DK50 4VR/50


04/2018 

- 23 -   

NP-DK50 4VR50-11_04-2018 

15.2. 

Condensation drain valve  

Compressors

 (Fig.10) 

Switch off the compressor at the mains.  Reduce air pressure in the 
appliance  to  max.  1  bar  by  releasing  air  via  a  connected  device. 
Place  the  vessel  under  release  valve  (1)  and  open  it.  Wait  until 
condensation  is  fully  drained  from  the  pressure  tank.  Close  drain 
valve (1).  

 
Compressors with air dryer 

In the case of a regular operation condensate is automatically excreted via air dryer and it is entrapped in a 
bottle. Take out the bottle from a holder, release cap and pour out the condensate.   


15.3. 

Check of dryer function  

Check  for  proper  dryer  function  by  opening  the  vent  valve.  No  condensate  should  leak  out.  Seek 
professional assistance if condensate appears during such venting! 


15.4. 

Safety valve check 

(Fig.9) 
When the compressor is operated for the first time, make sure that the safety valve is working properly.  Turn 
screw (4) of safety valve (1) several rotations to the left until the safety valve releases air.   Let the safety 
valve blow out for only a few seconds.  Turn screw (4) to the right until it seats, closing the valve.   


The safety valve must never be used for depressurizing the air tank.  It could damage the 
safety  valve.  The  valve  is  set  to  the  maximum  permitted  pressure  by  the  manufacturer.  
Adjustments are not permitted.  


Warning!  Compressed air can be dangerous.  Wear eye protection when blowing air out.


15.5.  Replacement of the inlet filter and prefilter 

(Fig.11) 

At the lid of the compressors crankcase is an 
Inlet filter (1) and prefilter (3).


Replacing of the inlet filter


Hand pull the rubber stopper

 (2). 

  Remove used and dirty filter. 

  Input new filter and set rubber stopper. 


Replacing of the prefilter: 


Hand pull prefilter

 (3). 

  Replace old prefilter with new 


Order number


Input filter


025200139-000 

Prefilter


025200150-000


Fig.11 

 Fig.10

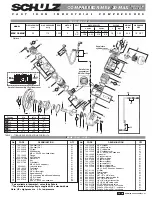
Summary of Contents for DK50 4VR/50

Page 1: ......

Page 2: ...5 TECHNICAL DATA 5 6 PRODUCT DESCRIPTION 6 7 FUNCTION 8 INSTALLATION 12 8 USE 12 9 INSTALLATION 12 10 WIRING DIAGRAMS 16 11 PNEUMATIC DIAGRAM 18 12 FIRST OPERATION 19 OPERATION 20 13 SWITCHING THE COM...

Page 3: ...rsion of the text prevails 2 2 General safety warnings The manufacturer developed and designed the equipment in such a way so that any risks were excluded if it is used according to intention The manu...

Page 4: ...age TEMPERATURE LIMITATIONS Handling mark on package LIMITED STACKING Mark on package RECYCLABLE MATERIAL 4 STORAGE AND TRANSPORT The compressor is shipped in cardboard that protects the appliance fro...

Page 5: ...70x1015 Dimensions with dryer W x L x H MD mm 580x635x790 NDM 580x635x790 Weight kg 70 128 Weight with dryer MD kg 81 139 NDM 89 147 Air dryer performance Atmospheric dew point MD C 20 Pressure dew po...

Page 6: ...independent installation in a suitable environment Dental compressors DK50 4VR 50 M are designed for independent installation in a suitable environment and are equipped with an air dryer MD NDM Denta...

Page 7: ...000 The regulator ensures a supply of output air at a constant pressure so long as the pressure value set on the regulator is not higher than the switching pressure set on the pressure switch Automati...

Page 8: ...into the air tank 2 The adsorbent media regenerates when the drying chamber is being evacuated always after the compressor is switched off by the pressure switch The air is then released from the ads...

Page 9: ...10 Compressor wheel 11 Hour meter 12 Dryer cooler 13 Plug 14 Membrane dryer MD 15 Micro filter 16 Filter 17 Check valve 18 Magnetic bracket 19 Plug 20 Condensate vessel 21 Outlet valve 22 Exhaust muff...

Page 10: ...DK50 4VR 50 NP DK50 4VR50 11_04 2018 10 04 2018 Fig 3 Compressor with adsorption dryer NDM...

Page 11: ...DK50 4VR 50 04 2018 11 NP DK50 4VR50 11_04 2018 Fig 4 Cabinet...

Page 12: ...Refer to the technical data of the product for this purpose When a unit is to be built in classification and evaluation of compatibility must be done by the manufacturer or supplier of the product to...

Page 13: ...e supporting bracket 30 in the front part of the cabinet Pass the pressure hose and mains plug from the compressor through the opening in the lower rear section of the cabinet Connect the cabinet conn...

Page 14: ...K50 4VR 50 M configuration to DK50 4VR 50S M or vice versa the following steps must be performed Prior to any maintenance or repair work switch off the compressor and disconnect it from the mains pull...

Page 15: ...M DK50 4VR 50S M to DK50 4VR 50 M install jumper Z jumper on use jumper Z Art 033190119 000 to make the connection to terminal strip X1 Fig 1 4 connect the cord to socket X2 Fig 5 X2 X3 DK50 4VR 50 M...

Page 16: ...ith the data stated on the appliance label Fig 8 Keep the socket easily accessible to ensure that in an emergency the appliance can be safely disconnected from the mains Connection to the power distri...

Page 17: ...PE I3 I4 I5 EKOM FLAIRMO ABSOLUTE TABULKA PREPOJOV PODLA ZAKAZNIKOV E5 X1 3 N L X3 2 1 4 3 5 2 1 4 3 6 5 04 03 A2 A1 Q11 M 6 150 C 1 3 2 4 2 1 p 40 C B1 B2 E1 E2 PE K1 3 N PE 400 V 50 Hz MAINS TN S T...

Page 18: ...essor without box Bridge OFF compressor with box 2 6 5 7 8 9 3 1 1 1 1 11 PNEUMATIC DIAGRAM DK50 4VR 50 1 Inlet filter 2 Compressor 3 Fan 5 Safety valve 6 Check valve 7 Pressure switch 8 Air tank 9 Pr...

Page 19: ...nt cabinet into the I position a lighted switch indicates the equipment is in operation Compressor At first operation the air tank is pressurized until it reaches a preset level when the compressor au...

Page 20: ...erconnect electric part of drier with compressor according to wiring diagram in accord with valid regional regulations Required drying performance can only be achieved when following the defined opera...

Page 21: ...pressure a From compressor start up until pressure reaches 5 5 bar b During operation if pressure drops below 5 1 bar 24 hour regeneration mode Dryer regeneration for 10 minutes is automatically switc...

Page 22: ...15 9 1 x every 2 years Conduct repeated test pursuant to EN 62353 14 1 x every 2 years or after 5000 hours Replace inlet filter and pre filter 15 5 NDM Replacement maintenance kit dryer 8 000 hours o...

Page 23: ...mpressor is operated for the first time make sure that the safety valve is working properly Turn screw 4 of safety valve 1 several rotations to the left until the safety valve releases air Let the saf...

Page 24: ...cro filter by pulling down 2 Rotate the vessel 2 and remove 3 Remove the filter 3 4 Install the new filter element 5 Reinstall the filter housing and rotate to secure it until the catch clicks Micro f...

Page 25: ...liance from the mains Release air pressure in the pressure tank by opening the drain valve 1 Fig 10 The components of the product are non toxic Dispose of the appliance following all environmental reg...

Page 26: ...automatic condensate drain on filters clean replace Dirty filter and micro filter elements Replace old elements with new elements NDM Dryer Decreased dew point performance 1 Insufficient pressure at...

Page 27: ...DK50 4VR 50 NP DK50 4VR50 11_04 2018 130 04 2018 NP DK50 4VR50 11_04 2018 112000123 000...

Reviews: