Firmware
RCX C-Link User’s Guide
13
EDT, Inc. November 2006
To update the RCX C-Link firmware to the current revision:
1. Run
pciload
with no arguments to ensure that the system recognizes the PCI DV FOX. Typical
output appears thus:
pdv unit 0 (pci dv fox):
XC2S200 PCI FPGA, AMD 29LV081B 8MB FPROM
s/n AP0064, p/n 019-02103-11, i/f fpga xc2s400e, rev 11 clock 40 Mhz, opt f2
Sector 0
Sector 1
Sector 2 PROM id: <dvtlk4_3v.ncd 2s200fg456 2005/06/10 14:58:10>
Sector 3 PROM id: <dvtlk4_5v.ncd 2s200fg456 2005/06/10 14:58:16>
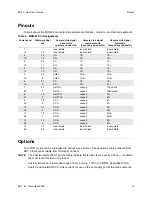
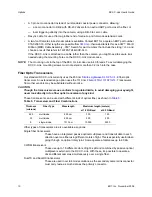
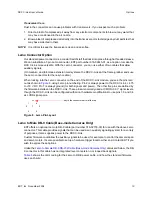
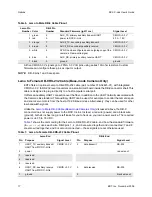
2. Put the RCX C-Link into blink code 3-3. (See
Setting the Blink Code on page 10
for instructions.)
3. Power-cycle the RCX C-Link.
4. Make sure the fiber optic cable is connected to channel 0 of the PCI DV FOX — the channel phys-
ically closest to the PCI bus. The RCX C-Link need not be connected to a camera.
5. Query the RCX C-Link to make sure it’s there and recognized, by entering
rcxload
with no ar-
guments. After you’ve started
rcxload
, the LEDs on both devices are lighted and not blinking.
Typical output appears thus:
pdv unit 0 (pci dv fox) chan. 0 RCX module:
sector 0 [10000]: <rgb11cm60_a01.ncd 2vp2fg256 2006/03/30 20:05:34>
sector 1 [38000]: <rgb11cm80_a01.ncd 2vp2fg256 2006/03/30 20:12:36>
sector 2 [60000]: <rgb11fg40_a01.ncd 2vp2fg256 2006/03/30 19:57:41>
sector 3 [88000]: <rgb11fg60_a01.ncd 2vp2fg256 2006/03/30 20:02:08>
sector 4 [b0000]: <rgb11fg80_a01.ncd 2vp2fg256 2006/03/30 20:09:30>
sector 5 [d8000]: <fud02b.ncd 2vp2fg256 2006/03/28 15:59:19>
If your output appears faulty, check the blink code, cables, and connections. If you still have
problems, e-mail the output to
.
6. Assuming correct output from step 5 above, update the firmware by running:
rcxload -u 0 flash/rcx/
file.rcx
replacing
file.rcx
with the filename of the current firmware revision.
The filename must be a valid
.rcx
file. EDT software packages ship with the current
.rcx
files in the
flash
/
rcx
subdirectory. The
README
file in the package has information about any
.rcx
file
updates including the specific filename of the current revision.
After a successful update, switch the module to the appropriate operating mode for its intended use.
For instructions, see
Configuration on page 8
.
NOTE
If
rcxload
reports errors within a section flagged as “critical,” do not power-cycle the RCX C-Link.
Instead, repeat the procedure. If you still get errors, leave the RCX C-Link powered on and contact
EDT.
You can turn off power to the host computer and camera. The RCX C-Link can be left powered on
indefinitely.


