36
y
Click (
) the keyboard icon on the right-hand side of each frame on Title column and the virtual keyboard will appear.
Then, please register the title of Alarm output.
y
When you check
5
a check box on No column, a corresponding Alarm output starts operating. However, if you do not
check the check box, the operation stops.
y
Click (
) each frame on Type column to select type of a corresponding Alarm output.
–
NO:
contact is normally open (Normally open)
–
NC:
contact is normally closed (Normally closed)
y
Click (
) each frame on Duration column to select duration (i.e.,
1 second ~3 hours
) of a corresponding Alarm output.
y
Choose ‘OK’ to confirm the setting.
4.5 RECORD
y
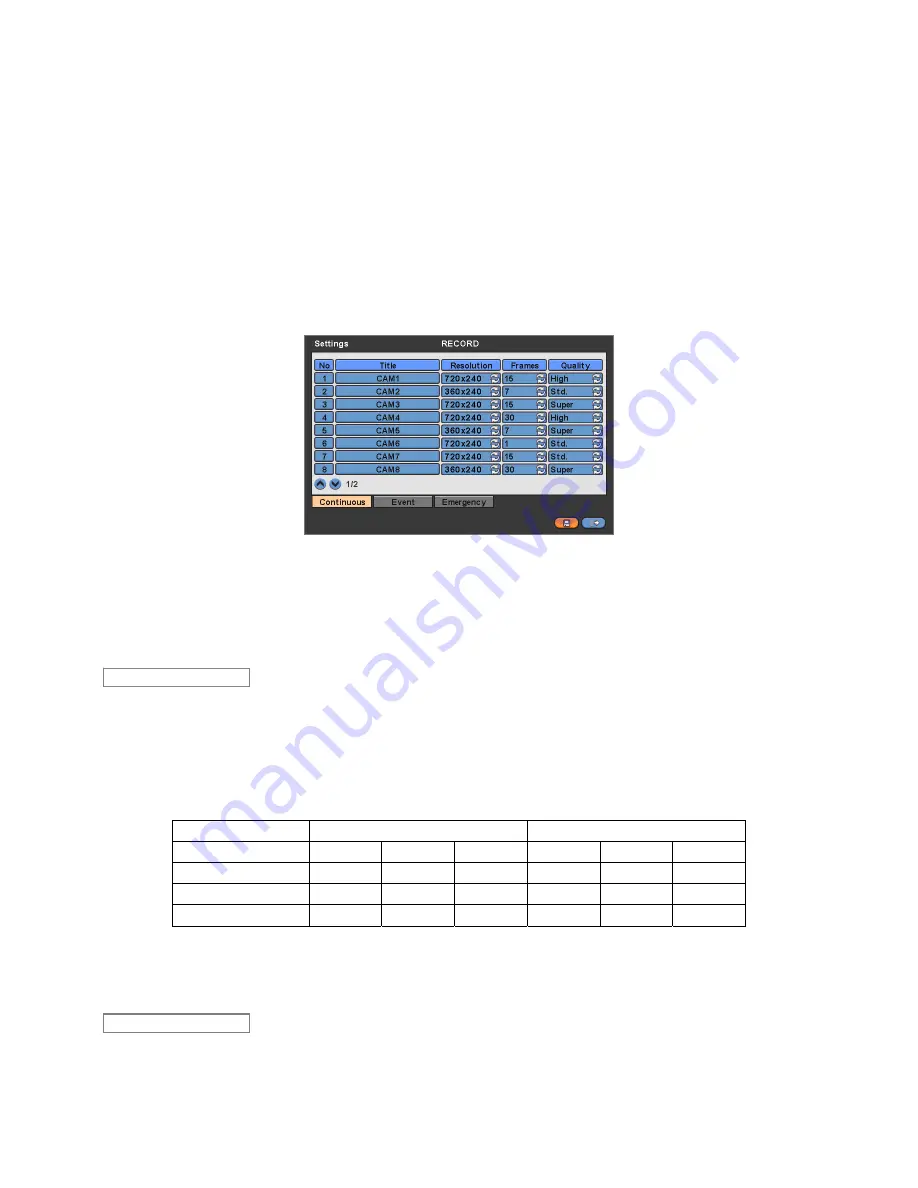
Please click (
) RECORD>Settings and the following screen will appear.
y
There are three kinds of recording mode.
–
Continuous:
record continuously.
–
Event:
record only when Sensor or Motion calls.
–
Emergency:
record when you press
EMERGENCY
key.
4.5.1 Settings
y
The Continuous menu will allow you to set recording mode.
y
Each frame on Title column shows camera title registered in DEVICES>Camera/PTZ. You cannot change camera titles
here.
y
Click (
) each frame on Resolution column to select recording resolution of a corresponding camera. You may select one of
720x480, 720x240 and 360x240
.
y
Click (
) each frame on Frames column to select recording rate of a corresponding camera. Recording rate varies by
camera. Below lists the maximum recording rate of each camera.
Network Setting
Dual Streaming Disabled
Dual Streaming Enabled
NTSC(PAL)
360x240 720x240
720x480
360x240
720x240 720x480
4 Channel DVR
120(100) 120(100)
60(50) 120(100)
120(100) 60(50)
8 Channel DVR
240(200) 120(100)
60(50) 240(200)
120(100) 60(50)
16 Channel DVR
480(400) 240(200)
120(100)
240(200)
120(100) 60(50)
y
Click (
) each frame on Quality column to select recording quality of a corresponding camera. You may select one of
Super, High and Std
.
y
Choose ‘OK’ to confirm the setting.
y
Please click (
) Event and the following screen will appear.
Event
Continuous


