34
XRGI® 15 COMMISSIONING INSTRUCTION
VERSION 1.0 2019
5.2.6
G A S Q U A L I T Y
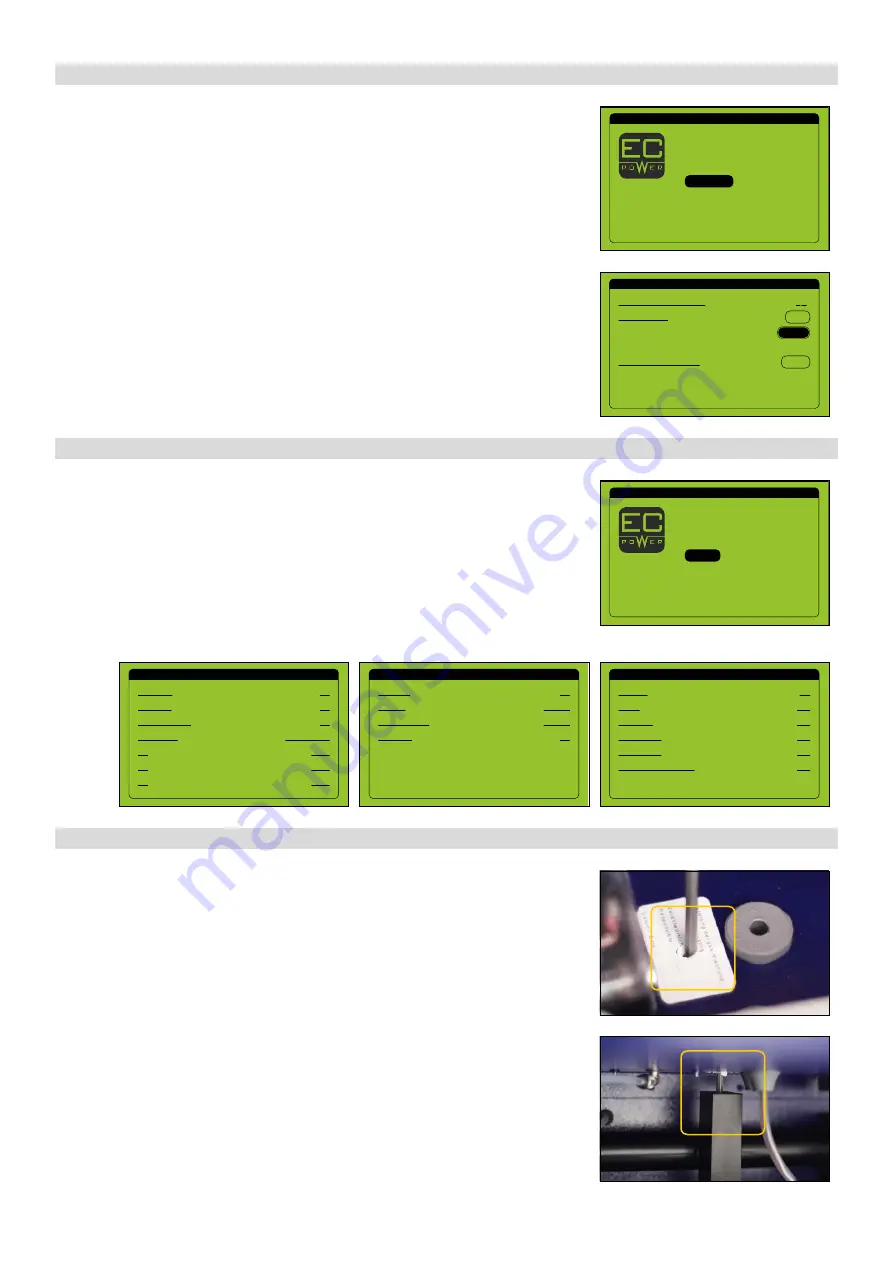
Adjust the gas quality. The XRGI® 15 is factory-fitted with a gas nozzle for H/LPG natural
gas. You can convert the XRGI® 15 if you require another gas quality:
■
Remove the rear cover of the Power Unit. The gas nozzle is located in the mixing
chamber. It is accessible through the housing beside the flue gas pressure gauge
and can be changed using a
5 mm
Allen key.
■
Refit afterwards the rear cover of the Power Unit.
TECHNICIAN MENU
1/1
Heat pumps
Configuration
Q-network statistics
Log
System info
IO status
Maintenance
TECHNICIAN MENU
1/1
Maintenance
Log
System info
Production
Heat pumps
Configuration
IO status
MAINTENANCE
1/1
OH until next maintenance:
Time to service:
System data and settings:
0 H
Delete
Confirm
Reset
OUTPUTS
3/3
Running:
Alarm:
Generator:
Heat pump 2:
Power factor correction:
Heat pump 1:
ON
OFF
OFF
OFF
OFF
OFF
INPUTS
2/3
G59 relay:
No start:
Forced standby:
Fire alarm:
OK
INACTIV
OK
INACTIV
INPUTS
1/3
Aux alarm:
Gas alarm:
Prot.eng. switch:
T1:
T2:
T2:
Oil pressure:
OK
OK
NO PRESSURE
COLD
COLD
COLD
OK
5.2.4 M A I N T E N A N C E
5.2.5 I O S TAT U S
■
In the technician menu, move the cursor to Maintenance by using the
▲▼
buttons and press
OK
on the user interface.
■
While the cursor is on
Reset
, press
OK
on the user interface to activate the field.
■
Move the cursor to
Confirm
by using the
▲▼
buttons and press
OK
on the user
interface. The correct maintenance interval for the XRGI® system will be displayed.
Check the status of the in- and outputs of the XRGI® system. The inputs should display
the status
OK
to enable the XRGI® system to start. If they do not, errors have to be elim-
inated on the ECU circuit board; the wiring between the Power Unit and iQ-Control
Panel may be faulty or an external control or switching operation may be preventing
the start-up of the Power Unit.
■
In the technician menu, move the cursor to
IO Status
by using the
▲▼
buttons
and press
OK
on the user interface.
■
Check the status of the in- and outputs.
■
Switch between pages by using the
▲▼
buttons.
Summary of Contents for XRGI 6
Page 1: ...VERSION 1 0 2019 01DOC1075 01 COMMISSIONING INSTRUCTION...
Page 2: ......
Page 14: ...XRGI COMMISSIONING INSTRUCTION VERSION 1 0 2019 12...
Page 47: ...XRGI COMMISSIONING INSTRUCTION VERSION 1 0 2019 45 N OT E S...
Page 48: ...XRGI COMMISSIONING INSTRUCTION VERSION 1 0 2019 46 N OT I Z E N...
Page 49: ......
Page 50: ...01DOC1075 01 09 2019 CO M M I S S I O N I N G I N S T R U C T I O N...


