7
www.eaton.com/wireless
call toll free: 1-800-663-8806
DM-R260-0056A R1
Mounting and Installation
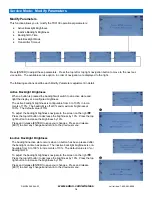
The Base Station can be mounted by fastening two ¼” bolts through the two mounting holes in the unit’s enclosure.
When mounting, ensure that the Base Station is oriented so that the text is upright and the connector is pointing “down”.
When selecting a mounting point for the Base Station, it is recommended that the location
Use a minimal length of wiring to connect it to the control panel
Be in a visible area where it has good exposure to the operator
Be mounted on a surface protected from the weather
Sustains minimal vibration
Has best possible line of sight with the RCU for maximum operational
range
.
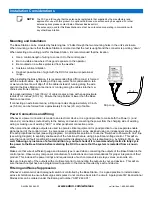
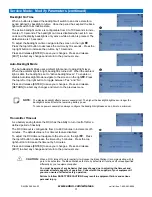
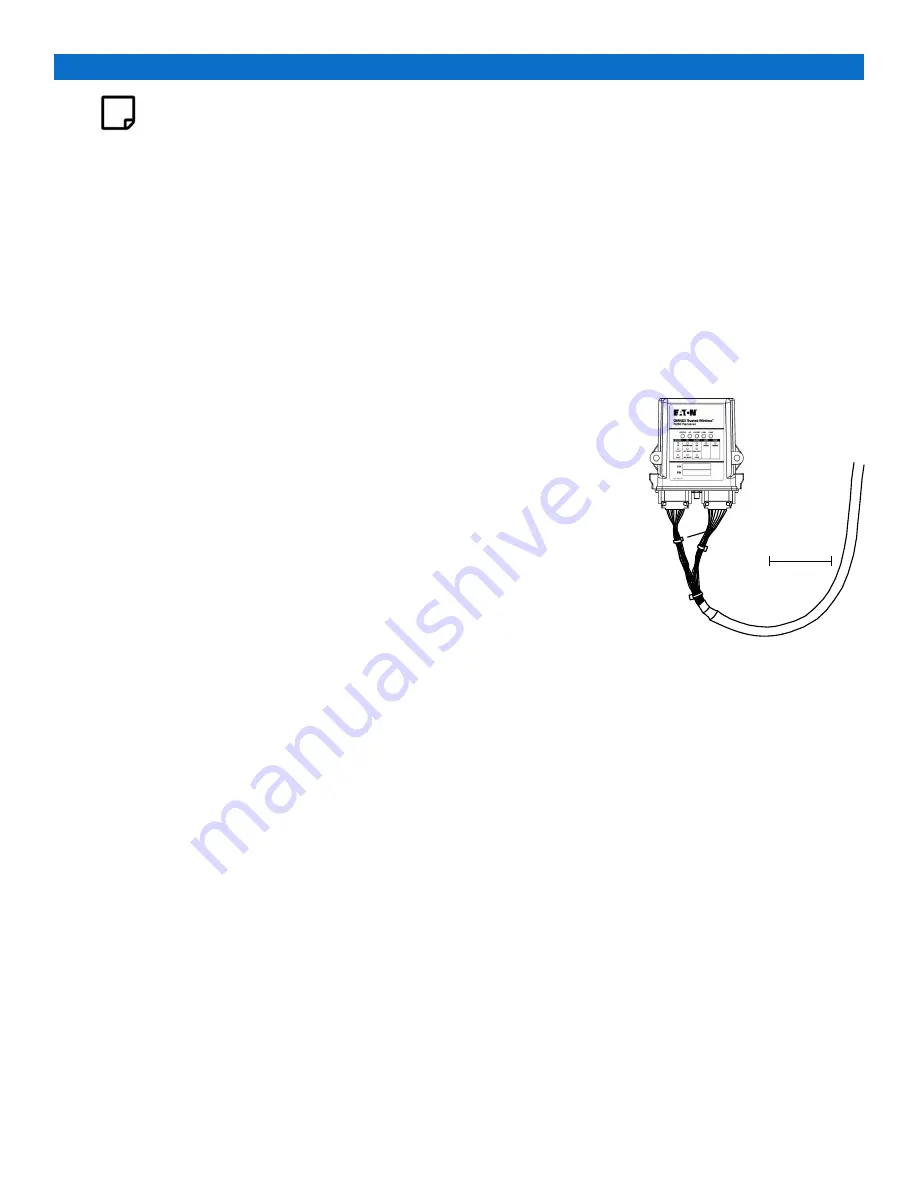
When installing the Base Station, it is recommended that a “Drip Loop” is formed
with the output cables. By creating a Drip Loop, water from condensation, rain
or wet environments, will drip off of the cable instead of running along the wire
and into the Base Station connections or running along the cables into the ma-
chine’s electronic controls.
Using approximately 1 foot (30 cm) of cable creates a loop with an approximate
radius of 3-4 inches (8-10 cm). Ensure the loop bottom is lower than the Base
Station connectors.
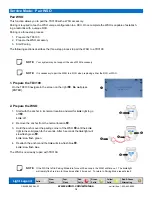
If connecting an external antenna, a Drip Loop radius of approximately 2-3 inch-
es (5-8 cm) can be formed from approximately 8 inches (20 cm) of cable.
Power Connections and Wiring
Whenever a power connection is made to an electronic device, it is a good practice to make both the Power (+) and
Ground (-) connections route directly to the battery and avoid connecting the power from the charging side of existing
wiring or making use of existing "ACC" or other peripheral connection points.
When proportional voltage outputs are used to operate critical equipment it is good practice to use a separate enable
signal as part of the control circuit. In some cases an application can be designed using an independent enable output
for each proportional output (see wiring diagram). An alternative solution is to use the “Switches to Power with Link” line
(see wiring diagram) to explicitly enable each of the functions that are using proportional voltage control. This will en-
sure that under all fault conditions the equipment will be disabled when the link is disabled (e.g.
by hitting E-Stop).
As
well, following any instance of a fault condition (e.g. output shorted) it is recommended practice to fully cycle
the power to the Base Station before restarting the RCU to ensure that the system is restarted from a known
state.
Make sure that wire of sufficient gauge and insulator type is used when connecting the outputs of the Base Station to the
control panel. Observe any component manufacturer's instructions and recommendations for proper integration of their
product. This includes the power ratings and requirements of such components as relays, valves, solenoids, etc.
Be sure to test each of the outputs with a multi-meter prior to connecting the outputs to your end devices. This will en-
sure that each output has been programmed to operate in the manner required by each end device.
Filtering and Noise Suppression
Whenever a solenoid or electromagnetic switch is controlled by the Base Station, it is a good practice to install a diode
across its terminals to ensure that surges and spikes do not continue back into the circuit. Appropriate 36V Bi-directional
Diodes kits can be ordered under the Eaton part number “AKIT-2492-01”.
Installation Considerations
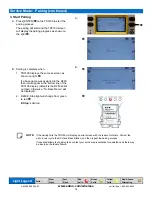
3” - 4 “
Drip Loop
NOTE:
The FCC and IC require that the antenna be restricted to that supplied by the manufacturer and
approved for use with this product. An optional 0dB coax wire antenna may be supplied. For other
antenna options please contact Eaton Wireless Business Unit.
The antenna(s) used for this Base Station must not be co-located or operating in conjunction with
any other Base Station.


