


Installation Leaflet
Page 29 Effective: April 2003
Pow-R-Command 100
IL01412003
For More Information visit www.cutler-hammer.com
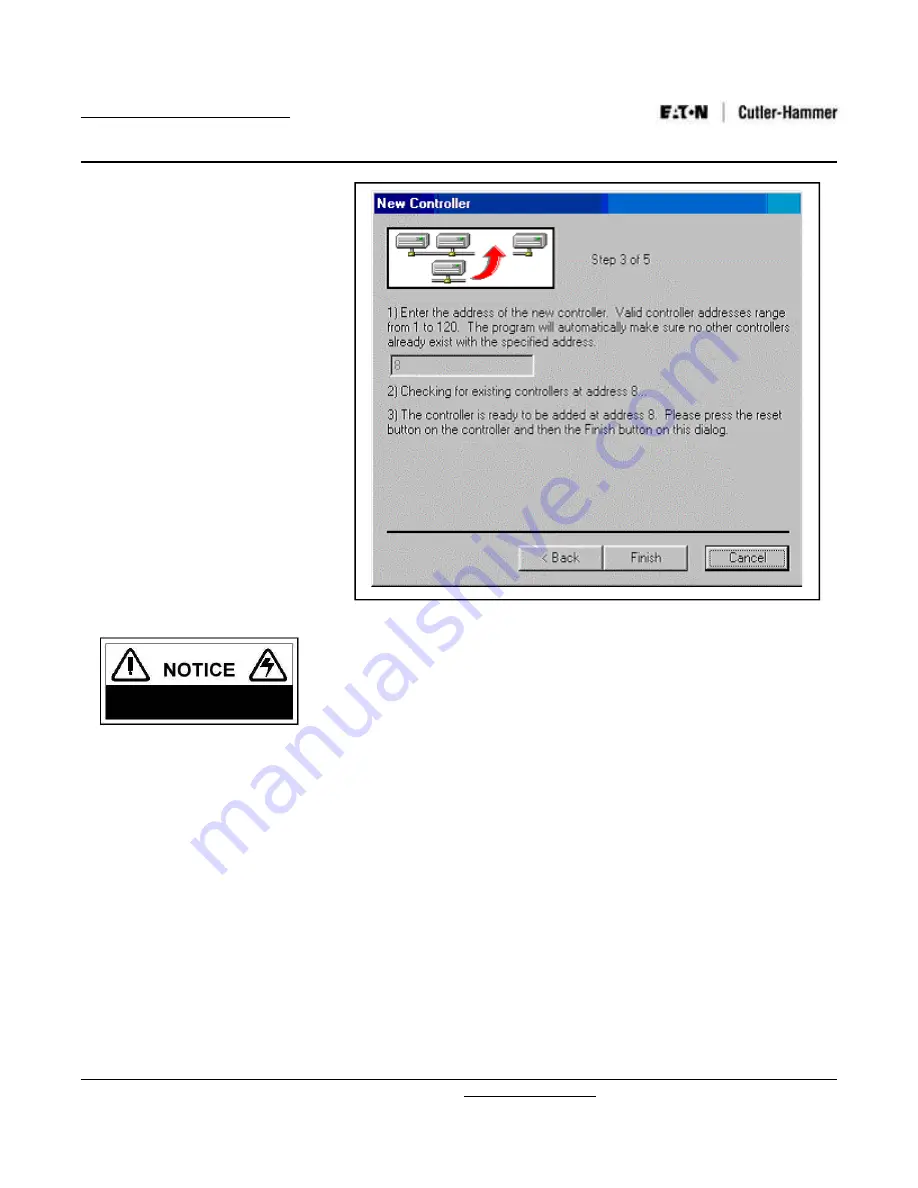
STEP 2:
The next step requires the RESET
button to be pressed on the controller being
added (see Figure 7-3 Step 3). If you need
help with identifying the controller type or
the location of the RESET button please
refer to Section 4.
Once the RESET button is pressed on the
controller the “Finish” button on the PC will
need to be clicked within 15 seconds. At
this point it is apparent why two persons
with radios are required for pre-assembled
panels. If the “Finish” button is clicked
before the “RESET” button is pressed on
the controller there will be a Time-out
counter displayed right-of-center at the top
of the window (beneath the text “Step 4 of
5”. This time-out will count down from 30
seconds and then explain that the RESET
button must be pressed before clicking the
Finish button.
STEP 3:
The PC will now display steps 4
and 5 describing the status and progress
of the operation. If completed successfully
there will appear a prompt to download a
database to the added controller. It is
beyond the scope of this document to
describe programming features so just click
“No” double-click the “<New Controller>
ICON and repeat the above procedure for
additional controllers.
The above procedure can also be used to
change the address of an existing
controller. While there are other methods
described in the Software manual this
method will work and has the added benefit
of insuring a unique address assignment.
Figure 7-3: Screen Shot From Wintalk Software For Adding New Controller


