Tutorials
Ableton Live Lite 4 for E-MU
30
Creative Professional
Ableton Live Lite 4 for E-MU
Ableton Live Lite 4 is an innovative composition and performance tool. Ableton Live
combines digital recording, virtual instruments, digital effects with an original interface
design that many people find more intuitive than traditional designs.
The following step by step tutorials are designed to get you recording as quickly as
possible. After you have finished the tutorial we encourage you to follow Ableton Live’s
excellent interactive Lessons and read the Ableton Live reference manual pdf in order to
learn more about the program.
1 - Setting up the Preferences
Follow these instructions carefully to ensure that Ableton Live Lite 4 runs smoothly the
first time. Ableton Live Lite 4 will remember these settings, so you’ll only have to do this
once.
1.
Open Ableton Live Lite 4
from the Start menu or by double-clicking its desktop
icon.
2.
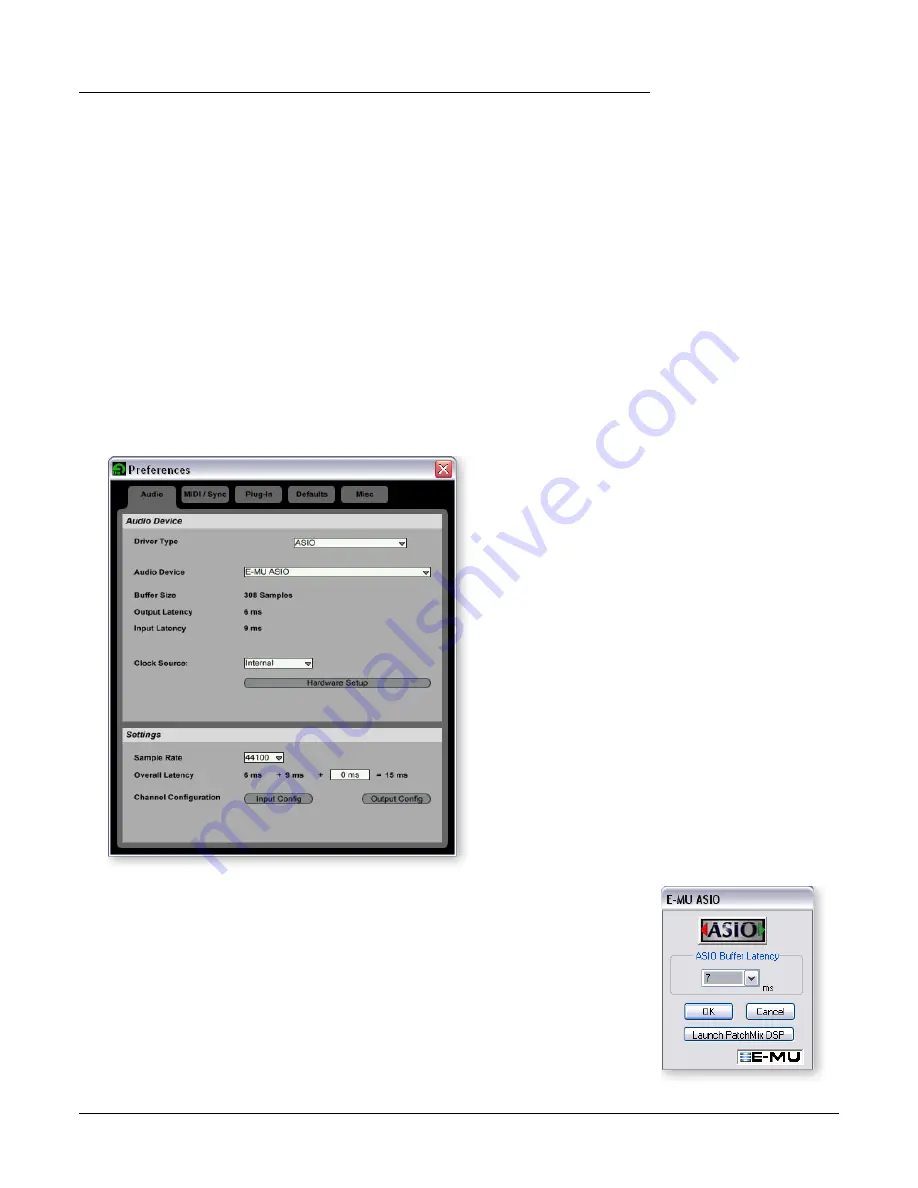
Select
Preferences…
from the
Options
menu. The following screen appears.
3.
In the Driver Type section of the dialog box, select
ASIO.
4.
In the Audio Device section of the dialog box, select
E-MU ASIO
.
5.
Click the
Hardware Setup
button. The pop-up dialog box shown at right appears.
6.
Set the
ASIO Buffer Latency
to 10 ms or less. A low latency setting is important to
assure fast MIDI response time and to minimize delay when monitoring.
Click OK
.
Setup the Channel Configuration
7.
The
Output Configuration
is already selected and doesn’t need to be changed.
8.
Click on the
Input Configuration
button in the Audio Preferences. The following
dialog box appears.


