


13
14
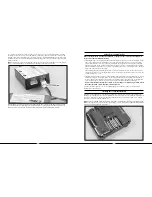
Installing the Flight Battery
Use the included hook and loop material for mounting the Li-Po battery pack . The “hook” material is already installed
on the battery frame stop . The included “loop” material can be installed on the end of the battery without the wire
leads, depending on how you choose to install the battery and route the wire leads .
The battery can be installed through the opening on the bottom of the MD 520N body . Be sure to install the end of
the battery with the leads first, toward the front at an angle, then slide the battery toward the back until the “loop”
material on the battery securely fastens to the “hook” material on the battery frame stop .
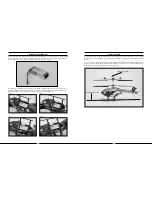
Center of Gravity
Once the battery has been properly installed and secured you will need to check the helicopter’s center of gravity . If
the helicopter is not properly balanced it can be difficult to control and constantly try to move forward or backward
in hover .
To check the center of gravity, lift the helicopter by the stabilizer flybar with the flybar positioned perpendicular to
the tail section of the body . Make sure that the helicopter balances level . If it does not, confirm that the battery has
been properly installed and reposition it forward or aft if necessary .
Skids Must Be Level
Support by Flybar
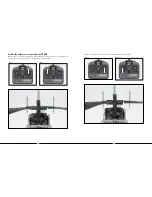
Step 1
Step 2
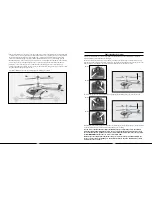
Step 3
Step 4


