5 1
WEBVIEWER*
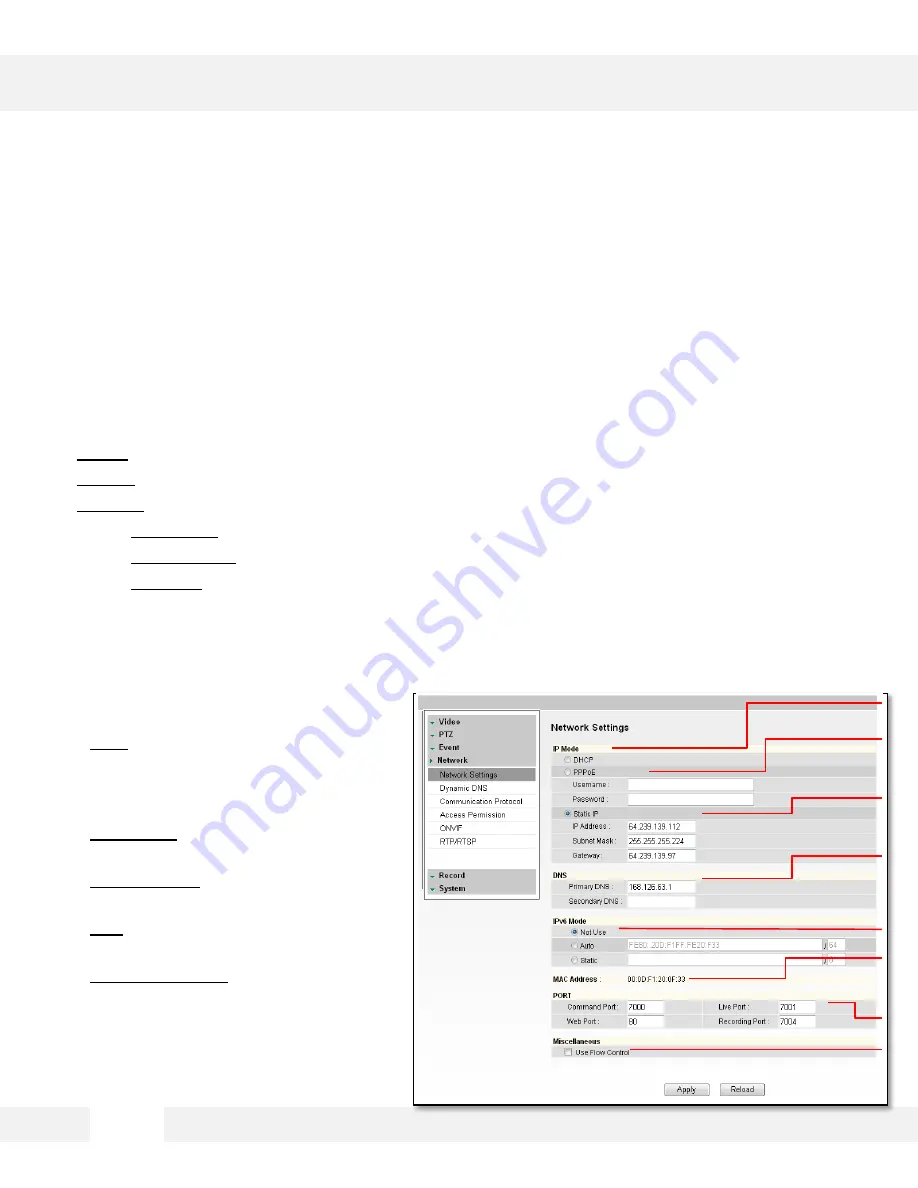
S e t u p > N e t w o r k > N e t w o r k S e t t i n g s
U s e t h i s s e t u p p a g e t o a d j u s t t h e c a m e r a ’ s n e t w o r k s e t t i n g s , i n c l u d i n g t h e
I P a d d r e s s , D N S i n f o r m a t i o n , a n d p o r t s . I n t h e I P M o d e s e c t i o n , s e l e c t
t h e t y p e o f I P a d d r e s s f o r t h e c a m e r a .
1. DHCP- Select if using a DHCP Server and camera will to obtain an IP address automatically.
2. PPPoE- Select when using a WAN service. Enter a Username and Password from your ISP.
3. Static IP- Enter IP information if you decided to give the camera a static (fixed) IP address.
a.
IP Address- Enter the static IP Address of the camera
b.
Subnet Mask- default is 255.255.255.0
c.
Gateway-
your router’s external (public) IP address. It is used when accessing the camera
from outside the network. The router will channel your data to the correct destination even
if it is on a different subnet mask.
d.
To obtain a static IP Address and
network information, contact your
Internet Service Provider or
Network Administrator.
4.
DNS- Enter Primary DNS and
Secondary DNS. The Domain Name
Server translates web addresses to IP
addresses.
5.
IPv6 Mode- IPv6 offers a new 128-bit
address system.
6.
MAC Address-
Displays the camera’s
Mobile Access Control Address.
7.
Port- Displays all the ports necessary
for communication and router setup.
8.
Use Flow Control- Control the network
stream (quality & Frame rate) pending
on the network circumstance.
9.
Select ‘
Apply
’ to save all changes and
reboot the server.
[1]
[2]
[3]
[4]
[5]
[6]
[7]
[8]


