


Duracomm | 12
Network Setup Page
The “Network Setup” page is available on the MU models.
A network administrator for your company must choose the settings for this page. The default HTTP port is
80
. If a
different HTTP port is used, it will need to be added to the URL to access the monitoring unit. For example: if the port is
changed to
8080
then the address would be changed to “
http://192.168.0.253:8080
”.
NOTE: You must reboot the device for changes in these settings to take effect.
SNMP Traps
This section is simplified and meant for network administrators who already understand SNMP traps and how to
configure capable equipment into their system. For those who want to understand the benefits of using SNMP traps,
you can search for training material online under “SNMP Traps”, “MIB Browsers”, and “SNMP Monitoring”.
The MIB file for the unit can be downloaded after you connect to it with your browser. Go to the Device Setup page and
log in to the unit. Halfway down the page there is a link to the MIB file. Right-click on the link and click “Save Link As” to
download the file.
After download, import the MIB file into your MIB browser or monitoring software to configure it for use with the unit.
When the MIB file has been loaded, complete the “SNMP Setup” section on the “Network Setup” page of the unit to
configure it for use with your monitoring solution.
The monitoring unit will send traps for all configured alarm conditions including bootup, temperature, analog alarms,
and digital alarms.
Digital Outputs can also be controlled by SNMP and configured for alarms on the unit.
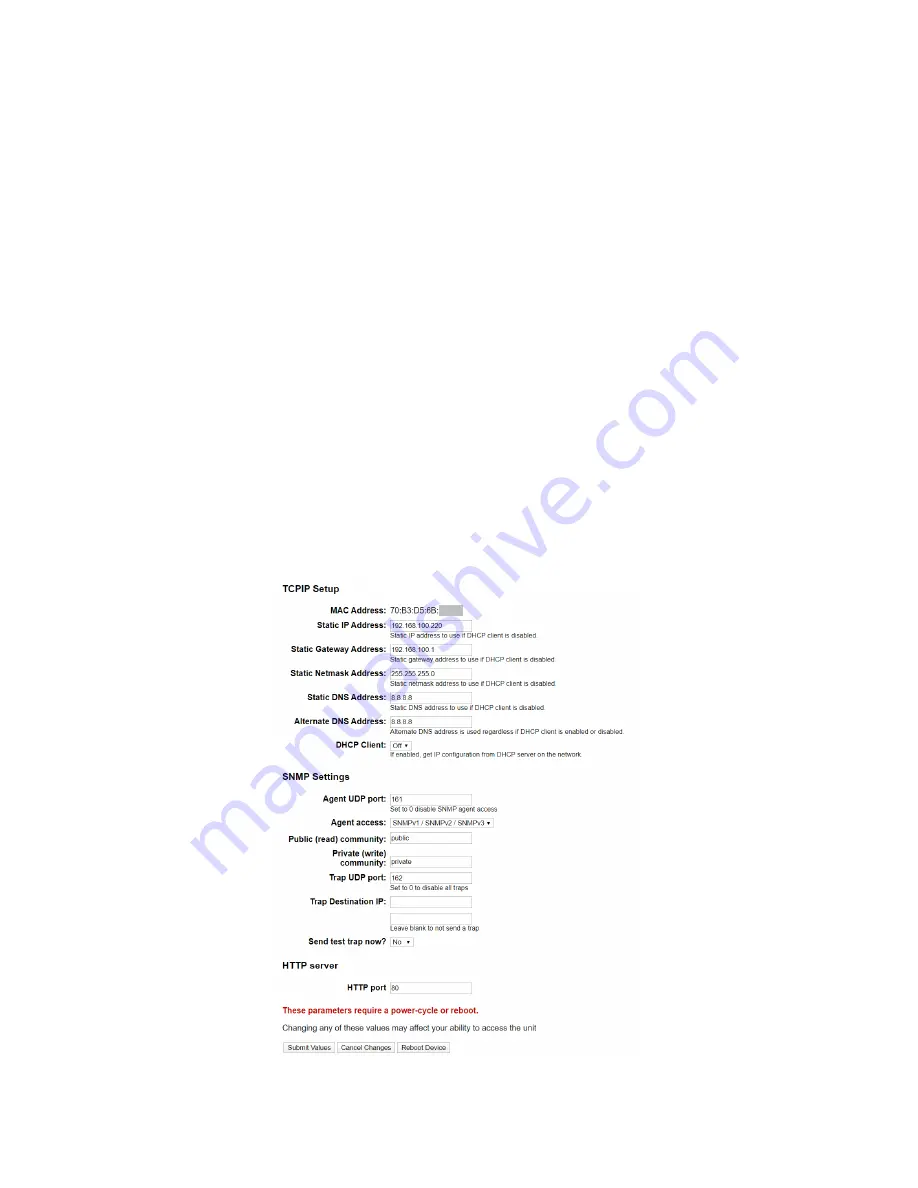
Figure 8. Network Setup Page.


