First,
connect the
floppy disk controller
cable and one
of
the
four
cables
from
the
power supply. The
power cable
is
simple to
connect: just
plug
it
in.
The
shape
of
the
plug
ensures
that
no
mistakes
will
be made. For
the
floppy disk
controller cable,
you must first
have
a
floppy
disk con-
troller
card.
You
should refer
to
the appropriate
card's
manual
for
installation instructions. One edge
of
the
ribbon
cable
is
marked
with
a
color
line.
This specific
line
side
of
the connector
should be
at
Pin
1
when
attached
to
the card.
Pin
1
is
clearly marked on
the
card.
The same
procedure
is
followed
for
a second
disk drive.
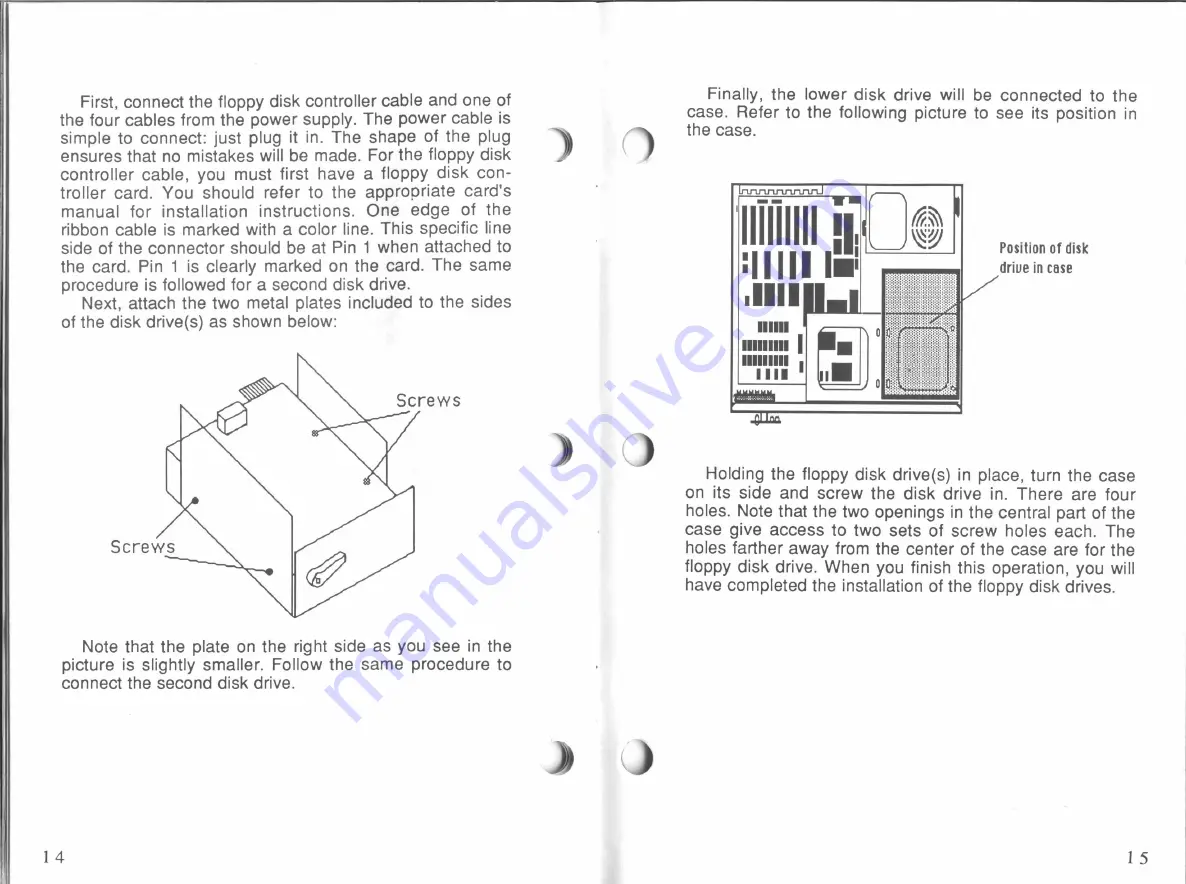
Next,
attach the
two metal
plates
included to
the sides
of
the
disk drive(s)
as
shown below:
Screws
Screws
Note
that the
plate on
the
right
side
as
you
see
in
the
picture
is
slightly smaller. Follow
the same procedure
to
connect the second
disk drive.
14
Finally,
the
lower
disk
drive
will
be
connected
to
the
case.
Refer to
the
following
picture to
see
its
position
in
)
the case.
‘.
|
--
I
lllllllll
,|.
H
I
I
II
In:
.IIII
IIIIIIIII
IIIIIIIII
I
W—
Tum
l
Position of disk
drive
in
case
.".'I'."
E
Holding
the
floppy disk drive(s)
in
place,
turn
the
case
on
its
side and screw the
disk drive
in.
There are
four
holes. Note
that the
two
openings
in
the central
part
of
the
case
give
access
to two
sets
of
screw holes each.
The
holes farther
away
from
the center
of
the
case
are
for
the
floppy disk drive. When you
finish
this
operation,
you
will
have
completed the
installation
of
the
floppy
disk drives.
15
All manuals and user guides at all-guides.com


