


VigorAP 910C User’s Guide
184
3
3
.
.
1
1
3
3
A
A
p
p
p
p
l
l
i
i
c
c
a
a
t
t
i
i
o
o
n
n
s
s
Below shows the menu items for Applications.
3
3
.
.
1
1
3
3
.
.
1
1
S
S
c
c
h
h
e
e
d
d
u
u
l
l
e
e
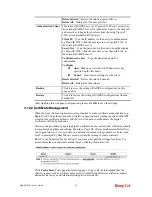
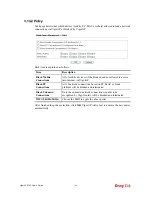
The Vigor AP has a built-in clock which can update itself manually or automatically by
means of Network Time Protocols (NTP). As a result, you can not only schedule the AP to
dialup to the Internet at a specified time, but also restrict Internet access to certain hours so
that users can connect to the Internet only during certain hours, say, business hours. The
schedule is also applicable to other functions.
You have to set your time before set schedule. In
System Maintenance>>
Time and Date
menu, press
Inquire Time
button to set the Vigor AP’s clock to current time of your PC.
The clock will reset once if you power down or reset the AP. There is another way to set up
time. You can inquiry an NTP server (a time server) on the Internet to synchronize the AP’s
clock. This method can only be applied when the WAN connection has been built up.
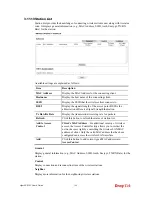
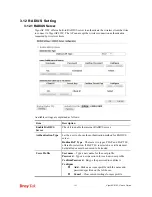
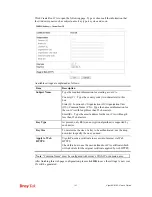
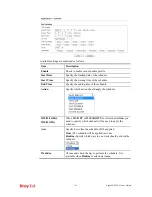
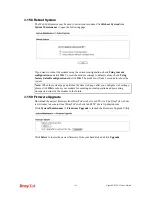
Available settings are explained as follows:
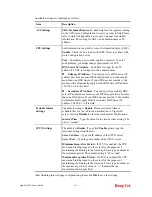
Item Description
Schedule
Enable Schedule
- Check it to enable the function of schedule
configuration.
Schedule
Configuration
Index
– Display the sort number of the schedule profile.
Setting
– Display the summary of the schedule profile.
Action
– Display the action adopted by the schedule profile.
Status
– Display if the profile is enabled (V) or not (X).
Add
– Such button is available when
Enable Schedule
is
checked. It allows to add a new schedule profile.
Delete
– Check the index box of the schedule profile and click
such button to remove the profile.
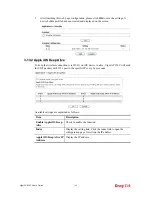
You can set up to
15
schedules. To add a schedule:
1.
Check the box of
Enable Schedule
.
2.
Click the
Add
button to open the following web page.


