8
WORKING CONSEQUENCE CLOSING THE SEAM
Dual safety switch K9-1-DF assembled to the seamer,
check the position of pin first before switching the
seamer to “on “.
If pin is in position 1 the machine will not switch
off automatically!
Pin in position 2 the dual safety switch is in operation.
Press locking handle down all the way, to
ensure that the handle does not open up
again.
Secure a safety rope to the lifting eyes.
Before working with the dual safety switch, check the
function of the switch.
Working direction variable up or down.
◼
Seamer must be operated on a grounded socket
only.
◼
To operate seamer switch to
”I” and push knob
2 (see page 20)
◼
After switching the machine to on position the
power seamer will work automatically and close
the panel to a double lock seam.
◼
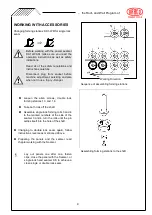
Insert the seamer, locking handle open, with the four
forming rolls into the panel.
◼
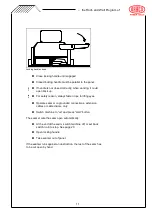
The first two forming rolls No. 1 and No. 2 must be set
under the single lock seam. See picture.
◼
At the end of the ridge or eave switch machine
to “0” off.
◼
Open locking handle.
◼
Take seamer out of the panel.
Insert the rolls no. 1 and no. 2 at the beginning of the seam
If there is an obstruction, the rest of the panel has to
be closed with the single lock hand seamer K8 and
double lock seamer K7.
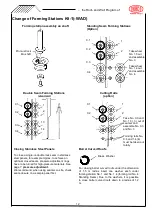
The locking handle must be positioned to the
forming side
If there is an obstruction, windows, chimneys,
vent pipes, move locking handle against the
spring and to the top. See picture previous
page.
Take seamer out of the panel, move locking
handle down, spring pushes pin into the
bracket, move handle to the top and take
seamer off.
Lock handle
... the Roof- and Wall Program of
0.1
0.2
0.3
0.4
1
2
1.3
1.4


