background image

Operation

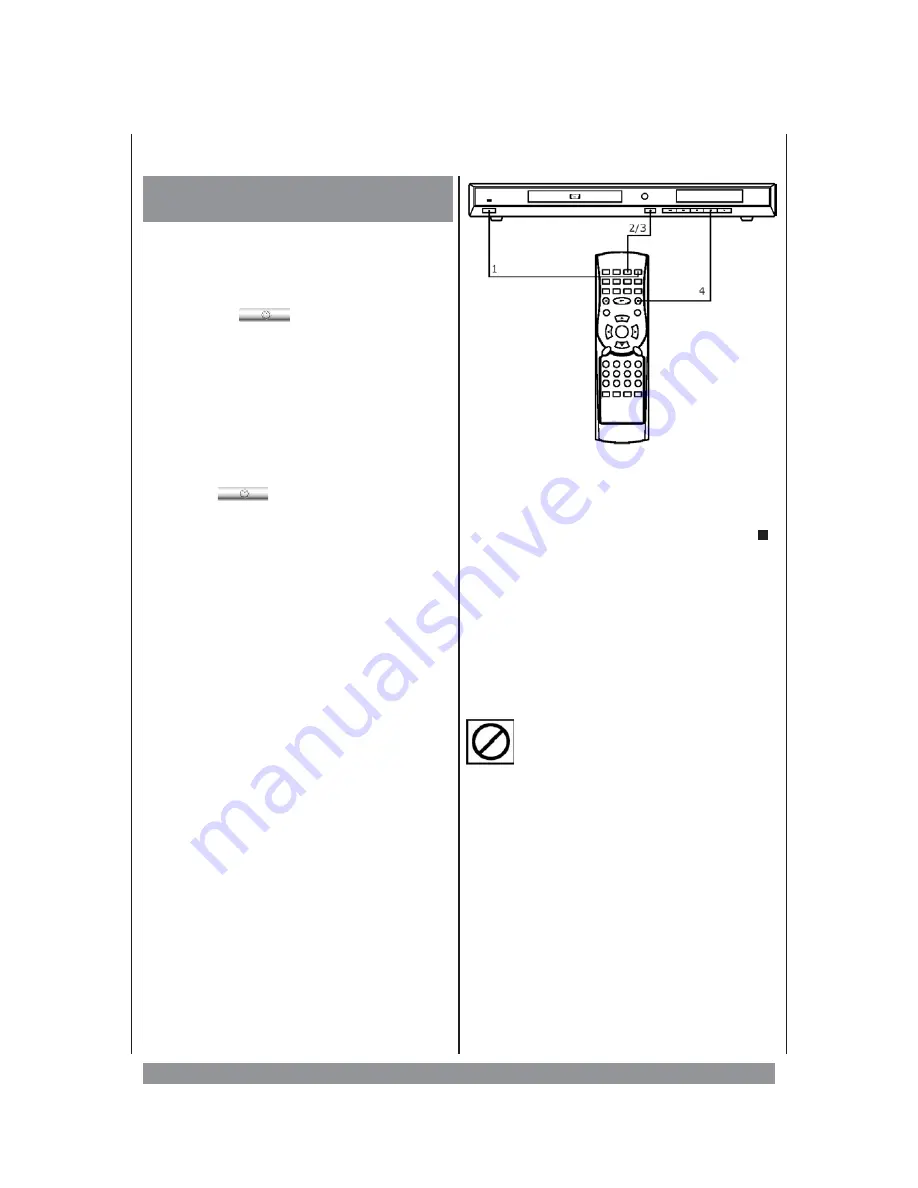
Switching On and Off,
Stand-by

Connect the mains cord to a wall outlet with a
voltage corresponding to the specifications
on the rear panel of the unit.

u

Press the

button to switch on the

unit. That activates the LCD display showing
your equipment is ready for action.
You can operate all functions using the R/C.
Additionally, many functions have buttons at
the unit as well. If no disc is inserted yet, the
display shows:

NO dISC

Press the

STANDBY ON/OFF

button on the

r/c or the

button at the unit's front

panel to switch the unit into stand-by mode,
means it is supplied with mains power but
not active. In this condition you can activate
the player by pressing either
- the STANDBY button on the R/C, or
- at the main unit the

4

- or

OPEN/CLOSE

button.

v

Press the

OPEN/CLOSE

button to open

the disc tray (The screen shows “OPEN”. The
TV screen keeps showing information about
operating steps etc.).
Put the disc with its shiny, unprinted side
downward onto the drawer.

w

Press again the

OPEN/CLOSE

button,

to

close

the

tray.

Play

back

starts

automatically. Usually DVD discs now show a
menu to choose from. You can control this
menu with the navigation buttons

3445

.

The display reads:

ROOT

Mark the desired option and press ENTER to
activate.

Mostly

you

find

additional

information about the DVD’s content on its
sleeve.

x

To interrupt playback press

STOP

once. The screen shows “PRESS PLAY KEY
TO CONTINUE”. So the player memorizes
the location where playback was stopped.
Press

PLAY

4

to resume playback there.

Press STOP twice and the unit completely
stops and won’t remember the last position.
Maybe resume play is not supported by all
discs.

If this symbol appears on the screen while
pressing a button the unit can’t carry out the
desired function, 'cause it’s not supported by
either the DVD inserted or the current
operating mode.

TIP: When the disc has stopped the unit
automatically

changes

to

stand-by

mode after 30 minutes without any
operation.

40

Summary of Contents for DVD-352

Page 1: ...3...

Page 2: ...r choosing one of our DVD players For your own safety and in order to learn all about the functions available please read this manual and keep it for future reference And if you once sell the unit ple...

Page 3: ...quid has been spilled onto the product immediately disconnect it from mains plug and consult qualified service personnel Never let children play with the unit or stick anything into it Otherwise you f...

Page 4: ...ng the TV using a SCART Cable 38 Using a S video cable 38 Connecting Diagram for your Digital Home Cinema 39 Optical Digital Output 40 Operation 40 Switching On and Off Stand by 40 Directly Calling up...

Page 5: ...rted The unit s operation and functions depend on the specific disc inserted In some cases these functions and operations may differ from the descriptions given in this Owner s Manual In this event pl...

Page 6: ...ngs If necessary please use a cleansing disc carefully following its operating instructions Condensing Moisture In these cases water may be condensing on the laser lens causing malfunction The unit is...

Page 7: ...works properly in a distance below 5m and in an angle of up to 45 of the front of the unit No obstacles may stand in the way between r c and infrared sensor Should the r c start to work unreliably rep...

Page 8: ...rmation 6 4 PLAY starts playback 7 STOP stops playback 8 PAUSE holds playback and gives a still picture 9 9 SKIP skips to next chapter DVD or audio track CD 10 SKIP skips to previous chapter DVD or au...

Page 9: ...The Remote Control Handset R C 34...

Page 10: ...s content options to choose from 14 TITLE MENU calls up the title menu if supported by DVD 15 SUBTITLE MENU shows subtitles available 16 AUDIO MENU toggles DVD audio options 17 CLEAR deletes input in...

Page 11: ...es are available 6 PBC indicator indicates a VCD 2 0 with PBC functions is loaded 7 MP3 indicator indicates a disc with MP3 coded program is loaded 8 Disc playing indicator shows a rotating disc durin...

Page 12: ...This will protect your speakers from possible damage 1 When using a 3 wire RCA cable plug one of the yellow RCA plugs into the VIDEO OUT socket at the rear panel of the DVD player Plug the other one i...

Page 13: ...se connect the components as shown with a SCART cable Using a S video cable If your TV set is equipped with a S video input we recommend to use a S video cable It provides improved picture quality com...

Page 14: ...nema Optical Digital Output To keep the optical output from dust and dirt we ve put in a protective cap If you re going to use the socket please carefully remove the cap and store it When you remove t...

Page 15: ...out operating steps etc Put the disc with its shiny unprinted side downward onto the drawer w Press again the OPEN CLOSE button to close the tray Play back starts automatically Usually DVD discs now s...

Page 16: ...forward Depending on how often you press the button playback speed increases up to 2 4 8 or 16fold The sound is muted Press the Play 4 button to resume normal playback Title Chapter Search During pla...

Page 17: ...eat Mode Depending on the disc type inserted various repeat functions are available DVD repeating a title a chapter or a defined portion of program A B CD repeating all tracks one track or a defined p...

Page 18: ...AL LB Choose this mode when your TV set has 4 3 screen format The picture will appear in its entire width but framed by black bars at the top and the bottom WIDE Choose this mode when using a 16 9 wid...

Page 19: ...on the particular disc You can also change the subtitle language during playback by pressing the SUBTITLE MENU button DISC MENU Here you can choose the language in which the DVD menu stored on the di...

Page 20: ...on about MP3 CD Playback When you have inserted a MP3 coded CD you see a menu showing the folders on the CD Use the navigation keys 56 to select the desired folder then press ENTER Now the MP3 tracks...

Page 21: ...CD Use the navigation keys to select the desired folder then press ENTER Now the files inside are displayed Use the navigation keys 56to choose the desired file and press the ENTER button That pictur...

Page 22: ...or rapid reverse The picture will be some what distorted at times this is normal No rapid advance or rapid reverse play Some discs may have sections which prohibit rapid advance or rapid reverse No 4...

Page 23: ...rom the TV monitor Perform the steps on page 16 to display the subtitles Alternative audio soundtrack or subtitle language fail to be selected An alternative language is not selected with discs which...

Page 24: ...ded dual layer 12 cm double sided single layer 8 cm single sided single layer 8 cm single sided dual layer 8 cm double sided single layer 2 Compact Disc 12 cm disc 8 cm disc Video output level 1 Vp p...

Reviews: