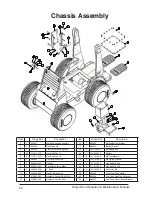
Dingo K9-4 Operation & Maintenance Manual
10
Dingo K9-4 Operation & Maintenance Manual
11
IMPORTANT:
Do not high pressure wash.
High pressure washing can damage the electrical
system.
Tyres and Traction
The correct tyre pressure is usually between
172 and 241 kpa (25-35psi). (Use lower
pressures for soft ground conditions & higher
pressures for hard ground conditions)
Use of
incorrect tyre pressure will reduce the stability
and carrying capacity of the Dingo.
Filling the tyres with water can improve the
Dingo’s stability for lifting applications. Water
filling equipment can be purchased from Dingo
Australia.
This range includes:
•
8” Dingo tyres
[machine width 970mm]
Specially designed for Dingo these 18"x8"
tyres feature a unique tread pattern for excellent
performance in a range of conditions, 6 ply for
strength & stability and a compound designed
for durability.
•
8” turf tyres
[machine width 970mm]
general purpose - suitable for grassy areas,
dry soil and paved surfaces - minimum ground
disturbance.
•
8” lug tyres
[machine width - 970] tractor type,
for building sites, and muddy situations.
•
20 x 8” sand tyre
[machine width - 1020]
better floatation & clearance for sandy & loose
material conditions.
•
5” forklift type tyres
[machine width -
810mm] narrower tyres, suitable for heavy
loads, restricted access, inside buildings, great
on all hard surfaces.
•
3” narrow solid tyres
[machine width -
760mm] only for very restricted access - will
fit through a standard doorway.
•
Tracks
[machine width - 1100mm] excellent
floatation and traction - suitable for mud, sand
and slush.
• Solid fill (all of the tyres mentioned above
(excluding the 3”solids) can be supplied by
Dingo Australia, filled with a puncture-proof,
solid foam).
• For more information on our range of traction
products, please speak to your nearest Dingo
representative.
Operating
Instructions
Read all the safety instructions and the pre start
up section of this manual and the engine manual
before operating the Dingo.
Caution
- Do not operate any of the control
levers (including auxiliary lever) unless you
are standing with both feet on the platform and
firmly holding the grip handles.
IMPORTANT!
Ensure the auxiliary
hydraulic lever is in the centre position
before attempting to start engine
. The most
common cause of ‘hard to start/engine, will not
turn over fast enough, battery does not have
enough power’ type starting problems is that
the auxiliary lever has been left on or knocked
into gear and the engine is trying to start under
load.
Control Levers / Control
Panel
Key Switch
The key switch, used to start the engine, var-
ies on petrol and diesel models. Check engine
manufacturer's manual for starting instructions.
To shut engine off, rotate key to OFF position
(counter clockwise direction).
Throttle
Move control forward to increase engine speed
and rearward to decrease engine speed.
Choke
For instructions regarding use of the choke (pet-
rol models) refer to the engine manufacturer's
manual.
Drive Control Levers
To go forward, slowly push the right and left
drive control levers forward.
To go backward, slowly pull the right and left
drive control levers backward.
To go straight, apply equal pressure to both drive
control levers.
Summary of Contents for K9-4
Page 24: ...Dingo K9 4 Operation Maintenance Manual 24 Main Control Bank Assembly ...
Page 26: ...Dingo K9 4 Operation Maintenance Manual 26 Remote Control Bank Assembly ...
Page 32: ...Dingo K9 4 Operation Maintenance Manual 32 Yanmar Dash Assembly ...
Page 34: ...Dingo K9 4 Operation Maintenance Manual 34 Perkins Dash Assembly ...
Page 38: ...Dingo K9 4 Operation Maintenance Manual 38 K9 4 Arm Assembly ...
Page 43: ...Dingo K9 4 Operation Maintenance Manual 43 Yanmar Engine Assembly Series I ...
Page 49: ...Dingo K9 4 Operation Maintenance Manual 49 K9 4 Perkins Engine Diagram And Part List ...


