S M - 5 3 0 0 S e r v i c e M a n u a l
S M - 5 3 0 0 S e r v i c e M a n u a l
|
|
102
102
Hardware Test And Maintenance
Hardware Test And Maintenance
–––––––––––––––––––
–––––––––––––––––––
7.9. Maintenance
7.9. Maintenance
7.9 Maintenance
7.9 Maintenance
7.9.1 Thermal Head Cleaning
7.9.1 Thermal Head Cleaning
To maintain good quality printouts and long life
To maintain good quality printouts and long life span for the thermal print
span for the thermal print head, regular cleaning of the
head, regular cleaning of the
thermal print head is
thermal print head is required. Please use the cleaning kit
required. Please use the cleaning kit supplied with the product.
supplied with the product.
Instruction
Instruction
1. Turn
1. Turn
OFF
OFF
Scale by
Scale by Main Power Switch.
Main Power Switch.
2. Open the printer
2. Open the printer door by pulling the printer l
door by pulling the printer latch outward horizontally.
atch outward horizontally.
3. Swing open the printer
3. Swing open the printer door in a
door in a clockwise direction.
clockwise direction.
4. Pull out the
4. Pull out the cassette horizontally.
cassette horizontally.
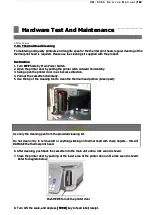
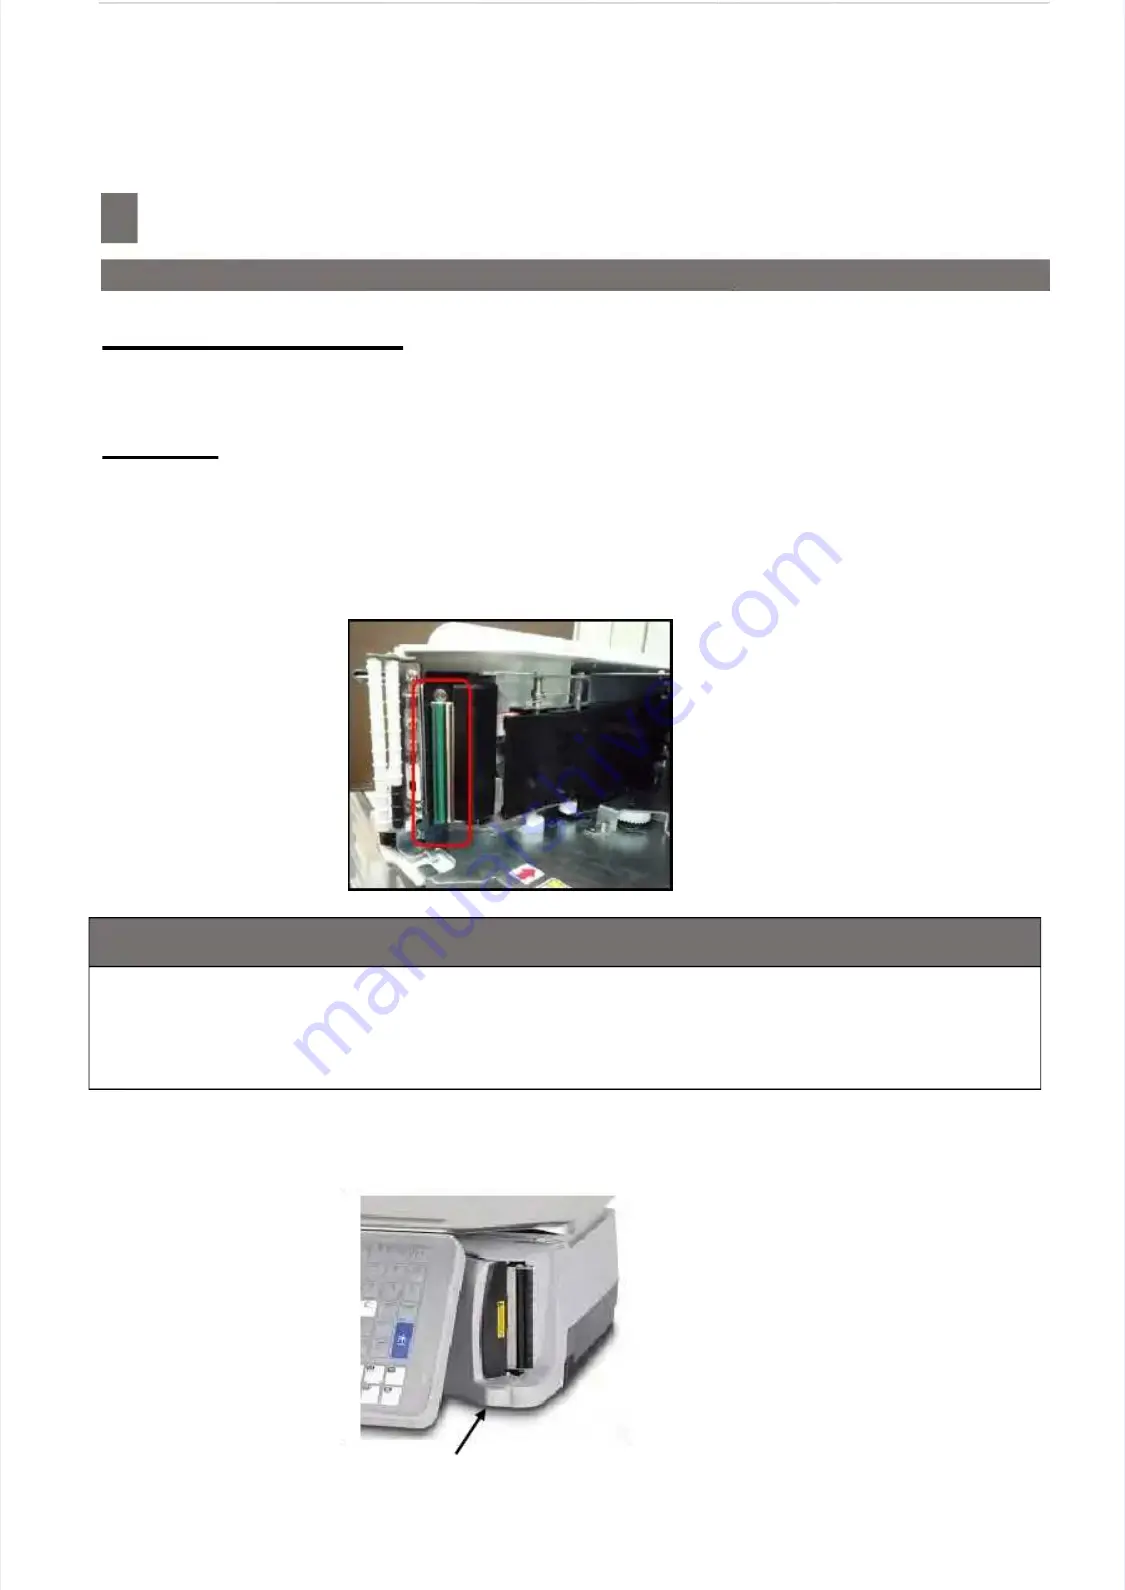
5. Use the tip of the
5. Use the tip of the cleaning tool to clean the thermal head portion (Green part):
cleaning tool to clean the thermal head portion (Green part):
CAUTION
CAUTION
Use only the
Use only the cleaning pen from the provided cleaning kit.
cleaning pen from the provided cleaning kit.
Do not clean or try to
Do not clean or try to remove dirt or anything sticking on thermal head with sharp objects
remove dirt or anything sticking on thermal head with sharp objects
–
–
this will
this will
DAMAGE the thermal print head.
DAMAGE the thermal print head.
6. After cleaning, push back the cassette into the main unit until a l
6. After cleaning, push back the cassette into the main unit until a lock sound is heard.
ock sound is heard.
7. Close the printer door by pushing at the lower area of the printer
7. Close the printer door by pushing at the lower area of the printer door until a lock sound is heard.
door until a lock sound is heard.
Refer to diagram below:
Refer to diagram below:
8. Turn ON the scale, and depress
8. Turn ON the scale, and depress
[FEED]
[FEED]
key to feed label/receipt.
key to feed label/receipt.
Push HERE to lock the printer door
Push HERE to lock the printer door

