4
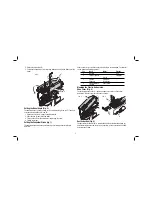
FIG. 1
C
B
A
J
I
H
D
G
E
F
R
FIG. 2
H
G
E
Fitting and Removing a Saw
Blade (Fig. 2)
The tool-free blade exchange system
ensures quick and easy changing
of saw blades.
1. Open the blade holder (G) by fully
retracting the blade latch (E).
2. Insert the saw blade into the blade
holder (G) guiding the back of the
blade into the groove of the guide roller (H).
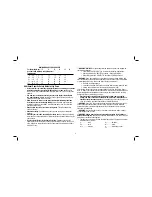
.......... direct current
...........alternating or direct current
.............. Class I Construction
no ..............no load speed
...................
(grounded)
.............earthing terminal
............... Class II Construction
.............safety alert symbol
...................
(double insulated)
RPM ..........revolutions per minute
…/min ........ per minute
BPM ..........beats per minute
sfpm ........... surface feet per minute
IPM ............impacts per minute
SAVE THESE INSTRUCTIONS FOR FUTURE USE
COMPONENTS (Fig. 1, 2)
A. On/off switch
G. Blade holder
B. Lock-on button
H. Guide roller
C. Speed control dial
I. Shoe
D. Saw dust blower
J. Pendulum stroke selector
E. Blade latch
F. Finger guard
INTENDED USE
Your jig saw has been designed for professional cutting of wood, steel, aluminium,
plastic and ceramic material.
DO NOT
use under wet conditions or in presence of flammable liquids or gases.
These jig saws are professional power tools.
DO NOT
let children come into contact with the tool. Supervision is required when
inexperienced operators use this tool.
ASSEMBLY AND ADJUSTMENTS
WARNING: To reduce the risk of injury, turn unit off and disconnect machine
from power source before installing and removing accessories, before adjusting or
changing set-ups or when making repairs.
Be sure the trigger switch is in the OFF
position. An accidental start-up can cause injury.


