Featur
es & Options
14
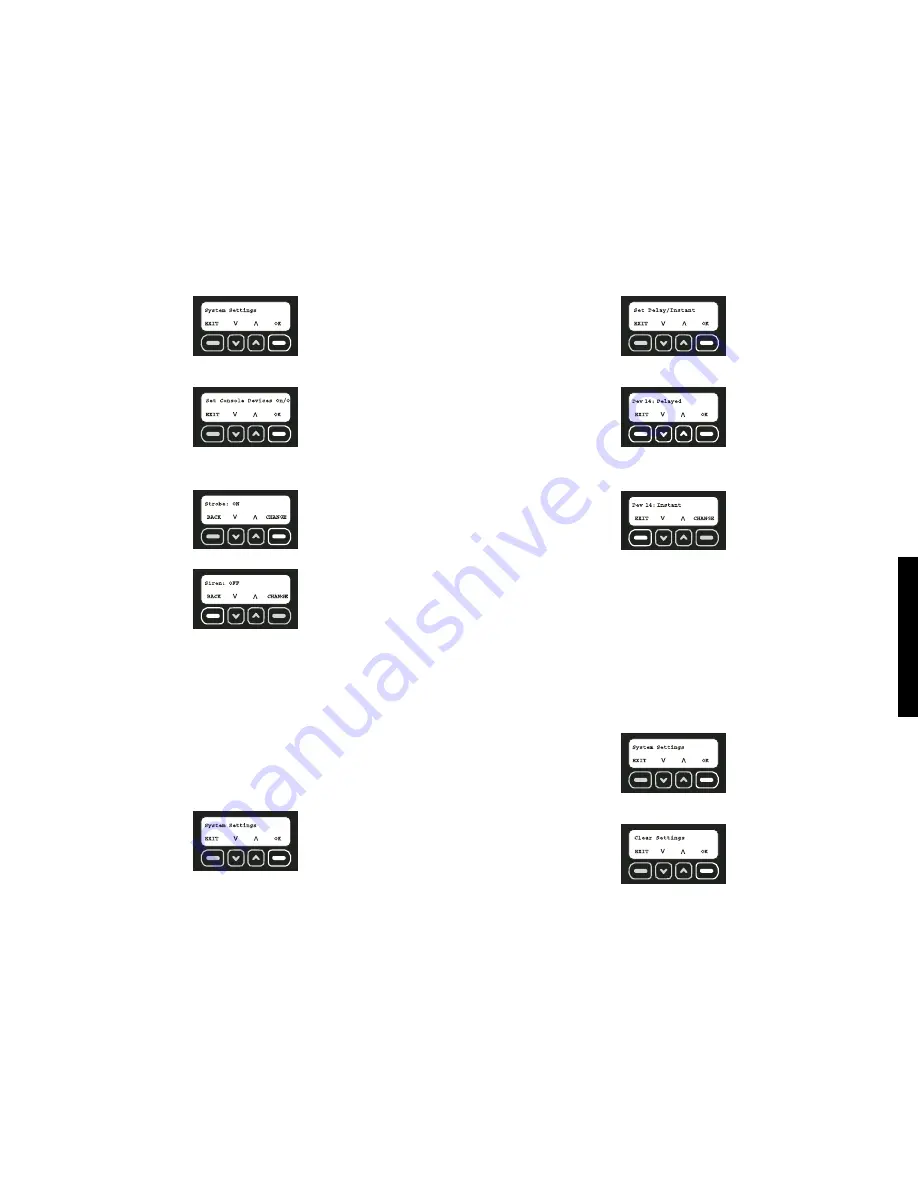
4. Use the up and down arrows to scroll through the menu until the System Settings
screen is displayed. Select OK.
5. Use the up and down arrows to scroll through the menu until the Set Console Devices
On/Off screen is displayed. Select OK.
6. Using the up and down arrows, scroll to choose between strobe and siren. The screen
will indicate whether the strobe/siren is currently set on or off. To change the status,
select CHANGE.
7. Once all settings are to the user’s preference, select BACK.
SET DELAY/INSTANT
Each sensor aside from the Base Unit motion sensor can be reset for
Instant
which elim-
inates the entry delay. By changing a device to
Instant
, when the system is armed, an
alarm will take place as soon as the device is tripped.
NOTE:
The vibration sensor in the Base Unit and the tamper in every sensor are automat-
ically set to
Instant
. This setting cannot be changed. The purpose of this setting is to send
a notification if an intruder attempts to disable or destroy the device.
NOTE:
To avoid a false alarm, sensors that are likely to be tripped as the user enters and
exits the site to arm/disarm the unit should remain set on delay mode.
1. Start at the main screen.
2. Select MENU or press MAIN MENU on the keypad.
3. Using the keypad, enter the master code.
4. Use the up and down arrows to scroll through the menu until the System Settings
screen is displayed. Select OK.
5. Use the up and down arrows to scroll through the menu until the Set Delay/Instant
screen is displayed. Select OK.
6. Using the up and down arrows, scroll through the list of programmed devices. The
screen will indicate whether the device is currently set on delay or instant.
7. When the device to be changed is reached, select CHANGE. The CHANGE button
toggles between delay and instant.
8. After changing each device, select EXIT to go back to the main screen.
CLEAR SETTINGS
NOTE:
This function will free the Base Unit to be completely reprogrammed.
This system has been designed to be portable. If the site location changes and users, sen-
sor descriptions and locations need to be changed, the system can clear the current set-
tings. All registered sensors and users will be deleted from the system. The master code
will
NOT
be deleted.
NOTE:
If changing locations will result in the unit being disconnected from the wall outlet
for more than 8 hours, place the unit in the standby state. This will preserve battery life and
protect the Base Unit. See
Turning System Off
.
1. Start at the main screen.
2. Select MENU or press MAIN MENU on the keypad.
3. Using the keypad, enter the master code.
4. Use the up and down arrows to scroll through the menu until the System Settings menu
is displayed. Select OK.
5. Use the up and down arrows to scroll through the menu until the Clear Settings screen
is displayed. Select OK.
6. Enter the master code.
Summary of Contents for DS200
Page 2: ......
Page 29: ...Appendix 22 Coverage Map ...
Page 61: ...54 Appendice Carte de la zone de couverture cellulaire analogique ...
Page 95: ...88 Mapa de cobertura Apéndice ...
Page 102: ......
Page 103: ......


