English
9
• Entry Delays
• Using the Keypad
• Using the Key Chain Remote
ENTRY DELAYS
Each sensor aside from the Base Unit motion sensor can be reset for
Instant
which elim-
inates the entry delay. By changing a device to instant, when the system is armed an alarm
will take place as soon as the device is tripped.
IMPORTANT:
The vibration sensor in the Base Unit and the tamper in every sensor are
automatically set to instant. This setting cannot be changed. The purpose of this setting is
to send a notification if an intruder attempts to disable or destroy the device.
IMPORTANT:
To avoid a false alarm, sensors that are likely to be tripped as the user enters
and exits the site to arm/disarm the unit should remain set on delay mode.
For more information, see
Set Delay/Instant
under
Features and Options.
USING THE KEYPAD
IMPORTANT: Avoid causing vibration in the Base Unit when typing the master
code.
The vibration sensor will be on as soon as the internal motion detector recognizes
motion. When a vibration occurs, the unit will send an alarm. This is to provide protection
of damage or destruction of the Base Unit. If the vibration sensor is accidentally tripped,
the system will immediately contact the monitoring system.
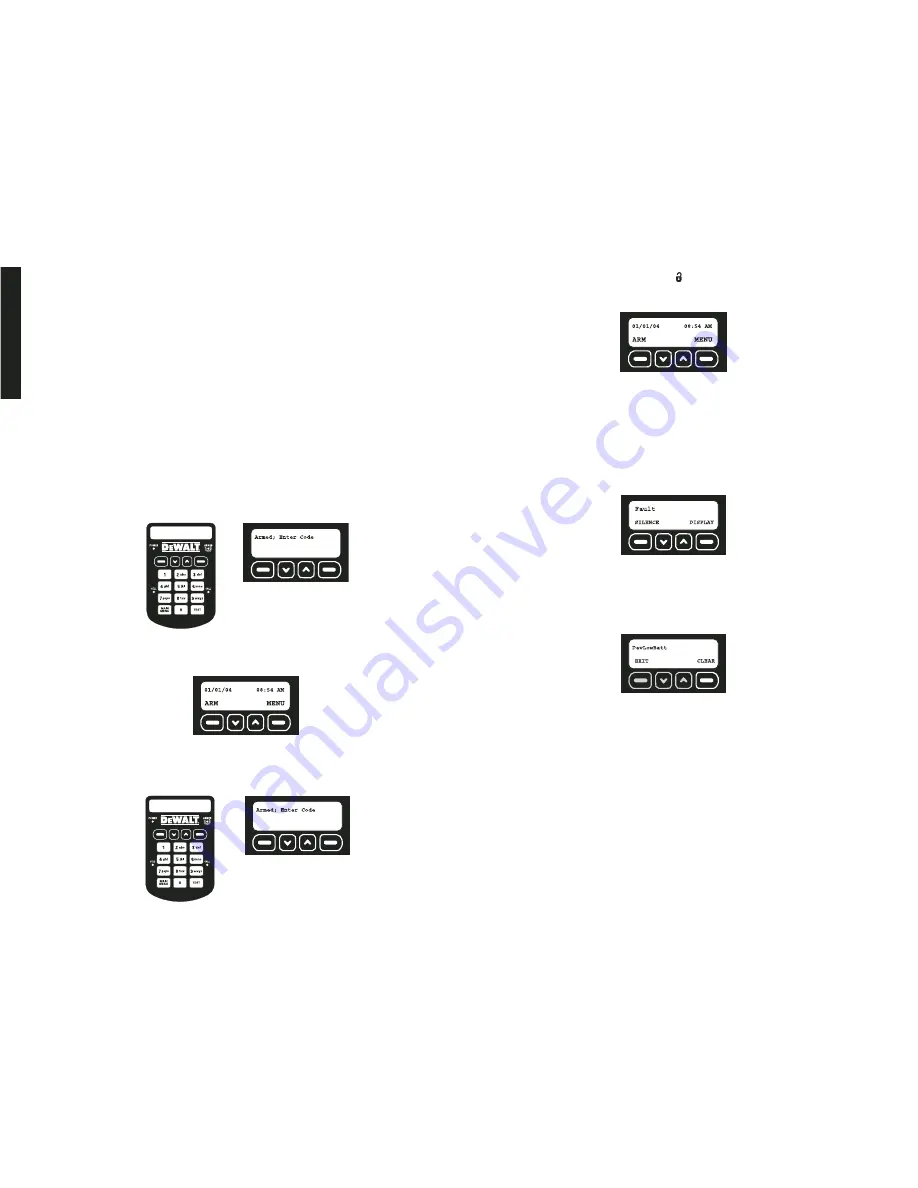
When the system is armed, the Armed screen will be displayed:
1. To disarm the system, use the keypad to enter either the master code or a valid user
code.
2. The main screen will be displayed. The ARMED light on the unit will be off.
USING THE KEY CHAIN REMOTE
Use the Key Chain Remote for one-touch disarming from up to 2000' away from the
Base Unit.
When the system is armed, the Armed screen will be displayed:
1. To disarm the system, press the unlock
button on the right side of the Key Chain
Remote.
2. The main screen will be displayed. The ARMED light on the unit will be off.
Faults
Faults indicate when there has been a serious issue that needs to be addressed. This
could be a number of things including an unsecured device, low battery, tamper and weak
signal.
• How to View Faults
• Clearing a Fault
• Description of Fault Codes
HOW TO VIEW FAULTS
If a fault is present, the system will chime and display the Fault screen.
1. To silence the chime, select SILENCE. This will simply allow the system to be armed
over a fault and/or silence the chime. It is recommended to correct the fault as soon as
possible. To display the fault and resolve immediately, select DISPLAY.
2. The fault code will be displayed. Use the up and down arrows to scroll through the
faults. Resolve the issue with the action listed in
Description of Fault Codes
chart and
the Fault screen will disappear. To remove a tamper fault, select CLEAR.
IMPORTANT:
See the
Description of Fault Codes
for more details regarding a fault and
resolution actions. All faults, except a tamper, will
automatically
be cleared when the issue
has been resolved. An event will be recorded in the event log indicating the date and time
that the event occurred and was resolved.
NOTE:
A tamper fault will not be automatically cleared. After the device has been
inspected, checked for damage, and the cover closed, the fault will need to be cleared.
See
Clearing a Fault
. This process was designed to create awareness of the tamper
with the master user and require verification that the problem has been resolved.
CLEARING A FAULT
To clear any fault other than a tamper fault, correct the condition at the sensor. For
example: replace the battery, relocate to an area with a better signal, etc.
To Clear a Tamper Fault:
IMPORTANT:
Before clearing a tamper fault, be sure that the issue has been resolved.
Only the master user can clear tamper faults.
1. When the Fault Code screen is displayed; select CLEAR.
2. Use the keypad to enter the master code.
3. Select OK.
Summary of Contents for DS100
Page 2: ......


