Initial Setup
6
IMPORTANT:
Write the device description and corresponding device number on the
Sensor Location List
. Keep this sheet for reference. This information will be needed
during the monitoring service enrollment process. The location and descriptions for each
device are critical for the monitoring of the system.
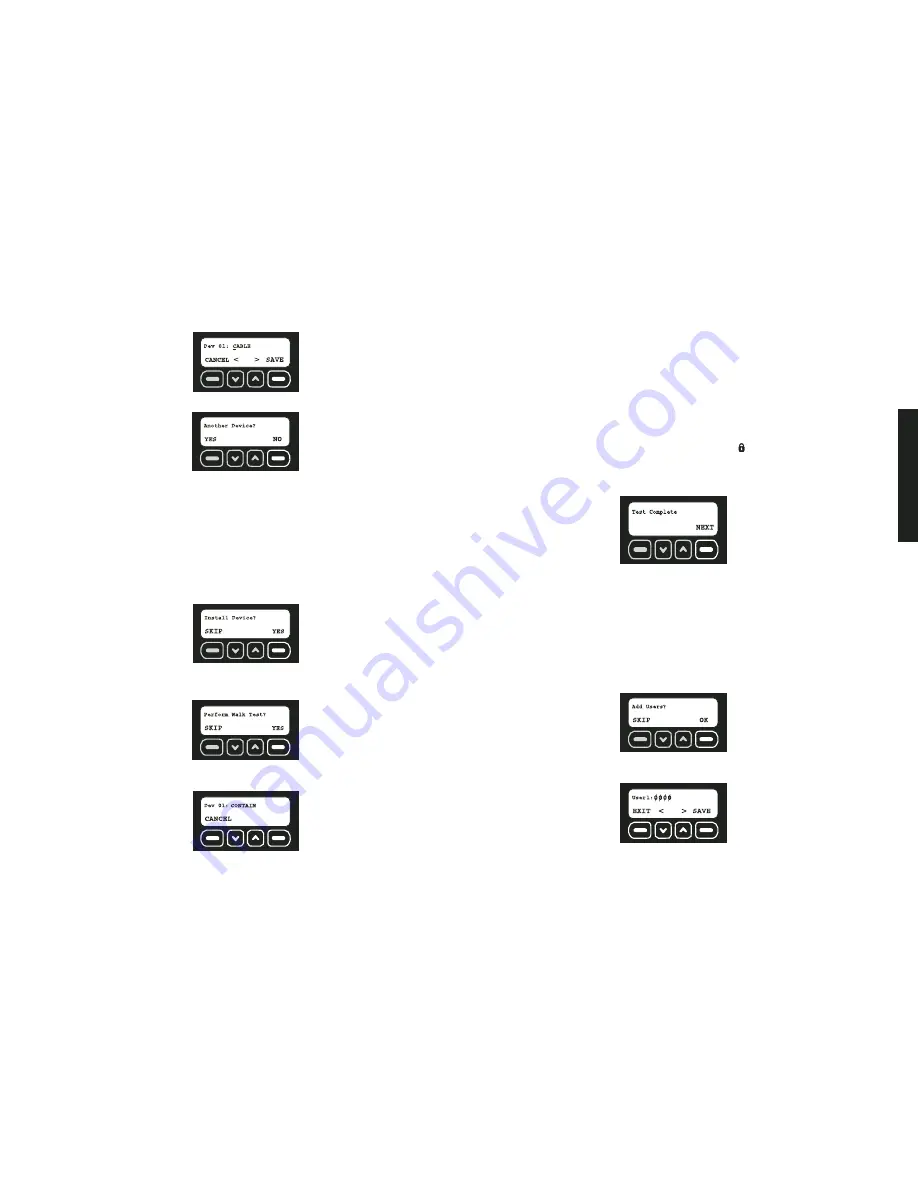
6. After editing the device description, select SAVE.
7. Select YES to add another device. Select NO to move to the next step.
If YES is selected, the system automatically assigns the device in the next available
space.
STEP FIVE: TEST RANGE
Each sensor and Key Chain Remote should be tested. Several conditions, including radio
frequency interference from metal objects may affect a sensor’s ability to communicate
with the Base Unit.
IMPORTANT:
The system will ask if the devices have been installed. See
System
Overview
and each sensor’s individual manual to determine the best location for each
sensor.
1. When the sensors have been installed in the desired location, select YES.
2. A walk test will verify that each sensor can communicate with the Base Unit. Be sure all
sensors have been installed in the desired location. Begin the walk test by selecting
YES.
3. During the test function, the system will cycle through the list of registered devices.
Each device is displayed for one second.
4. Walk through the site and trigger each sensor using the list below. As that sensor is
tripped, the entry should disappear.
Indoor Motion:
Wait 90 seconds since last motion was detected then walk
through the areas where protection is expected. When motion is detected,
it will signal the Base Unit and be removed from the test list. Determine the
limits of the coverage by repeating this test until the motion is not detected.
Door/Window:
Open and close the door or window to test.
Cable Lock:
Open and close the lock to test.
Container Sensor:
Wait 60 seconds since the last container vibration, then
create vibration on the container to test. Adjust sensitivity as necessary.
Outdoor Motion:
Wait 90 seconds since last motion was detected then walk
through the areas where protection is expected. When motion is detected, it
will signal the Base Unit and be removed from the test list. Determine the lim-
its of the coverage by repeating this test until the motion is not detected.
Key Chain Remote:
Press and release the lock (
) button.
NOTE:
After testing each sensor, if a sensor is still listed on the screen, see the
Troubleshooting Guide
for more detailed information.
5. When the test is complete, select NEXT.
NOTE:
See
Test
under
Features and Options
for more detailed information.
STEP SIX: ADD USERS
Up to 6 users (including the master user) can access the system to arm and disarm.
Additional users can be programmed at any time after the initial setup. Refer to
User Code
Maintenance
.
NOTE:
The master user is the only user that can access the programming functions. Any
users other than the master user will only have access to arming and disarming the system.
After the devices have been registered, the Base Unit will display the Add User screen.
1. To add new users, select OK.
2. Starting with User 1, enter a four digit access code. To move back a character, use the
down arrow. To move forward a character, use the up arrow.
3. After entering the user code, select SAVE.
4. Next, enter a name for the user. Using the keypad, type the text (up to 8 characters).
The character that is being changed will be underlined. To move back a character, use
the down arrow.
Summary of Contents for DS100
Page 2: ......


