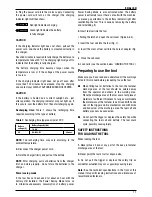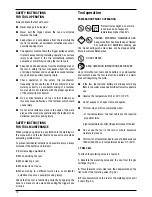
To check the metering valve is correctly fitted:
Press the metering valve stem on fuel cell two or three
times against a stationary object and release. If gas is not
dispersed, fuel cell is empty and needs to be replaced.
OBSERVE SAFETY REGULATIONS
CAUTION
: If the gas leaks from the metering valve or the
gas cartridge after you have attached the metering valve,
replace with a new metering valve.
Do not attempt to reuse the metering valve- replace it with
each fuel cell used.
2. BATTERY
You must charge the battery before use- see previous
section
‘CHARGING THE BATTERY’.
3. SAFETY CHECK
l
Unauthorised persons (including children) must be kept
away from the equipment.
l
Wear eye protection.
l
Check the retaining screws which fix the top cover, etc.
for tightness. Check the tool for defective or rusty parts.
l
Check whether or not the contact arm works correctly
without nails, fuel cell and battery fitted in the tool.
Also check whether or not any dirt has adhered to the
moving parts of the contact arm.
l
Ensure you have read and understood all the relevant
safety instructions in this manual before proceeding..
4. TOOL OPERATION: BEFORE USE
1.
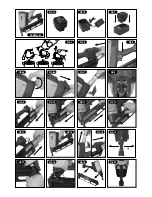
Insert battery into the handle of the tool (Fig. 4)
Note:
Do not operate the contact arm or trigger while
installing the battery.
-Make sure the battery indicator light is flashing GREEN
(Fig. 5).
-If the battery indicator light is flashing RED, the battery
doesn’t have enough power and needs to be charged.
BATTERY INDICATOR LIGHT
l
Flashing GREEN: Enough power remaining
(The light becomes steady during operation).
l
Flashing RED: Insufficient power remaining
l
OFF (No light visible): The battery is flat. Charge the
battery.
2.
Insert the fuel cell into the tool
i. Pull the latch and open the fuel cell cover (Fig. 6).
ii. Insert the fuel cell into the tool (Fig. 7), making sure that
the stem of the fuel cell lines up correctly with the hole in
the adaptor (Fig. 8).
iii. Close the cover.
5. LOADING THE TOOL
CAUTION:
When loading nails into tool:
l
Do not depress trigger
l
Do not depress contact arm
l
Keep your face, hands, feet and other body parts, as
well as those of other persons away from the nose to
avoid possible injury during loading.
1. Insert nail strip into rear of magazine (Fig. 9).
2. Slide the nail strip forward in the magazine (Fig. 10).
3. Pull the nail feeder (B) back to engage the feeder knob to
the nail strip (Fig. 11).
NOTE Use nail strip of more than 10 nails.
Removing the nails:
1. Pull the feeder knob backward (Fig. 12).
2. Return the feeder knob forward quietly while pushing the
nail feeder (B).
3. Pull out nails from the back of the magazine (Fig.13).
CAUTION
: To prevent unintentional operation, never touch
the trigger or place the top end of the contact arm on a work
bench on floor. Also, never face the nail outlet toward any
part of a person.
6. USING THE NAILER
CAUTION
l
Squeeze the contact arm when drivng a nail, otherwise
the piston can not return correctly.
l
Using the tool for an extended period may lead to
oil around the exhaust outlet or nose, resulting in
spattering.
l
To ensure that the material to be nailed stays clean,
wipe off any oil that gets on the tool.
ENGLISH
13
Summary of Contents for DGN9033-XJ
Page 2: ...DGN9033 XJ ...
Page 4: ...3 ...

