


3
ENGLISH
1
FEATURES
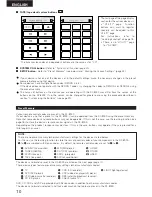
1. Large liquid crystal touch display
320 x 240 dot liquid crystal display with EL back light.
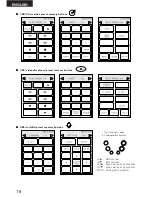
2. Preset memory function
Easy memory presetting thanks to a preset memory
search function (1-button search).
3. System call function
Up to 20 system call settings (10 codes per setting)
can be registered.
Delay times can be set between the transmission
codes.
4. Customizing function
Up to 23 extra devices to be used can be registered
additionally, and buttons can be moved and their
names changed for easier use.
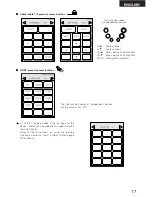
5. User menu function
The user menu settings can be used to register
frequently used buttons on a single page and this
page can always be displayed first.
6. User backup function
Customized settings can be backed up so that set
data is not lost.
7. Learning function
The remote control signals of your devices can be
stored (“learned”) in the RC-8000, so all your
equipment can be operated using the RC-8000.
Approximately 200 codes can be learned.
8. RF transmission function (only when the RC-8000
and RC-8001ST are used in combination)
RF transmission is possible when the RC-8000 is
used in combination with the RC-8001ST.
9. Charging function (only when the RC-8000 and
RC-8001ST are used in combination)
When using the nickel cadmium battery included
with the RC-8001ST, the RC-8000 can be charged on
the RC-8001ST.
10. USB update function
In the future the RC-8000 will allow customizing and
updating of remote control signals on a personal
computer through connection to the computer using
the USB connector.
(A separately available PC application program is
required.)
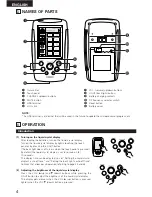
2
BEFORE USING
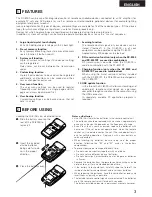
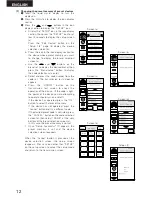
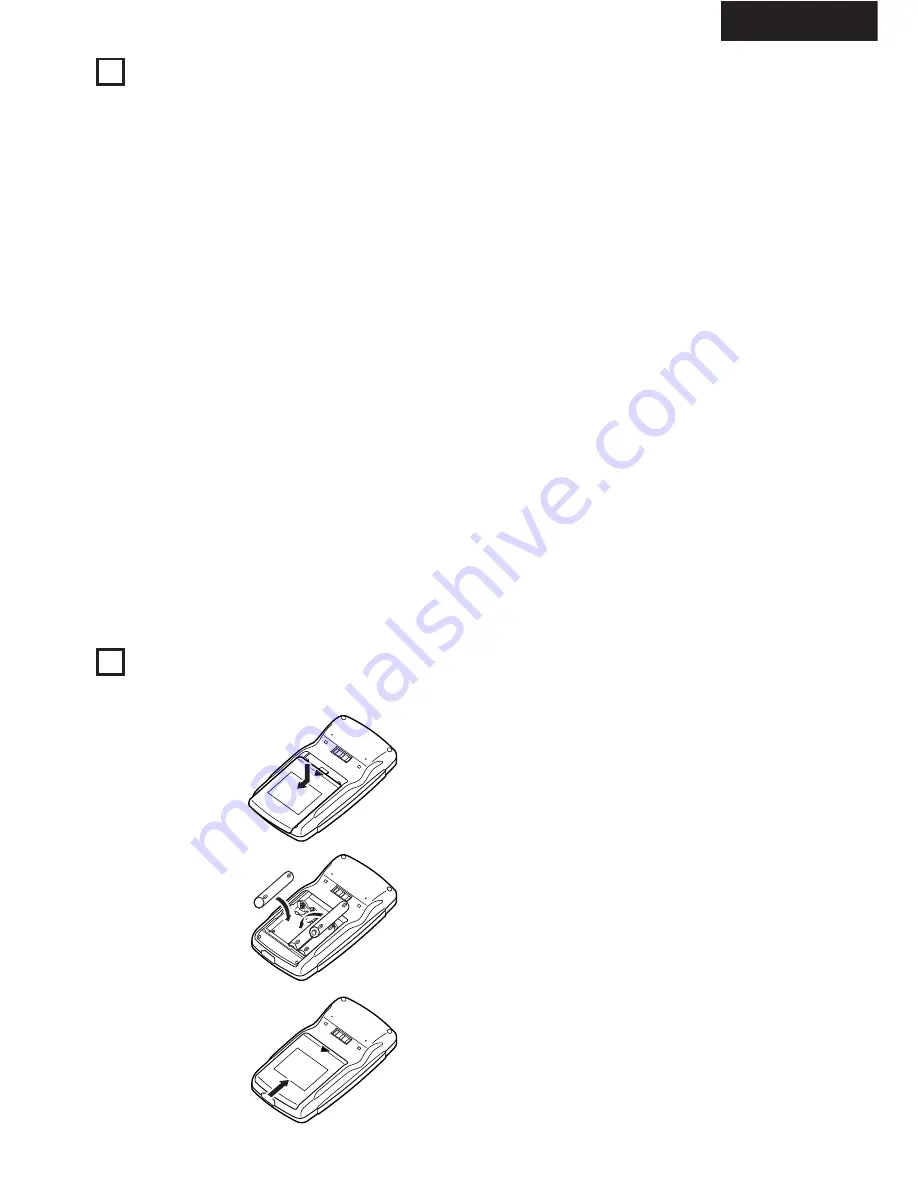
Loading the LR6 (AA size) alkaline batteries
q
Slide the battery cover on the
rear of the RC-8000 to
remove it.
w
Insert the included
alkaline batteries,
being careful to do
so in the proper
direction.
e
Close the battery cover.
Notes on Batteries
• Use LR6 (AA size) alkaline batteries in the remote control unit.
• The batteries should be replaced with new ones approximately
once a year, though this depends on the frequency of usage.
• Even if less than a year has passed, replace the batteries with
new ones if the set does not operate even when the remote
control unit is operated nearby the set. (The included battery is
only for verifying operation. Replace it with a new battery as
soon as possible.)
• When inserting the batteries, be sure to do so in the proper
direction, following the “
<
” and “
>
” marks in the battery
compartment.
• To prevent damage or leakage of battery fluid:
• Do not use a new battery together with an old one.
• Do not use two different types of batteries.
• Do not short-circuit, disassemble, heat or dispose of batteries
in flames.
• Remove the batteries from the remote control unit when you do
not plan to use it for an extended period of time.
• If the battery fluid should leak, carefully wipe the fluid off the
inside of the battery compartment and insert new batteries.
• When replacing the batteries, have the new batteries ready and
insert them as quickly as possible.
• The learned remote control signals may be cleared if no batteries
are in the remote control unit for about 5 seconds.
The factory-installed codes are in permanent memory, however.
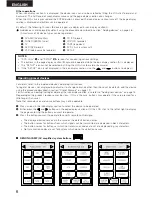
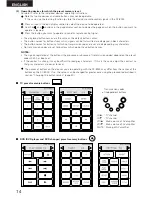
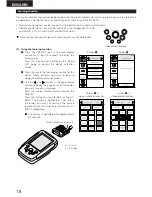
The RC-8000 can be used for integrated control of remote controllable devices connected to an AV amplifier (for
example TV sets and DVD players) as well as remote control compatible peripheral devices (for example lighting
equipment and power screens).
Icons are registered for 20 types of devices, and presettings are available for 14 of these device types. (Of the device
types for which presettings are registered, six are for Denon products only).
Devices for which no presettings are registered can be operated using the learning function.
In addition, system call settings can be made to operate multiple devices at once in a “macro” sequence.


