10
F
D
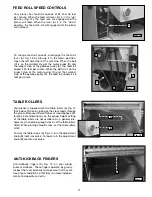
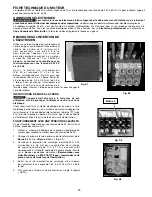
Fig. 10
g
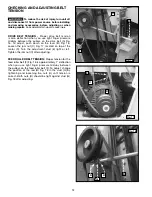
Fig. 11
TABLE ADJUSTINg CONTROLS
To reduce the risk of injury, turn unit off
and disconnect it from power source before installing
and removing accessories, before adjusting or when
making repairs.
An accidental start-up can cause injury.
Thickness settings to accomodate thick or thin
workpieces can be fast and easy. Turn the machine
"ON"
and engage the feed rolls, then raise or lower
the table by pulling up or pushing down on the table-
adjusting control lever (C) Fig. 10.
You can fine adjust the table height by loosening the
lock knob (D) Fig. 10 and turning the table-adjusting
handwheel (E). Tighten the lock knob (D) after adjusting.
NOTE:
The English/Metric Scale (F) indicates table
height setting.
Use the English/Metric scale and shelf (G) Fig. 11,
located on the front of the table, to determine the
thickness of stock, before or after planing, by placing
the stock on the shelf as shown in Fig. 11. This enables
you to quickly position the table for the next cut.
NOTE:
Raise the table to its final position rather than
lowering it to ensure a stable, accurate setting.
C
E
OPERATION
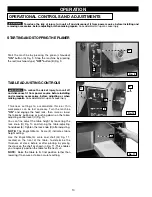
OPERATIONAL CONTROLS AND ADJUSTMENTS
Start the machine by pressing the green (shrouded)
"ON"
button (A) Fig. 9. Stop the machine by pressing
the red (mushroom type)
"OFF"
button (B) Fig. 9.
B
A
Fig. 9
STARTINg AND STOPPINg THE PLANER
To reduce the risk of injury, turn unit off and disconnect it from power source before installing and
removing accessories, before adjusting or when making repairs.
An accidental start-up can cause injury.
Summary of Contents for 22-610
Page 63: ...63 NOTES NOTAS ...


