Removing and Installing Parts
125
3
Grasping the lever on the sliding plate, pull the sliding plate downward
and hold in place.
NOTE:
The sliding plate secures and releases the drive panel and helps to secure
the drives. Push from the inside and pivot the drive panel to the left to release the
panel from its side hinges.
4
The drive panel clicks open, gently ease it out and set it aside in a secure
location.
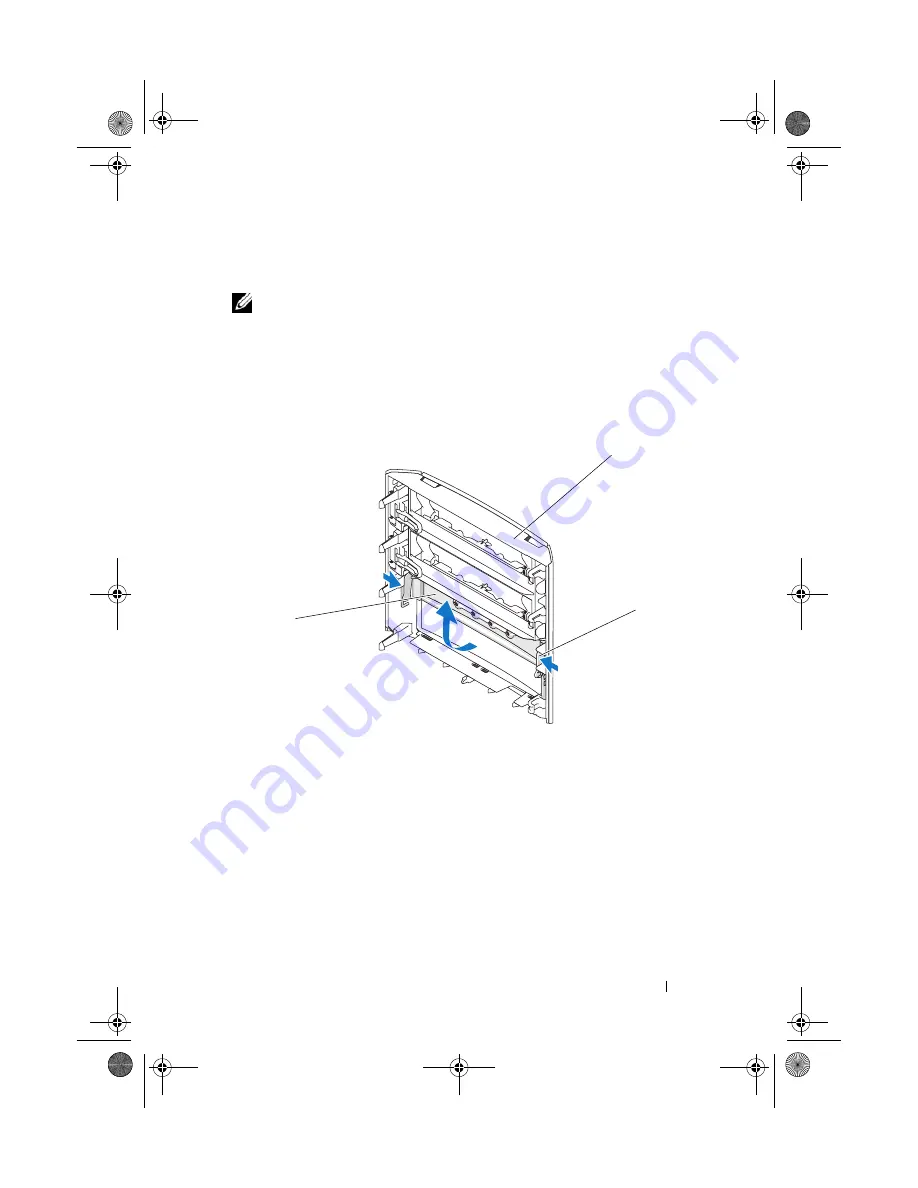
Removing the Drive-Panel Insert
1
Remove the drive panel, see "Removing the Drive Panel" on page 124.
2
Turn the drive panel around to find and hold both outer edges of the drive
panel insert tab, pull inwards to ease it out of the latches that hold it in
place.
3
Set the drive-panel insert aside in a secure location.
1
drive panel
2
drive-panel insert tab
3
drive-panel insert
1
3
2
book.book Page 125 Tuesday, November 27, 2007 10:29 AM
Summary of Contents for XPS 420
Page 58: ...58 Setting Up and Using Your Computer book book Page 58 Tuesday November 27 2007 10 29 AM ...
Page 60: ...60 Optimizing for Greater Performance book book Page 60 Tuesday November 27 2007 10 29 AM ...
Page 218: ...218 Glossary book book Page 218 Tuesday November 27 2007 10 29 AM ...
Page 226: ...226 Index book book Page 226 Tuesday November 27 2007 10 29 AM ...


