


46
Troubleshooting
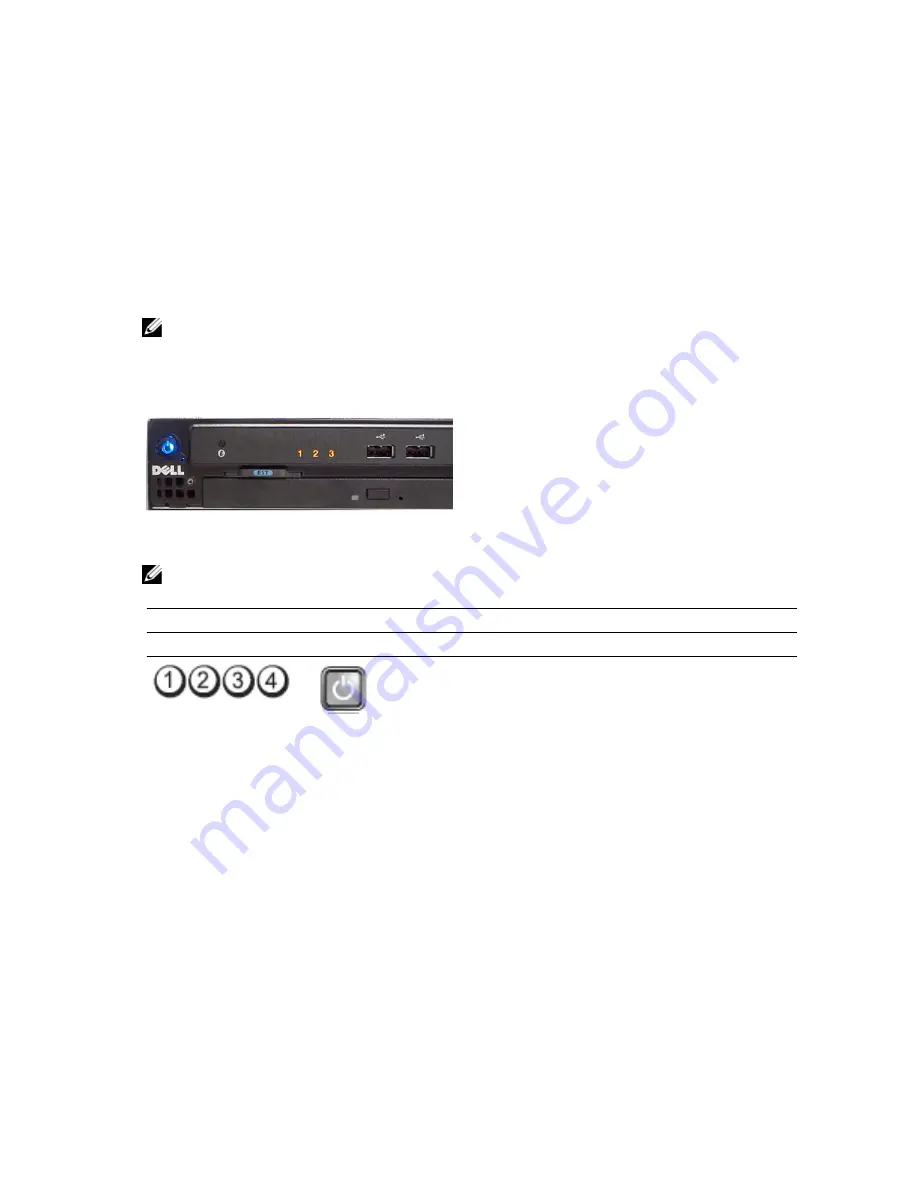
Diagnostic LEDs
NOTE: The diagnostic LEDs only serve as an indicator of the progress through the POST process. These LEDs do
not indicate the problem that caused the POST routine to stop.
The diagnostic LEDs are located on the front of the chassis next to the power button. These diagnostic LEDs are only
active and visible during the POST process. Once the operating system starts to load, they turn off and are no longer
visible.
The system now includes pre-POST and POST LEDs in an attempt to help pinpointing a possible problem with the system
easier and more accurate.
NOTE: The diagnostic lights will blink when the power button is amber or off, and will not blink when it is blue. This
has no other significance.
Light Pattern
Problem Description
Troubleshooting Steps
Diagnostic LEDs
Power Button LED
The computer is either
turned off or is not receiving
power.
•
Re-seat the power
cable in the power
connector at the
back of the
computer and the
electrical outlet.
•
Bypass power
strips, power
extension cables,
and other power
protection devices
to verify that the
computer turns on
properly.
•
Ensure that any
power strips being
used are plugged
into an electrical
outlet and are
turned on.
•
Ensure that the
electrical outlet is
working by testing it
with another
101
Summary of Contents for Precision R7610
Page 1: ...Dell Precision Workstation R7610 Owner s Manual Regulatory Model E15S Regulatory Type E15S002 ...
Page 6: ...6 ...
Page 10: ...10 ...
Page 12: ...12 ...
Page 14: ...14 ...
Page 16: ...16 ...
Page 18: ...18 ...
Page 20: ...20 ...
Page 22: ...22 ...
Page 24: ...24 ...
Page 26: ...26 ...
Page 28: ...28 ...
Page 30: ...30 ...
Page 32: ...32 ...
Page 34: ...34 ...
Page 36: ...36 ...
Page 38: ...38 ...
Page 40: ...40 ...
Page 42: ...42 ...
Page 44: ...44 ...
Page 46: ...46 ...
Page 48: ...48 ...
Page 50: ...50 ...
Page 52: ...52 ...
Page 54: ...54 ...
Page 56: ...56 ...
Page 58: ...58 ...
Page 60: ...60 ...
Page 62: ...62 ...
Page 64: ...64 ...
Page 66: ...66 ...
Page 68: ...68 ...
Page 70: ...70 ...
Page 72: ...72 ...
Page 76: ...76 ...
Page 79: ...7 Lift the center expansion card upwards and move it away from the computer 79 ...
Page 80: ...80 ...
Page 82: ...82 ...
Page 86: ...86 ...
Page 88: ...88 ...
Page 90: ...90 ...
Page 92: ...92 ...
Page 94: ...94 ...
Page 96: ...96 ...
Page 98: ...98 ...
Page 100: ...100 ...
Page 122: ...122 ...


