


Installing System Components
87
b
Insert the hard-drive carrier into the drive bay until the carrier
contacts the backplane.
c
Close the handle to lock the drive in place.
With the lever on the
hard drive carrier open, slide the hard drive into the drive bay until the
carrier contacts the backplane (see Figure 3-5).
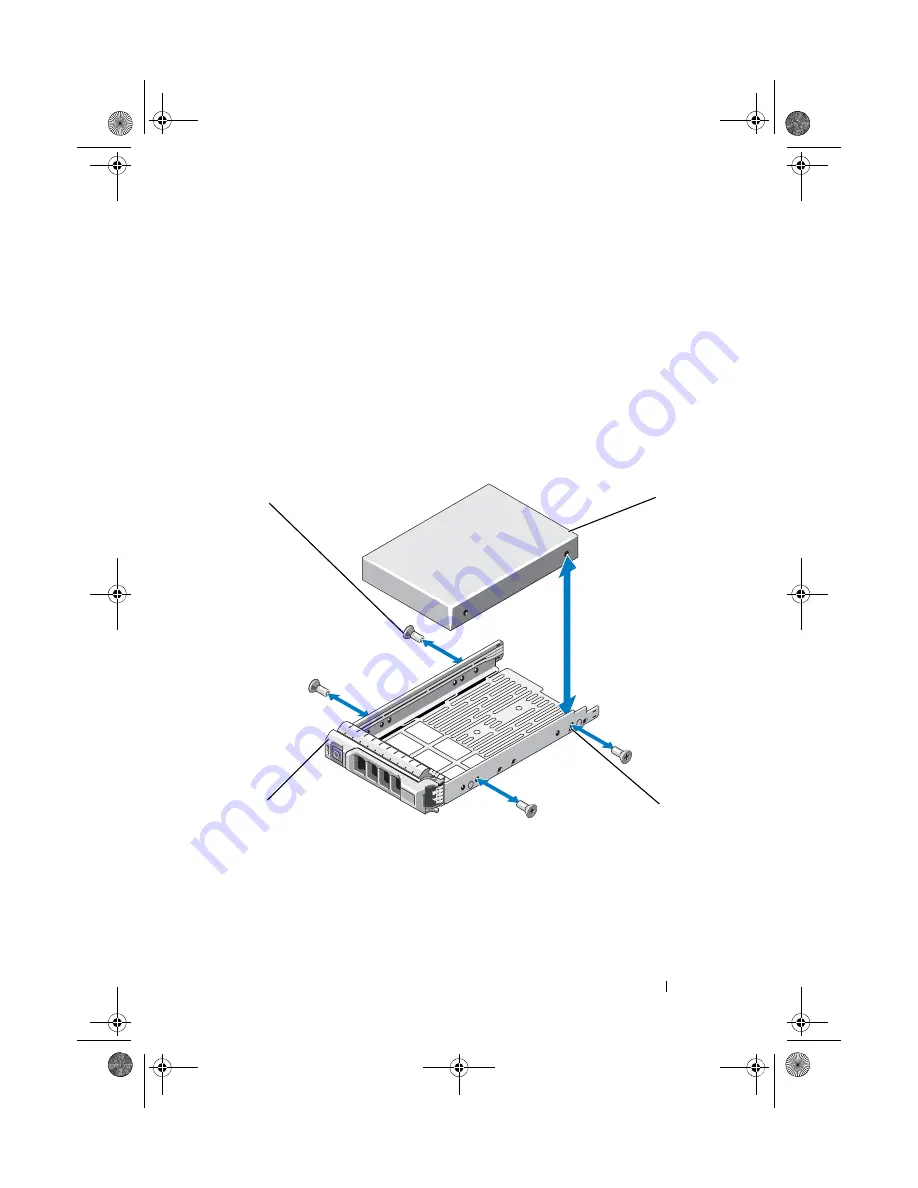
Removing a Hard Drive From a Hard-Drive Carrier
Remove the screws from the slide rails on the hard-drive carrier and separate
the hard drive from the carrier. See Figure 3-6.
Figure 3-6.
Installing a Hard Drive Into a Drive Carrier
*Screws are supplied along with the hard drives ordered from Dell.
1
drive carrier
2
screws (4)*
3
hard drive
4
SAS/SATA screw hole
4
3
1
2
book.book Page 87 Thursday, August 13, 2009 7:27 AM
Summary of Contents for PowerVault NX300
Page 8: ...8 Contents book book Page 8 Thursday August 13 2009 7 27 AM ...
Page 56: ...56 About Your System book book Page 56 Thursday August 13 2009 7 27 AM ...
Page 145: ...Installing System Components 145 book book Page 145 Thursday August 13 2009 7 27 AM ...
Page 146: ...146 Installing System Components book book Page 146 Thursday August 13 2009 7 27 AM ...
Page 164: ...164 Troubleshooting Your System book book Page 164 Thursday August 13 2009 7 27 AM ...
Page 174: ...176 Jumpers and Connectors book book Page 176 Thursday August 13 2009 7 27 AM ...
Page 176: ...178 Getting Help book book Page 178 Thursday August 13 2009 7 27 AM ...
Page 186: ...188 Glossary book book Page 188 Thursday August 13 2009 7 27 AM ...