CAUTION:
Many repairs may only be done by a certified service technician. You should only perform troubleshooting and simple
repairs as authorized in your product documentation, or as directed by the online or telephone service and support team. Damage
due to servicing that is not authorized by Dell is not covered by your warranty. Read and follow the safety instructions that are
shipped with your product.
1
Follow the safety guidelines listed in the Safety instructions section.
2
Follow the procedure listed in the Before working inside your system section.
3
Remove the cooling shroud.
4
If installed, remove the expansion card riser.
Steps
1
Locate the battery socket. For more information, see the Jumpers and connectors section.
CAUTION:
To avoid damage to the battery connector, you must firmly support the connector while installing or
removing a battery.
2
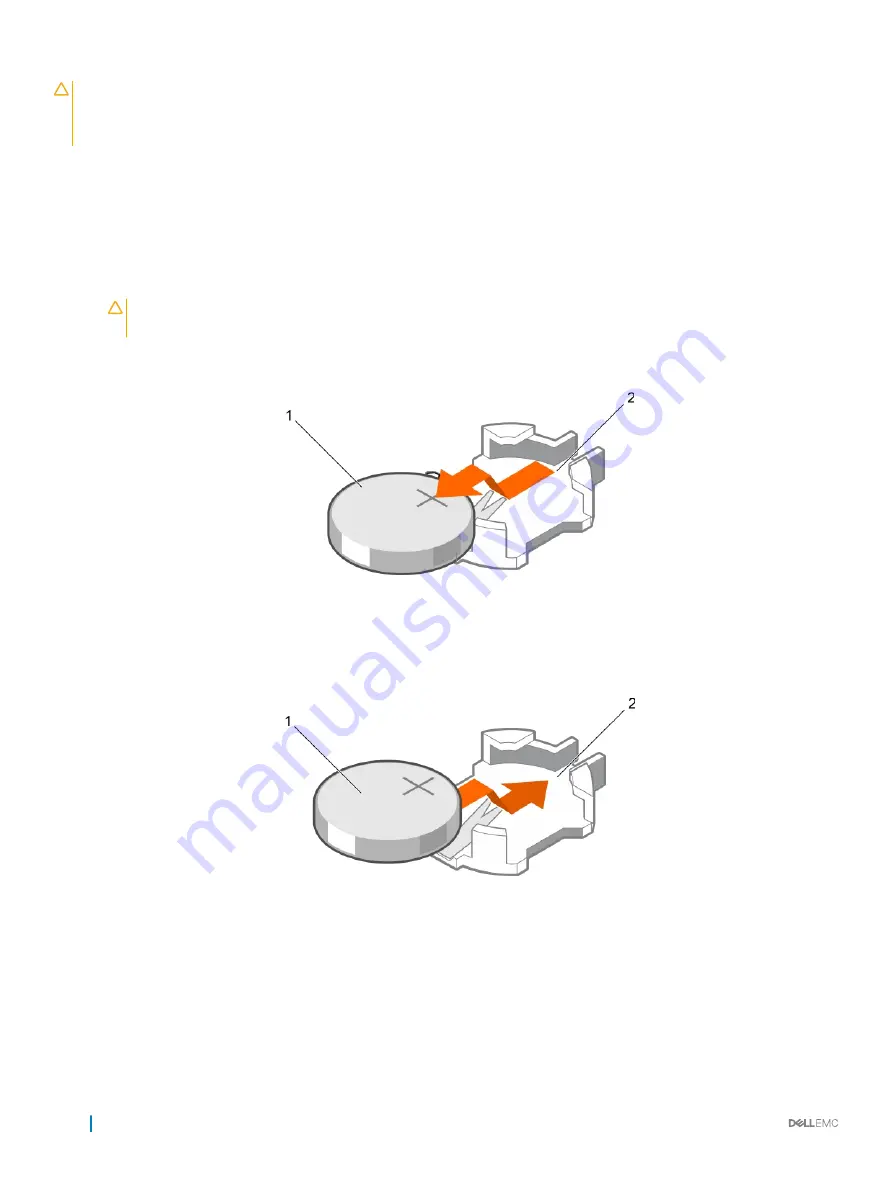
Place your finger between the securing tabs at the negative side of the battery connector and lift the battery out of the socket.
Figure 75. Removing the system battery
1
system battery
2
system battery slot
3
To install a new system battery, hold the battery with the "+" facing up and slide it under the securing tabs.
4
Press the battery into the connector until it snaps into place.
Figure 76. Installing the system battery
1
system battery
2
system battery slot
Next steps
1
Install the cooling shroud.
2
If removed, install the expansion card riser.
3
Follow the procedure listed in the After working inside your system section.
4
While booting, press F2 to enter System Setup and ensure the battery is operating properly.
144
Installing and removing system components


