Steps
1. Place the LCD panel by less than 90° and use a plastic scribe to connect the eDP cable to the connector on the system board.
2. Connect the function key cable to the connector on the system board.
3. Connect the touch cable to the connector on the system board.
4. Align the LCD panel on the chassis.
5. Press the edges of the display assembly to secure it to the chassis.
6. Flip the tablet.
NOTE:
Ensure to place the tablet on a flat surface.
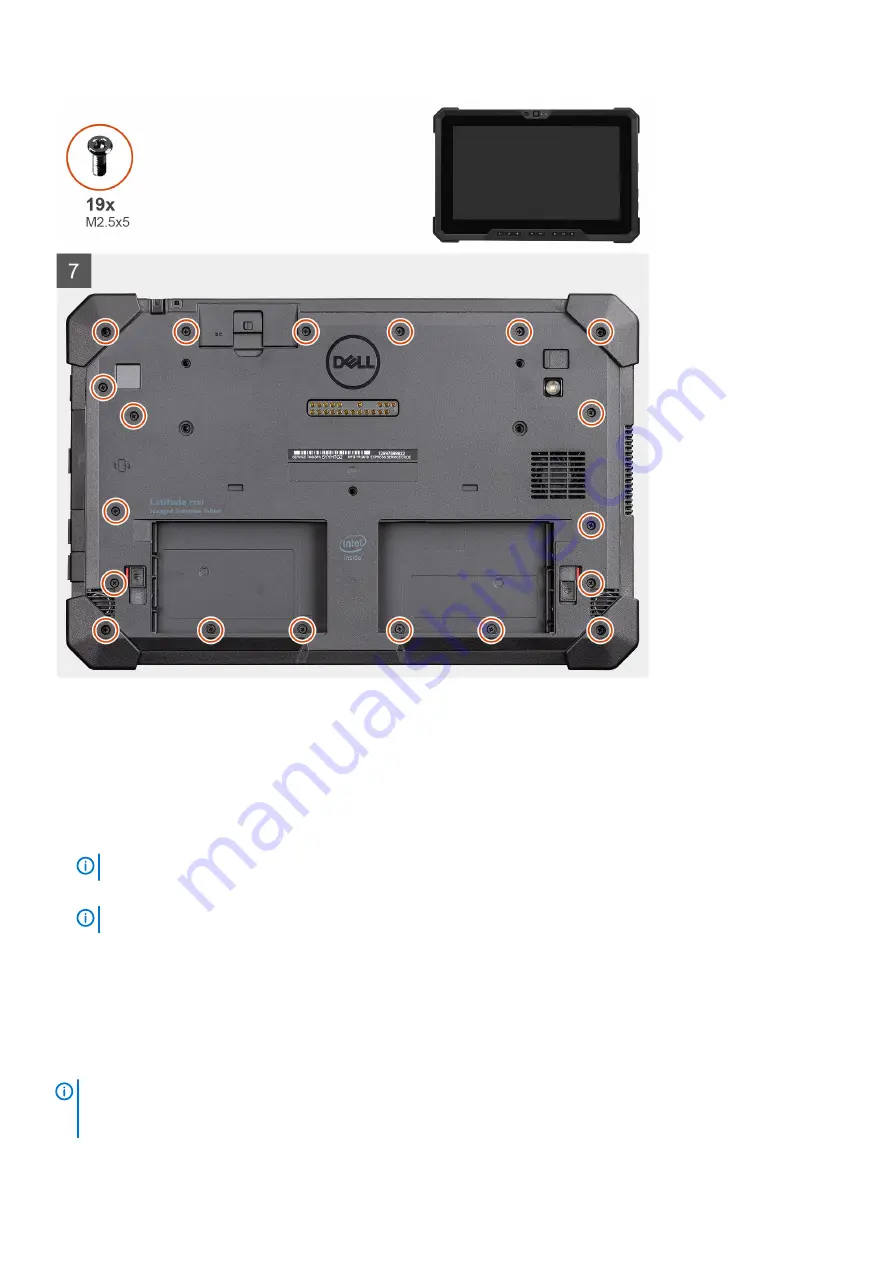
7. Replace the 19 (M2.5x5) screws that secure the display assembly to the chassis.
NOTE:
DO NOT force tighten the screws, to avoid damage to the screws thread.
Next steps
1. Install the
.
2. Follow the procedure in
after working inside your computer
.
Function keys
NOTE:
The function key buttons are NOT keyed for correct installation. These keys can be installed with several
incorrect combinations which leads to RDs. During a service incident, technicians must note the function keys button
layout to ensure that the function keys are installed at their correct location.
Removing and installing components
23
Summary of Contents for Latitude 7220
Page 18: ...18 Removing and installing components ...
Page 19: ...Removing and installing components 19 ...
Page 22: ...22 Removing and installing components ...
Page 39: ...Removing and installing components 39 ...
Page 41: ...Removing and installing components 41 ...
Page 46: ...46 Removing and installing components ...
Page 47: ...Removing and installing components 47 ...
Page 50: ...50 Removing and installing components ...
Page 51: ...Steps 1 Place the system board on the tablet chassis Removing and installing components 51 ...
Page 60: ...60 Removing and installing components ...


