background image

Steps

NOTE:

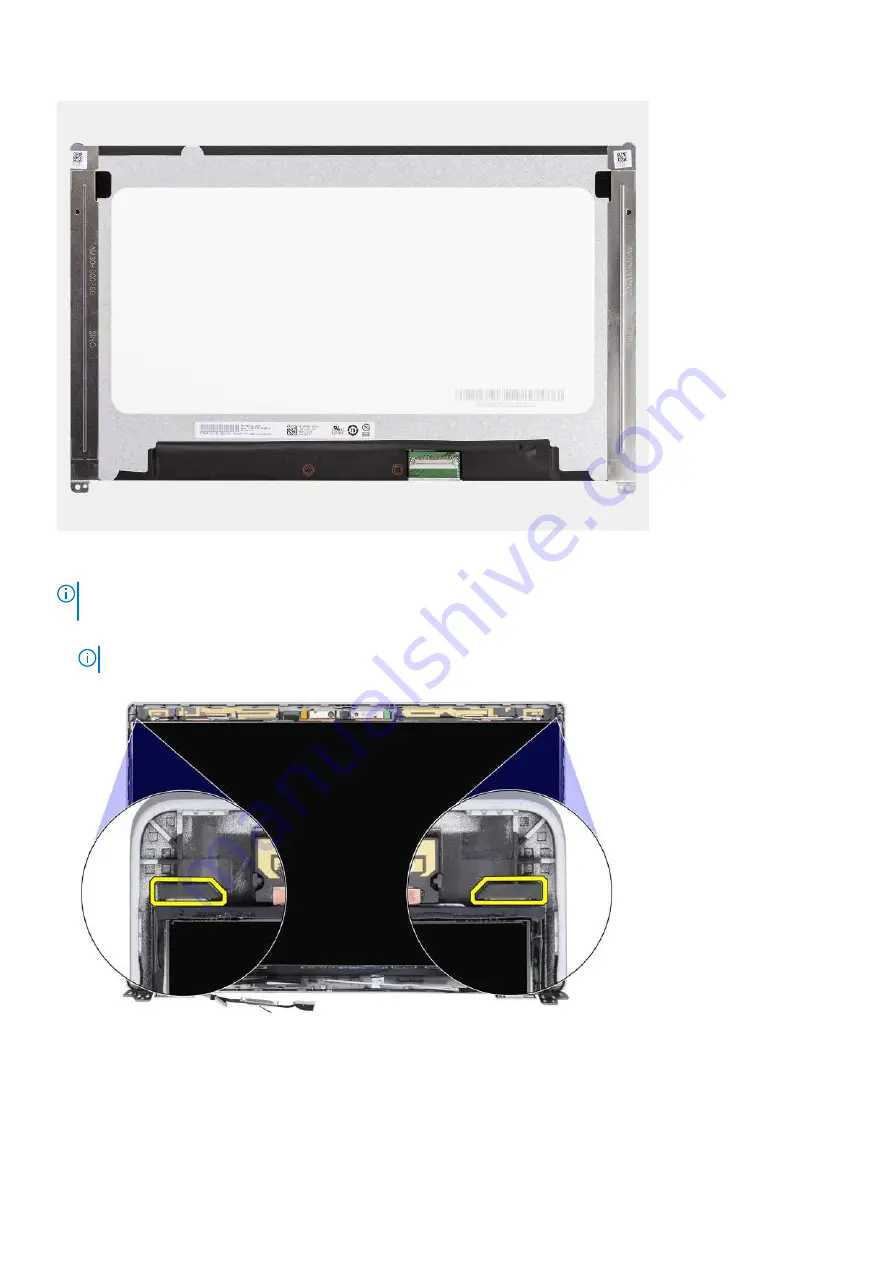
 The display panel is preassembled with the display brackets as a single service part. Do not pull the Stretch Release

(SR) tapes and separate the brackets from the display panel.

1. Remove the two (M2.5x3) screws that secure the display panel to the display back cover.

NOTE:

 While removing the display panel, disengage the display panel tabs from the display cover before flipping it over.

2. Lift and open the display panel to access the display cable.
3. Peel the conductive tape on the display cable connector.
4. Open the latch and disconnect the cable from the connector on the display panel.
5. Lift the display panel away from the display back cover.

Ta bort och installera komponenter

67

Summary of Contents for Latitude 5430

Page 1: ...Latitude 5430 Servicehandbok Regulatory Model P137G Regulatory Type P137G005 P137G006 March 2022 Rev A00 ...

Page 2: ... skada på maskinvara eller förlust av data och förklarar hur du kan undvika problemet VARNING En VARNING visar på en potentiell risk för egendoms personskador eller dödsfall 2022 Dell Inc eller dess dotterbolag Med ensamrätt Dell EMC och andra varumärken är varumärken som tillhör Dell Inc eller dess dotterbolag Andra varumärken kan vara varumärken som tillhör respektive ägare ...

Page 3: ...the micro SD card 15 Baskåpa 16 Removing the base cover 16 Installing the base cover 18 WLAN kort 19 Removing the WLAN card 19 Installing the WLAN card 20 WWAN kort 22 Removing the WWAN card 22 Installing the WWAN card 23 Halvledarenhet 24 Removing the M 2 2280 solid state drive 24 Installing the M 2 2280 solid state drive 25 Removing the M 2 2230 solid state drive 25 Installing the M 2 2230 solid...

Page 4: ...ing the smart card reader 52 Tangentbordsenhet 54 Removing the keyboard assembly 54 Installing the keyboard assembly 56 Bildskärmsenhet 58 Removing the display assembly 58 Installing the display assembly 60 Bildskärmsram 63 Removing the display bezel 63 Installing the display bezel 64 Bildskärmspanelen 65 Removing the display panel 65 Installing the display panel 68 Kamera mikrofonmodulen 71 Remov...

Page 5: ...ationslösenord 100 Tilldela ett systeminstallationslösenord 101 Radera eller ändra ett befintligt systeminstallationslösenord 101 Rensa BIOS systeminställningar och systemlösenord 102 Chapter 5 Felsökning 103 Hantera svullna litiumjonbatterier 103 Dell SupportAssist diagnostik för kontroll av systemprestanda före start 103 Köra systemprestandakontroll för SupportAssist före start 104 Inbyggt själv...

Page 6: ...uti datorn Medan du arbetar bör du med jämna mellanrum röra vid en olackerad metallyta för att avleda statisk elektricitet som kan skada de inbyggda komponenterna CAUTION När du kopplar bort en kabel ska du alltid dra i dess kontakt eller dragflik inte i själva kabeln Vissa kablar har kontakter med låsflikar eller vingskruvar som måste lossas innan kabeln kan kopplas från När du kopplar från kabla...

Page 7: ...ning från växelströmmen Koppla bort alla nätverkskablar telefon och telekommunikationsledningar från systemet Använd ett ESD fältservicekit när du arbetar inom någon surfplattabärbar dator för att undvika skador på elektrostatisk urladdning ESD När du har tagit bort någon systemkomponent placera försiktigt den borttagna komponenten på en antistatisk matta Använda skor med icke ledande gummisulor f...

Page 8: ... Den antistatiska mattan är dissipativ och delar kan placeras på den under serviceförfaranden När du använder en antistatisk matta din handledsrem ska sitta åt och jordningstråden ska kopplas till mattan och till någon omålad metall på systemet som du arbetar på När den har anslutits ordentligt kan reservdelar tas ut från ESD påsen och placeras direkt på mattan ESD känsliga artiklar är säkra i din...

Page 9: ...t de använder antistatiska påsar för transport av känsliga komponenter Transport av känsliga komponenter Vid transport av ESD känsliga komponenter såsom reservdelar eller delar som ska returneras till Dell är det viktigt att placera dessa delar i antistatiska påsar för säker transport När du har arbetat inuti datorn Om denna uppgift CAUTION Kvarglömda och lösa skruvar inuti datorn kan allvarligt s...

Page 10: ... är för att säkerställa att rätt antal skruvar och korrekt skruvtyp används när komponenten sätts tillbaka OBS Vissa datorer har magnetiska ytor Kontrollera att skruvarna inte blir kvar på sådana ytor när du sätter tillbaka en komponent OBS Skruvfärgen kan variera med den konfiguration som beställts Tabell 1 Skruvlista Komponent Skruvtyp Kvantitet Skruvbild Kåpa Fästskruv 8 e t WLAN M2x2 5 1 WWAN ...

Page 11: ...5 3 LED kort M2x3 1 Tangentbordsenhet M2x2 17 Tangentbordsfäste M2x2 6 Bildskärmsenhet M2 5x5 bildskärmsgångjärn till handledsstödsenheten 4 Bildskärmsgångjärn M2 5x3 bildskärmsgångjärn till bildskärmens baksida 4 Bildskärm M2 5x3 2 Huvudkomponenter för Latitude 5430 Följande bild visar huvudkomponenterna för Latitude 5430 Ta bort och installera komponenter 11 ...

Page 12: ...1 Kåpa 2 Batteri 3 Högtalare 4 Minnesmoduler 5 Innerramens enhet 6 Moderkort 7 Tangentbordsenhet 8 Smartkortläsare 12 Ta bort och installera komponenter ...

Page 13: ... artikelnummer för den ursprungliga systemkonfigurationen som köpts Dessa delar är tillgängliga enligt garantitäckningar som kunden har köpt Kontakta din Dell säljare för köpalternativ SIM korthållare Removing the SIM card tray Prerequisites Follow the procedure in before working inside your computer About this task The following image provides a visual representation of the SIM card tray removal ...

Page 14: ...SIM card tray Prerequisites If you are replacing a component remove the necessary component before the installation procedure About this task The following image provides a visual representation of the SIM card tray installation procedure Steps 1 Align and place the SIM card in the dedicated slot on the SIM card tray 2 Slide the SIM card tray into the slot in the system and push it to lock in plac...

Page 15: ...val procedure Steps 1 Push the micro SD card to eject it from the slot 2 Remove the micro SD card from the system Installing the micro SD card Prerequisites Om du byter ut en komponent ta bort den befintliga komponenten innan du utför installationsproceduren About this task The following image provides a visual representation of the micro SD card installation procedure Ta bort och installera kompo...

Page 16: ...uter Baskåpa Removing the base cover Prerequisites 1 Follow the procedure in before working inside your computer 2 Remove the microSD card 3 Remove the microSIM card About this task The following images indicate the location of the base cover and provide a visual representation of the removal procedure 16 Ta bort och installera komponenter ...

Page 17: ...Ta bort och installera komponenter 17 ...

Page 18: ... keyboard assembly 3 Grasp the left side and the right side of the base cover and remove the base cover from the palm rest assembly Installing the base cover Prerequisites Om du byter ut en komponent ta bort den befintliga komponenten innan du utför installationsproceduren About this task The following images indicate the location of the base cover and provide a visual representation of the instal...

Page 19: ...M card 2 Install the microSD card 3 Follow the procedure in after working inside your computer WLAN kort Removing the WLAN card Prerequisites 1 Follow the procedure in before working inside your computer 2 Remove the microSD card 3 Remove the microSIM card 4 Remove the base cover About this task The following images indicate the location of the WLAN card and provide a visual representation of the ...

Page 20: ...ve the WLAN card bracket off the WLAN card 3 Disconnect the antenna cables from the WLAN card 4 Slide at an angle and remove the WLAN card from the WLAN card slot Installing the WLAN card Prerequisites Om du byter ut en komponent ta bort den befintliga komponenten innan du utför installationsproceduren About this task The following image indicates the location of the WLAN card and provides a visua...

Page 21: ... WLAN card from the computer if the adhesive pad which helps secure the WLAN card in place is removed from the computer along with the WLAN card adhere it back to the computer 3 Slide the WLAN card at an angle into the WLAN card slot 4 Place the WLAN card bracket on the WLAN card 5 Replace the M2x2 5 screw to secure the WLAN card bracket to the WLAN card Next steps 1 Install the base cover 2 Insta...

Page 22: ...k The following image indicates the location of the WWAN card and provides a visual representation of the removal procedure Steps 1 Remove the M2x2 5 screw that secures the WWAN card bracket to the WWAN card 2 Remove the WWAN card bracket off the WWAN card 3 Disconnect the antenna cables from the WWAN card 4 Slide and remove the WWAN card from the WWAN card slot 22 Ta bort och installera komponent...

Page 23: ... antenna cables to the WWAN card The following table provides the antenna cable color scheme Table 3 Antenna cable color scheme Connectors on the WWAN card Antenna cable color Main white triangle White Auxiliary black triangle Black 2 Align the notch on the WWAN card with the tab on the WWAN slot 3 Slide the WWAN card at an angle into the WWAN slot 4 Place the WWAN card bracket on the WWAN card 5 ...

Page 24: ... the procedure in before working inside your computer 2 Remove the microSD card 3 Remove the microSIM card 4 Remove the base cover About this task The following images indicate the location of the M 2 2280 solid state drive and provide a visual representation of the removal procedure Steps 1 Remove the two M2x3 screws that secure the M 2 2280 solid state drive thermal plate to the system board 2 L...

Page 25: ... drive into the solid state drive slot on the system board 3 Align the screw holes on the M 2 2280 solid state drive thermal plate with the screw holes on the system board 4 Replace the two M2x3 screws to secure the M 2 2280 solid state drive thermal plate to the system board Next steps 1 Install the base cover 2 Install the microSIM card 3 Install the microSD card 4 Follow the procedure in after ...

Page 26: ...f the system board 4 Flip the M 2 2230 solid state drive holder and remove the M2x3 screw that secures the M 2 2230 solid state drive to the M 2 2230 solid state drive holder 5 Slide and remove the M 2 2230 solid state drive from the M 2 2230 solid state drive holder Installing the M 2 2230 solid state drive Prerequisites If you are replacing a component remove the existing component before perfor...

Page 27: ...te the M 2 2230 solid state drive 4 Replace the M2x3 screw to secure the M 2 2230 solid state drive holder to the system board 5 Align the screw holes on the M 2 2230 solid state drive thermal pad with the screw holes on the M 2 2230 solid state drive holder 6 Replace the two M2x2 5 screws to secure the M 2 2230 solid state drive thermal pad to the M 2 2230 solid state drive holder Next steps 1 In...

Page 28: ...ps spread apart the securing clips on the memory module slot until the memory module pops up 2 Slide and remove the memory module from the memory module slot on the system board NOTE Repeat step 1 and 2 if there are two memory modules Installing the memory modules Prerequisites Om du byter ut en komponent ta bort den befintliga komponenten innan du utför installationsproceduren About this task The...

Page 29: ...itiumjonbatterier Lossa batteriet helt innan det tas bort Koppla bort nätaggregatet från systemet och driv datorn enbart på batteriström batteriet är helt urladdat när datorn inte längre slås på när strömbrytaren trycks in Undvik att krossa tappa skada eller tränga in i batteriet med främmande föremål Utsätt inte batteriet för höga temperaturer eller montera isär batteripaketen och cellerna Tryck ...

Page 30: ... working inside your computer 2 Remove the microSD card 3 Remove the microSIM card 4 Remove the base cover NOTE If battery is disconnected from system board for service then there is a delay during system boot up as the system undergoes RTC battery reset About this task The following images indicate the location of the 3 cell battery and provide a visual representation of the removal procedure Ste...

Page 31: ...connector on the system board Next steps 1 Install the base cover 2 Install the microSIM card 3 Install the microSD card 4 Follow the procedure in after working inside your computer Removing the 4 cell battery Prerequisites 1 Follow the procedure in before working inside your computer 2 Remove the microSD card 3 Remove the microSIM card 4 Remove the base cover NOTE If battery is disconnected from ...

Page 32: ...rerequisites If you are replacing a component remove the existing component before performing the installation procedure About this task The following image indicates the location of the 4 cell battery and provides a visual representation of the installation procedure NOTE If battery is disconnected from system board for service then there is a delay during system boot up as the system undergoes R...

Page 33: ...ikabel Removing the battery cable Prerequisites 1 Follow the procedure in before working inside your computer 2 Remove the microSD card 3 Remove the microSIM card 4 Remove the base cover 5 Remove the 3 cell battery or 4 cell battery NOTE If battery is disconnected from system board for service then there is a delay during system boot up as the system undergoes RTC battery reset About this task The...

Page 34: ...battery cable away from the battery Installing the battery cable Prerequisites If you are replacing a component remove the existing component before performing the installation procedure About this task The following image indicates the location of the battery cable and provides a visual representation of the installation procedure 34 Ta bort och installera komponenter ...

Page 35: ...e your computer Innerramens enhet Removing the assembly inner frame Prerequisites 1 Follow the procedure in before working inside your computer 2 Remove the microSD card 3 Remove the microSIM card 4 Remove the base cover 5 Remove the 3 cell battery or 4 cell battery 6 Remove the M 2 2280 solid state drive or M 2 2230 solid state drive 7 Remove the WLAN card 8 Remove the WWAN card About this task T...

Page 36: ...nector on the system board and unroute the cable from the routing guides on the assembly inner frame 3 Remove the ten M2x3 screws that secure the assembly inner frame to the system board and the palm rest assembly 4 Lift the assembly inner frame off the system board and the palm rest assembly 36 Ta bort och installera komponenter ...

Page 37: ...ponent ta bort den befintliga komponenten innan du utför installationsproceduren About this task The following image indicates the location of the assembly inner frame and provides a visual representation of the installation procedure Ta bort och installera komponenter 37 ...

Page 38: ... routing guides on the assembly inner frame Next steps 1 Install the WLAN card 2 Install the WWAN card 3 Install the M 2 2280 solid state drive or M 2 2230 solid state drive 4 Install the 3 cell battery or 4 cell battery 5 Install the base cover 6 Install the microSIM card 7 Install the microSD card 8 Follow the procedure in after working inside your computer LED kort Removing the LED board Prereq...

Page 39: ... board and cable away from the palm rest assembly Installing the LED board Prerequisites Om du byter ut en komponent ta bort den befintliga komponenten innan du utför installationsproceduren About this task The following image indicates the location of the LED board and provides a visual representation of the installation procedure Ta bort och installera komponenter 39 ...

Page 40: ...he procedure in after working inside your computer Kylfläns Removing the heat sink assembly Prerequisites 1 Follow the procedure in before working inside your computer CAUTION The heat sink may become hot during normal operation Allow sufficient time for the heat sink to cool before you touch it 2 Remove the microSD card 3 Remove the microSIM card 4 Remove the base cover 5 Remove the 3 cell batter...

Page 41: ...heat sink assembly to the system board 4 Lift the heat sink assembly off the system board Installing the heat sink assembly Prerequisites Om du byter ut en komponent ta bort den befintliga komponenten innan du utför installationsproceduren About this task The following image indicates the location of the heat sink assembly and provides a visual representation of the installation procedure Ta bort ...

Page 42: ...3 cell battery or 4 cell battery 2 Install the base cover 3 Install the microSIM card 4 Install the microSD card 5 Follow the procedure in after working inside your computer Högtalare Removing the speaker Prerequisites 1 Follow the procedure in before working inside your computer 2 Remove the microSD card 3 Remove the microSIM card 4 Remove the base cover 5 Remove the 3 cell battery or 4 cell batt...

Page 43: ...Lift the speakers along with the cable off the palm rest assembly Installing the speaker Prerequisites Om du byter ut en komponent ta bort den befintliga komponenten innan du utför installationsproceduren About this task The following image indicates the location of the speaker and provides a visual representation of the installation procedure Ta bort och installera komponenter 43 ...

Page 44: ...working inside your computer Moderkort Removing the system board Prerequisites 1 Follow the procedure in before working inside your computer 2 Remove the microSD card 3 Remove the microSIM card 4 Remove the base cover 5 Remove the 3 cell battery or 4 cell battery 6 Remove the M 2 2280 solid state drive or M 2 2230 solid state drive 7 Remove the WLAN card 8 Remove the WWAN card 9 Remove the memory ...

Page 45: ...tor 4 Touch and sensor cable connector 5 System fan connector 6 Battery cable connector 7 Memory modules 8 Touchpad cable connector 9 USH board connector 10 Coin cell battery cable connector 11 Speaker cable connector 12 LED board connector Ta bort och installera komponenter 45 ...

Page 46: ...play cable from the connector on the system board 5 Peel the coin cell battery from the palm rest assembly 6 Open the latch and disconnect the USH board cable from the connector on the system board 7 Open the latch and disconnect the touchpad cable from the connector on the system board 8 Remove the three M2x5 screws that secure the USB Type C bracket to the system board 9 Lift the USB Type C brac...

Page 47: ...tor 4 Touch and sensor cable connector 5 System fan connector 6 Battery cable connector 7 Memory modules 8 Touchpad cable connector 9 USH board connector 10 Coin cell battery cable connector 11 Speaker cable connector 12 LED board connector Ta bort och installera komponenter 47 ...

Page 48: ...48 Ta bort och installera komponenter ...

Page 49: ...ble through the routing guide on the system board 9 Connect the eDP cable to the connector on the system board 10 Connect the display cable to the connector on the system board 11 Adhere the tape that secures the display cable to the system board 12 Align the screw holes on the eDP cable bracket with the screw holes on the system board 13 Replace the two M2x3 screws to secure the eDP cable bracket...

Page 50: ...he two M2x2 5 screws that secure the power button board to the palm rest assembly 2 Lift the power button board off the palm rest assembly Installing the power button board About this task NOTE The system board can be installed with the heat sink attached in order to simplify the procedure and preserve the thermal bond between the system board and heat sink The following images indicate the locati...

Page 51: ...30 solid state drive 7 Install the 3 cell battery or 4 cell battery 8 Install the base cover 9 Install the microSIM card 10 Install the microSD card 11 Follow the procedure in after working inside your computer Smartkortläsare Removing the smart card reader Prerequisites 1 Follow the procedure in before working inside your computer 2 Remove the microSD card 3 Remove the microSIM card 4 Remove the ...

Page 52: ...and disconnect the smart card reader cable from the connector on the USH board 2 Peel the smart card reader cable 3 Remove the three M2x2 5 screws that secure the smart card reader to the palm rest assembly 4 Lift the smart card reader off the palm rest assembly Installing the smart card reader Prerequisites Om du byter ut en komponent ta bort den befintliga komponenten innan du utför installation...

Page 53: ...assembly 3 Adhere the smart card reader cable 4 Connect the smart card reader cable to the connector on the USH board Next steps 1 Install the assembly inner frame 2 Install the WLAN card 3 Install the WWAN card 4 Install the M 2 2280 solid state drive or M 2 2230 solid state drive 5 Install the 3 cell battery or 4 cell battery 6 Install the base cover 7 Install the microSIM card 8 Install the mic...

Page 54: ...olid state drive 7 Remove the WLAN card 8 Remove the WWAN card 9 Remove the memory module 10 Remove the assembly inner frame 11 Remove the system board About this task NOTE The system board can be removed with the heat sink attached in order to simplify the procedure and preserve the thermal bond between the system board and heat sink The following images indicate the location of the keyboard asse...

Page 55: ...the touchpad 2 Disconnect the keyboard backlight cable from the connector on the touchpad 3 Remove the seventeen M2x2 screws that secure the keyboard assembly to the palm rest assembly 4 Remove the keyboard assembly off the palm rest assembly Ta bort och installera komponenter 55 ...

Page 56: ...a bort den befintliga komponenten innan du utför installationsproceduren About this task NOTE The system board can be installed with the heat sink attached in order to simplify the procedure and preserve the thermal bond between the system board and heat sink The following image indicates the location of the keyboard assembly and provides a visual representation of the installation procedure 56 Ta...

Page 57: ...nect the keyboard cable and keyboard backlight cable to the connector on the touchpad Next steps 1 Install the system board 2 Install the assembly inner frame 3 Install the memory module 4 Install the WLAN card 5 Install the WWAN card 6 Install the M 2 2280 solid state drive or M 2 2230 solid state drive 7 Install the 3 cell battery or 4 cell battery 8 Install the base cover 9 Install the microSIM...

Page 58: ... computer 2 Remove the microSD card 3 Remove the microSIM card 4 Remove the base cover 5 Remove the WLAN card 6 Remove the WWAN card About this task The following images indicate the location of the display assembly and provide a visual representation of the removal procedure 58 Ta bort och installera komponenter ...

Page 59: ...Ta bort och installera komponenter 59 ...

Page 60: ...e the antenna cables from the routing guides on the system board 7 Open the display assembly to a 180 degree and flip over the computer and then place the computer on a flat surface 8 Remove the four M2 5x5 screws that secure the display hinges to the system board 9 Remove the display assembly off the computer Installing the display assembly Prerequisites Om du byter ut en komponent ta bort den be...

Page 61: ...Ta bort och installera komponenter 61 ...

Page 62: ...ecure the cables to the system board 5 Route the display and eDP cable through the routing guide on the system board 6 Connect the eDP cable to the connector on the system board 7 Connect the display cable to the connector on the system board 8 Adhere the tape that secures the display cable to the system board 9 Align the screw holes on the eDP cable bracket with the screw holes on the system boar...

Page 63: ...ve the WLAN card 6 Remove the WWAN card 7 Remove the display assembly About this task The following images indicate the location of the display bezel and provide a visual representation of the removal procedure Steps NOTE The display bezel is adhered to the display panel with adhesive Insert a plastic scribe into the recesses near both hinge caps to start the prying process to release the display ...

Page 64: ...lay bezel Prerequisites Om du byter ut en komponent ta bort den befintliga komponenten innan du utför installationsproceduren About this task The following image indicates the location of the display bezel and provides a visual representation of the installation procedure Steps 1 Align and place the display bezel on the display assembly 2 Gently snap the display bezel into place Next steps 1 Insta...

Page 65: ...SD card 3 Remove the microSIM card 4 Remove the base cover 5 Remove the WLAN card 6 Remove the WWAN card 7 Remove the display assembly 8 Remove the display bezel About this task The following images indicate the location of the display panel and provide a visual representation of the removal procedure Ta bort och installera komponenter 65 ...

Page 66: ...66 Ta bort och installera komponenter ...

Page 67: ...nel to the display back cover NOTE While removing the display panel disengage the display panel tabs from the display cover before flipping it over 2 Lift and open the display panel to access the display cable 3 Peel the conductive tape on the display cable connector 4 Open the latch and disconnect the cable from the connector on the display panel 5 Lift the display panel away from the display bac...

Page 68: ...ponent ta bort den befintliga komponenten innan du utför installationsproceduren About this task The following images indicate the location of the display panel and provides a visual representation of the installation procedure 68 Ta bort och installera komponenter ...

Page 69: ...Ta bort och installera komponenter 69 ...

Page 70: ...the display panel tabs are inserted into the slots on the display cover 4 Replace the two M2 5x3 screws to secure the display panel to the display back cover Next steps 1 Install the display bezel 2 Install the display assembly 3 Install the WLAN card 4 Install the WWAN card 5 Install the base cover 6 Install the microSIM card 7 Install the microSD card 8 Follow the procedure in after working insi...

Page 71: ...IM card 4 Remove the base cover 5 Remove the WLAN card 6 Remove the WWAN card 7 Remove the display assembly 8 Remove the display bezel 9 Remove the display panel About this task The following images indicate the location of the camera module and provide a visual representation of the removal procedure Figure 1 Removing camera module Ta bort och installera komponenter 71 ...

Page 72: ...ra microphone module in place is not damaged throughout the prying process 1 Peel the two conductive tapes that secure the camera module in place 2 Disconnect the camera module cable from the connector on the camera module 3 Carefully lift the camera module from the display back cover Installing the camera module Prerequisites Om du byter ut en komponent ta bort den befintliga komponenten innan du...

Page 73: ...y back cover 2 Connect the camera module cable to the connector on the camera module Next steps 1 Install the display panel 2 Install the display bezel 3 Install the display assembly 4 Install the WLAN card 5 Install the WWAN card 6 Install the base cover 7 Install the microSIM card 8 Install the microSD card Ta bort och installera komponenter 73 ...

Page 74: ...roSIM card 4 Remove the base cover 5 Remove the WLAN card 6 Remove the WWAN card 7 Remove the display assembly 8 Remove the display bezel 9 Remove the display panel About this task The following images indicate the location of the eDP cable and provide a visual representation of the removal procedure Steps 1 Disconnect the eDP cable from the connector on the camera microphone module 74 Ta bort och...

Page 75: ...following image indicates the location of the eDP cable and provides a visual representation of the installation procedure Steps 1 Connect the eDP cable to the connector on the camera 2 Adhere the eDP cable to the display back cover 3 Adhere the conductive tape and route the eDP cable to the display back cover Next steps 1 Install the display panel 2 Install the display bezel 3 Install the display...

Page 76: ... WWAN card 7 Remove the display assembly 8 Remove the display bezel About this task The following images indicate the location of the sensor board and provide a visual representation of the removal procedure Steps 1 Open the latch and disconnect the display cable from connector on the sensor board 2 Gently lift the sensor board away from the display back cover Installing the sensor board About thi...

Page 77: ...the procedure in after working inside your computer Bildskärmsgångjärn Removing the display hinges Prerequisites 1 Follow the procedure in before working inside your computer 2 Remove the microSD card 3 Remove the microSIM card 4 Remove the base cover 5 Remove the WLAN card 6 Remove the WWAN card 7 Remove the display assembly 8 Remove the display bezel 9 Remove the display panel About this task Th...

Page 78: ...the display back cover 4 Lift and remove the left hinge from the display back cover Installing the display hinges Prerequisites Om du byter ut en komponent ta bort den befintliga komponenten innan du utför installationsproceduren About this task The following images indicate the location of the display hinges and provides a visual representation of the installation procedure 78 Ta bort och install...

Page 79: ...le on the display back cover 4 Replace the two screws M2 5x3 to secure the right hinge to the display back cover Next steps 1 Install the display panel 2 Install the display bezel 3 Install the display assembly 4 Install the WLAN card 5 Install the WWAN card 6 Install the base cover 7 Install the microSIM card 8 Install the microSD card 9 Follow the procedure in after working inside your computer ...

Page 80: ...move the camera microphone module 11 Remove the eDP cable 12 Remove the sensor board 13 Remove the display hinges About this task The following images indicate the location of the display back cover and provide a visual representation of the removal procedure Steps After performing the steps in the pre requisites we are left with the display back cover Installing the display back cover Prerequisit...

Page 81: ... module 5 Install the display panel 6 Install the display bezel 7 Install the display assembly 8 Install the WLAN card 9 Install the WWAN card 10 Install the base cover 11 Install the microSIM card 12 Install the microSD card 13 Follow the procedure in after working inside your computer Handledsstödsenhet Removing the palm rest assembly Prerequisites 1 Follow the procedure in before working inside...

Page 82: ...e the LED board 14 Remove the power button board 15 Remove the keyboard assembly 16 Remove the display assembly About this task The following image indicates the palm rest assembly and provides a visual representation of the removal procedure Steps After performing the steps in the pre requisites we are left with the palm rest assembly Installing the palm rest assembly Prerequisites Om du byter ut...

Page 83: ...rd 6 Install the system board NOTE The system board can be installed with the heat sink attached in order to simplify the procedure and preserve the thermal bond between the system board and heat sink 7 Install the assembly inner frame 8 Install the memory module 9 Install the WLAN card 10 Install the WWAN card 11 Install the M 2 2280 solid state drive or M 2 2230 solid state drive 12 Install the ...

Page 84: ...e thermal bond between the system board and heat sink 11 Remove the assembly inner frame 12 Remove the smart card reader 13 Remove the LED board 14 Remove the power button board 15 Remove the keyboard assembly 16 Remove the display assembly 17 Remove the palm rest assembly About this task NOTE For models shipped with WLAN antennas only the dummy SIM card slot filler is a separate service part and ...

Page 85: ... into its compartment on the palm rest NOTE Ensure that the dummy SIM card slot filler is aligned with the ribs on the palm rest assembly 2 Press the dummy SIM card slot filler until it clicks into place and ensure it fits securely into the SIM card slot Next steps 1 Install the palm rest assembly 2 Install the display assembly 3 Install the keyboard assembly 4 Install the power button board 5 Ins...

Page 86: ...olid state drive or M 2 2230 solid state drive 13 Install the 3 cell battery or 4 cell battery 14 Install the base cover 15 Install the microSIM card 16 Install the microSD card 17 Follow the procedure in after working inside your computer 86 Ta bort och installera komponenter ...

Page 87: ...gsbara filer Vid felsökning hämtning eller installation av drivrutiner rekommenderas läsning av Dells kunskapsbasartikel Vanliga frågor om drivrutiner och hämtningsbara filer 000123347 3 Drivrutiner och hämtningsbara filer 87 ...

Page 88: ...erad och aktivering eller inaktivering av grundenheter Översikt av BIOS BIOS hanterar dataflödet mellan datorns operativsystem och anslutna enheter såsom hårddisk grafikkort tangentbord mus och skrivare Öppna BIOS inställningsprogrammet Om denna uppgift Starta eller starta om datorn och tryck omedelbart på F2 Navigeringstangenter OBS För de flesta alternativ i systeminstallationsprogrammet gäller ...

Page 89: ...t Tag of the computer Manufacture Date Displays the manufacture date of the computer Ownership Date Displays the ownership date of the computer Express Service Code Displays the express service code of the computer Ownership Tag Displays the Ownership Tag of the computer Signed Firmware Update Displays whether the Signed Firmware Update is enabled on your computer Battery Information Primary Displ...

Page 90: ...ess device information of the computer Native Resolution Displays the native resolution of the computer Video BIOS Version Displays the video BIOS version of the computer Audio Controller Displays the audio controller information of the computer Bluetooth Device Displays the Bluetooth device information of the computer LOM MAC Address Displays the LAN On Motherboard LOM MAC address of the computer...

Page 91: ...sable the Thunderbolt adapter peripheral device and USB devices connected to the Thunderbolt adapter to be used during BIOS Pre boot By default the Enable Thunderbolt Boot Support option is disabled Enable Thunderbolt and PCIe behind TBT pre boot modules Enable or disable the PCIe devices that are connected through a Thunderbolt adapter to execute the PCIe devices UEFI Option ROM if present during...

Page 92: ...information of the computer Device Displays the SATA 1 device information of the computer M 2 PCIe SSD 1 Type Displays the M 2 PCIe SSD 1 type information of the computer Device Displays the M 2 PCIe SSD 1 device information of the computer M 2 PCIe SSD 2 Type Displays the M 2 PCIe SSD 2 type information of the computer Device Displays the M 2 PCIe SSD 2 device information of the computer Enable M...

Page 93: ... controls the on board LAN Controller By default the Enable UEFI Network Stack option are enabled Wireless Radio Control Control WLAN radio Sense the connection of the computer to a wired network and subsequently disable the selected wireless radios WLAN By default the option is disabled Control WWAN radio Sense the connection of the computer to a wired network and subsequently disable the selecte...

Page 94: ...ed Lid Switch Enable or disable the lid switch By default the Lid Switch option is enabled Intel Speed Shift Technology Enable or disable the Intel speed shift technology support By default the Intel Speed Shift Technology option is enabled Long Life Cycle Primary Battery By default the Normal Battery option is enabled Tabell 12 System setup options Security menu Security TPM 2 0 Security TPM 2 0 ...

Page 95: ... Controls whether or not the computer will prompt the user to enter the admin password if set when booting to a UEFI boot device from the F12 boot menu By default the Always Except Internal HDD option is enabled Tabell 13 System setup options Passwords menu Passwords Admin Password Set change or delete the administrator password System Password Set change or delete the computer password NVMe SSD0 ...

Page 96: ...ve Enables the user to recover from certain corrupted BIOS conditions from a recovery file on the user primary hard drive or an external USB key By default the option is enabled BIOS Downgrade Allow BIOS Downgrade Enable or disable the flashing of the computer firmware to previous revision is blocked By default the option is enabled SupportAssist OS Recovery Enable or disable the boot flow for Sup...

Page 97: ...or the keyboard backlight when an AC adapter is connected to the computer By default the 10 seconds option is enabled Keyboard Backlight Timeout on Battery Set the timeout value for the keyboard backlight when the is running only on battery power By default the 10 seconds option is enabled Device Configuration Hotkey Access Manages whether you can access device configuration screens through hotkey...

Page 98: ...Intel Turbo Boost Technology Enable or disable Intel TurboBoost mode of the processor By default the option is enabled Intel Hyper Threading Technology Enable Intel Hyper Threading Technology Enable or disable Hyper Threading in the processor By default the option is enabled Dynamic Tuning Machine Learning Enable Dynamic Tuning Machine Learning Enables the operating system capability to enhance dy...

Page 99: ... för BIOS uppdateringsfilen och följ anvisningarna på skärmen Om du vill ha mer information kan du söka i kunskapsbasresursen på www dell com support Uppdatera BIOS i Linux och Ubuntu Information om hur du uppdaterar system BIOS på en dator som har Linux eller Ubuntu finns i kunskapsbasartikeln 000131486 på www dell com support Uppdatera BIOS med USB enheten i Windows Om denna uppgift CAUTION Om B...

Page 100: ...pdatering OBS Endast datorer med alternativet BIOS Flash Update uppdatera BIOS i F12 menyn för engångsstart kan använda den här funktionen Uppdatera via menyn för engångsstart Om du vill uppdatera BIOS via F12 menyn för engångsstart behöver du följande USB minne som formaterats med FAT32 filsystemet enheten måste inte vara startbar En körbar BIOS uppdateringsfil som hämtats från Dells supportwebbp...

Page 101: ... Admin Password system administratörslösenord och skapa ett lösenord i fältet Enter the new password ange det nya lösenordet Använd följande rekommendationer för systemlösenordet Ett lösenord kan ha upp till 32 tecken Minst ett specialtecken _ Nummer 0 till 9 Versaler från A till Z Gemener från a till z 3 Skriv in lösenordet som du angav tidigare i fältet Bekräfta nytt lösenord och klicka på OK 4 ...

Page 102: ... det nya lösenordet igen när du uppmanas till det Om du tar bort ett system och eller installationslösenordet ska du bekräfta borttagningen när du uppmanas göra det 5 Tryck på Esc så blir du ombedd att spara ändringarna 6 Tryck på Y för att spara ändringarna och avsluta systeminstallationsprogrammet Datorn startar om Rensa BIOS systeminställningar och systemlösenord Om denna uppgift För att rensa ...

Page 103: ...n följd av svullnad försök inte att frigöra det eftersom punktering böjning eller krossning av ett batteri kan vara farligt Försök inte att sätta i ett skadat batteri eller ett batteri som svällt i en bärbar dator Svullna batterier som täcks av garantin ska returneras till Dell i en godkänd fraktbehållare som tillhandahålls av Dell detta är för att följa transportbestämmelserna Svullna batterier s...

Page 104: ...ST inbyggt självtest är moderkortets inbyggda verktyg för diagnostik med självtestning som förbättrar diagnosen hos moderkortets inbäddade styrenhetsfel OBS M BIST kan initieras manuellt före POST Power On Self Test Hur man kör M BIST OBS M BIST måste initieras på systemet från ett avstängt strömtillstånd som antingen är anslutet till nätström eller endast med batteri 1 Tryck och håll både M tange...

Page 105: ...lla eller vertikala linjer färgtoner etc är det alltid en bra metod att isolera LCD skärmen genom att köra det inbyggda självtestet BIST Hur man öppnar LCD självtest 1 Stäng av den bärbara Dell datorn 2 Koppla bort eventuell kringutrustning som är ansluten till den bärbara datorn Anslut endast nätadaptern laddaren till den bärbara datorn 3 Se till att LCD skärmen är ren inga dammpartiklar får finn...

Page 106: ...ulen 2 4 Fel på minne RAM Återställ och byt plats på minnesmodulerna Om problemet kvarstår byt ut minnesmodulen 2 5 Ogiltigt installerat minne Återställ och byt plats på minnesmodulerna Om problemet kvarstår byt ut minnesmodulen 2 6 Fel på moderkortet kretsuppsättningen Sätt tillbaka moderkortet 2 7 LCD fel SBIOS meddelande Byt ut LCD modulen 2 8 LCD fel EC detektering av strömskenefel Sätt tillba...

Page 107: ...t OS Recovery Dell SupportAssist OS Recovery är ett fristående verktyg som är förinstallerat på alla Dell datorer som är installerade med Windows operativsystem Den består av verktyg för att diagnostisera och felsöka problem som kan uppstå innan datorn startar till operativsystemet Det gör att du kan diagnostisera hårdvaruproblem reparera datorn säkerhetskopiera dina filer eller återställa datorn ...

Page 108: ...OBS Vissa Internet leverantörer tillhandahåller en modem router kombinationsenhet Steg 1 Stäng av datorn 2 Stäng av modemet 3 Stäng av den trådlösa routern 4 Vänta 30 sekunder 5 Slå på den trådlösa routern 6 Slå på modemet 7 Starta datorn Dränering av kvarvarande ström utför maskinvaruåterställning Om denna uppgift Kvarvarande ström är den återstående statiska elektriciteten som finns kvar på dato...

Page 109: ...et 7 Installera kåpan 8 Anslut nätaggregatet till datorn 9 Starta datorn OBS Om du vill ha mer information om hur du utför en maskinvaruåterställning kan du söka i kunskapsbasresursen på www dell com support Felsökning 109 ...

Page 110: ... service tag eller expresstjänstkoden på www dell com support Mer information om hur du hittar service tag för din dator finns i Hitta servicetaggen på din dator Artiklarna i Dells kunskapsdatabas innehåller information om en rad olika datorproblem 1 Gå till www dell com support 2 Välj Support Kunskapsdatabas i menypanelen längst upp på sidan Support 3 I sökfältet på sidan Kunskapsdatabas skriver ...

Reviews: