


84
System Setup
Clearing CMOS Passwords
WARNING:
Before working inside your computer, read the safety information
that shipped with your computer and follow the steps in "Before You Begin" on
page 9. For additional safety best practices information, see the Regulatory
Compliance Homepage at dell.com/regulatory_compliance.
WARNING:
The computer must be disconnected from the electrical outlet to
clear the CMOS setting.
1
Follow the instructions in "Before You Begin" on page 9.
2
Remove the computer cover. See "Removing the Computer Cover" on
page 17.
3
Remove fan shroud. See "Removing the Fan Shroud" on page 19.
4
Remove the front bezel. See "Removing the Front Bezel" on page 33.
5
Remove the drive cage. See "Removing the Drive Cage" on page 37.
6
Locate the 3-pin CMOS reset jumper (CMOS1) on the system board. See
"System Board Components" on page 15.
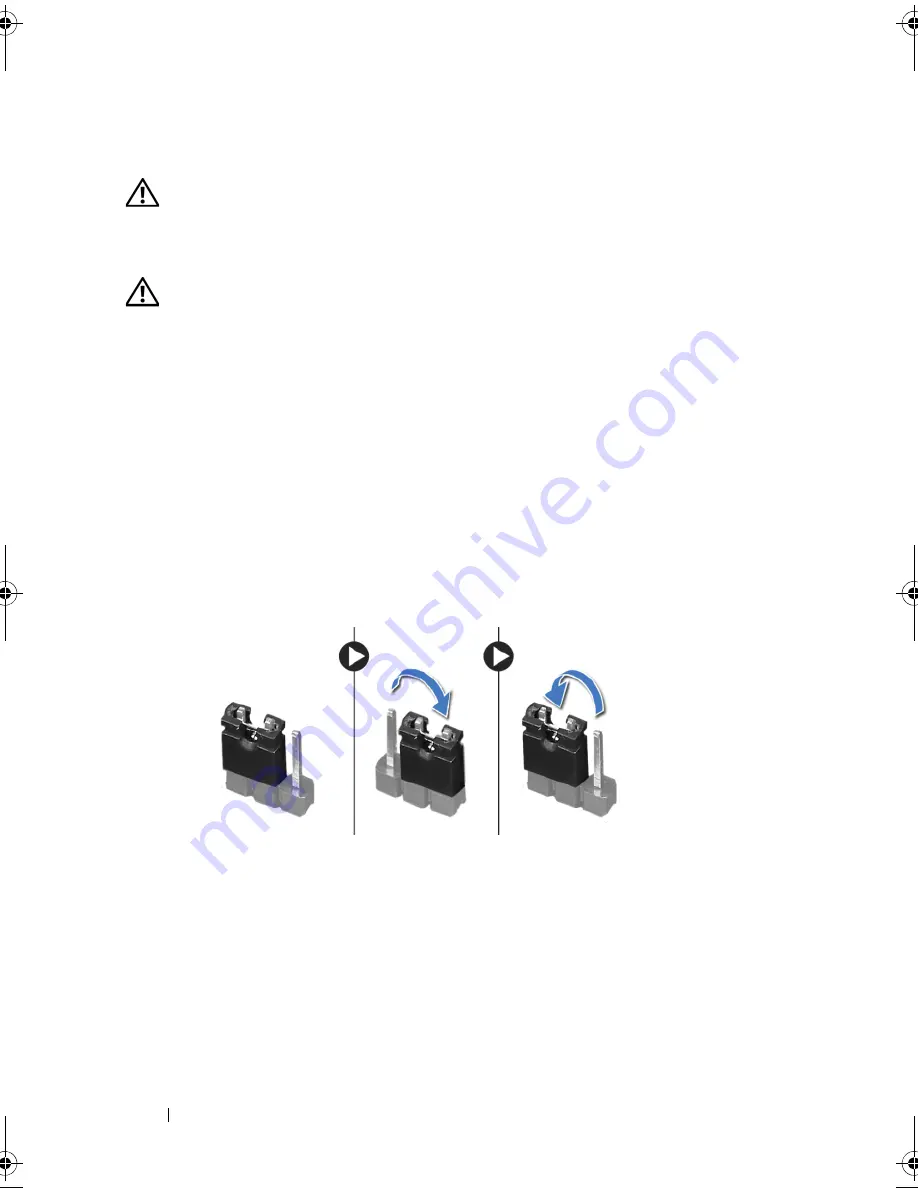
7
Remove the 2-pin jumper plug from pins 2 and 3 and fix it on pins 1 and 2.
8
Wait for approximately five seconds to clear the CMOS setting.
9
Remove the 2-pin jumper plug from pins 1 and 2 and replace it on pins 2
and 3.
10
Replace the drive cage. See "Replacing the Drive Cage" on page 39.
11
Replace the front bezel. See "Replacing the Front Bezel" on page 35.
12
Replace the fan shroud. See "Replacing the Fan Shroud" on page 20.
book.book Page 84 Thursday, April 5, 2012 5:38 PM
Summary of Contents for Inspiron 660s
Page 8: ...8 Contents ...
Page 12: ...12 After Working Inside Your Computer ...
Page 16: ...16 Technical Overview ...
Page 26: ...26 Memory Module s ...
Page 34: ...32 Mini Card ...
Page 38: ...36 Front Bezel ...
Page 42: ...40 Drive Cage ...
Page 46: ...44 Optical Drive ...
Page 50: ...46 Hard Drive ...
Page 54: ...50 Front I O Panel ...
Page 58: ...54 Power Button Module ...
Page 62: ...58 Power Supply Unit ...
Page 66: ...62 Processor Fan and Heat Sink Assembly ...
Page 70: ...66 Processor ...
Page 90: ...86 System Setup ...
Page 94: ...88 Specifications ...