Basic Troubleshooting
2-5
2. Remove the computer cover.
NOTE: For your safety and protection of the system, observe the guidelines
listed in “Precautionary Measures” in Chapter 4.
3. Verify that the single-edge contact (SEC) cartridge, SIMMs, and expan-
sion cards are fully seated in their sockets or connectors.
To reseat the SEC cartridge/heat sink assembly, remove it from its connector
and reinstall it as described in “SEC Cartridge and Heat Sink Assembly” in
Chapter 4.
To reseat a SIMM, remove it from its socket and reinstall it as described in
“SIMMs” in Chapter 4.
To reseat an expansion card, remove it from its connector and reinstall it as
described in “Expansion Cards” in Chapter 4.
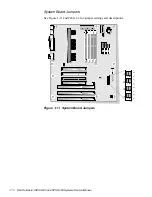
4. Verify that all configuration jumpers are set correctly.
For information about these jumpers, see “Configuration Jumpers” in Chapter 1.
5. Check all cable connectors inside the computer to verify that they are
firmly attached to their appropriate connectors.
6. Reinstall the computer cover.
7. Reconnect the computer and any attached peripherals to their power
sources, and turn them on.
Does the problem appear to be resolved?
Yes. No further steps are necessary.
No. Proceed to the next section, “Eliminating Resource Conflicts.”
E
liminating Resource Conflicts
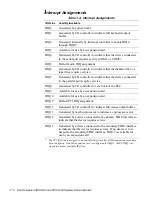
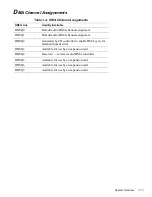
Devices within or connected to the computer may require dedicated memory
spaces, interrupt levels, or DMA channels, all of which must be allocated during
installation of the devices. Because devices may be installed at different times,
it is possible that the same resource is assigned to two or more devices.
Resource conflicts can result in disorderly or erratic system operation or failure
of the system to operate at all. If you suspect that resource conflicts might exist,
check the system using the Windows 95 Device Manager or the ISA Configura-
tion Utility (ICU), and reassign the resources as necessary. See “Advanced
WARNING: The SEC cartridge/heat sink assembly can get extremely
hot. Be sure the assembly has had sufficient time to cool before you
touch it.
WARNING: While reseating the SEC cartridge/heat sink assembly,
use a wrist grounding strap or maintain contact with a metal surface
on the chassis.
Summary of Contents for Dimension XPS H233
Page 1: ... HOO LPHQVLRQ 36 DQG 36 6 VWHPV 6 59 0 18 ...
Page 2: ......
Page 3: ... HOO LPHQVLRQ 36 DQG 36 6 VWHPV 6 59 0 18 ...
Page 84: ...A 16 Dell Dimension XPS H233 and XPS H266 Systems Service Manual ...
Page 88: ......


