Checking Inside the Computer
7-3
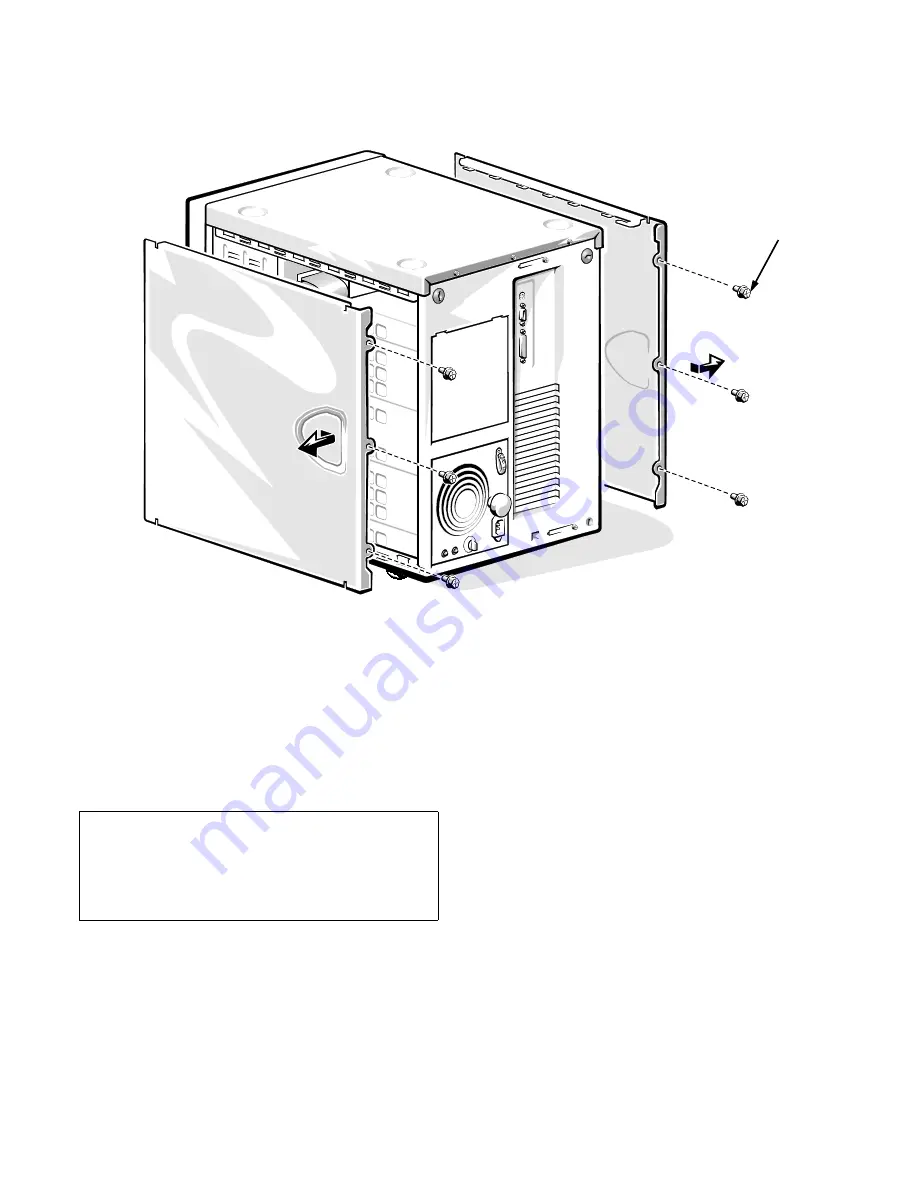
Figure 7-2. Removing the Computer Covers
Replacing the Computer Covers
Use the following procedure to replace a computer cover:
1.
Check all cable connections, especially those that
might have come loose during your work. Fold
cables out of the way so that they do not catch on
the computer cover.
2.
Check that no tools or extra parts (including
screws) are left inside the computer.
3.
Make sure the applicable keylock is in the
unlocked position.
4.
Fit the cover over the side rail at the bottom of the
chassis, and slide it closed.
5.
Secure the cover with the three screws.
6.
Set the keylock to the locked position.
screws (6)
CAUTION: Make sure that there are no cables
or cable connectors lying on the top diskette
drive in the upper drive cage. Foreign objects
on top of the drive can interfere with drive
operation and permanently damage the drive.
Summary of Contents for 6100
Page 1: ... HOO 3RZHU GJH 6 VWHP 167 7 21 1 7528 6 227 1 8 ...
Page 8: ...x ...
Page 18: ...xx ...
Page 20: ...xxiv DELL CONFIDENTIAL Preliminary 12 17 96 ...
Page 32: ...3 6 Dell PowerEdge 6100 200 System Installation and Troubleshooting Guide ...
Page 52: ...5 18 Dell PowerEdge 6100 200 System Installation and Troubleshooting Guide ...
Page 78: ...7 22 Dell PowerEdge 6100 200 System Installation and Troubleshooting Guide ...
Page 124: ...11 16 Dell PowerEdge 6100 200 System Installation and Troubleshooting Guide ...
Page 134: ...B 8 Dell PowerEdge 6100 200 System Installation and Troubleshooting Guide ...


