16
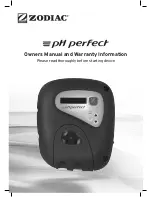
SIMPLE DESCRIPTION OF OPERATION
The pH control has been designed to provide an acid feed in proportion to the difference between the actual pH
and the pH set point. The control also operates on a cycle to allow the acid being fed to mix with the pool water.
The cycle is approximately five minutes duration. If the pH is 0.3pH or more above the set pH at the start of a
cycle the acid dosing pump will operate continuously until the pH falls below the set point plus 0.3pH. When this
happens the amount of time the pump operates each cycle will reduce as the pH gets closer to the set point. The
acid dosing pump will turn off when the set point is reached. The proportional system is designed to keep pH
relatively constant with little or no overshoot (pH falling below the set point). The Total Alkalinity (TA) plays a vital
role in the maintenance of the pH. A low TA can distort the reading the unit receives from the sensor probe, and as
a result excessive acid may be fed into the pool.
ALWAYS MAINTAIN TA ABOVE 100ppm
.
INSTALLING THE PUMP MODULE:
IMPORTANT: KEEP BARE HANDS AWAY FROM POOL ACID AND ALWAYS USE CAUTION WHEN
HANDLING POOL CHEMICALS.
1. Select a convenient position within 2 metres of the ESCpH Control Unit, and 1.5 metres above ground level.
Ensure chemical drum is placed as far away as possible from the Control Unit and Pump Module to avoid
corrosive damage. Control Unit and Pump Module must be a minimum of 1.0 metre horizontally from drum.
2. Use the same mounting procedures as for the Control Unit. (Refer page 4).
3.
Connecting Pump Module to Control Unit
.
Plug the mains lead into the GPO in the bottom right of the unit (marked ‘pH pump module only’.)
4. Remove cap from drum and clean in water.
5. Drill a 9mm hole through the centre of cap. Feed the clear tube through the cap, then the tube weight, then the
barbed fitting. Push enough tube through the cap to allow the tube weight to sit at the bottom of the drum.
6. Re - fit cap to acid drum.
7. Place chemical drum away from the Control Unit and Pump Module to avoid possible corrosive damage from
chemical vapour. Minimum distance horizontally between Pump Module and Chemical Drum is 1.0 metres.
8. Using PVC cement fit Probe/Injector Housing to suction or return line (before the cell and ensure probe is
horizontal to the ground). NOTE: if return has a high backpressure use the suction line. The Housing has
50mm standard fittings with reducers supplied for 40mm applications. Ensure Housing is fitted with arrows
pointing in the direction of water flow.
IMPORTANT: ENSURE SENSOR PROBE ALWAYS REMAINS MOIST. A NON-RETURN VALVE MAY NEED
TO BE FITTED IN POOL FILTRATION LINE TO STOP DRAINAGE IN THE PLUMBING. SENSOR PROBE
MAY BE DAMAGED BEYOND REPAIR IF LEFT TO DRY OUT. WARRANTY WILL BE VOID IF THIS TYPE
OF DAMAGE IS APPARENT.
9. Remove cap from sensor probe and discard travel solution. Remove plug from housing and carefully screw pH
Sensor into housing.
Keep cap in a safe place for future sensor removal
.
Note:
The glass sensor on the pH probe is very delicate. Take care not to break when handling.
10. Connect wire from sensor probe to the connector on the base of the control unit. Ensure water (garden
sprayers, reticulation etc) does not splash or spray onto the connector. This is likely to cause erroneous
operation and may damage the sensor probe, voiding warranty.
11. Fit Injector to Housing and connect the 6mm diameter clear tubes. Cut Clear tube can be softened in hot water
to enable easier connection. Tube may change colour and/or become opaque in use. A one way check valve
may be required if installing on a flooded suction situation.
12. Push tube onto barb connectors of dosing pump nearest arrows facing down and secure with plastic clamps
provided.
13. Connect clear tube from the chemical containers then fit tube as described previously.
14. Ensure that hydrochloric acid is diluted by 1 Part Acid to minimum of 2 Parts water, if using Sulphuric Acid it
must be no greater than 10% strength.
INITIAL SET-UP
1. After installation leave pH Control off and run pool pump for an hour. While this is being done it is a good time
to ensure that the pool balance is correct.
2. Using a pool test kit measure the pH.
3. Using the tool supplied adjust CAL until the pH display matches the test kit result. The display will alternate
between pH and the chlorine cell production so this may take a little time to get right.
Summary of Contents for ChloroMatic MC16C
Page 18: ...18 Notes Service History...
Page 19: ...19...