7
drive, or click on “browse” to locate the requested file.
6. Once the file path has been entered in the box,
click on
“Next”
to con-
tinue the installation.
7. Windows may display a message
“Building driver database”
, while
locating the file.
8. Click
on
“Next”
to install the device. Windows should display a message
indicating the installation was successful.
File Manager Information
The File Manager is used to exchange files, information between the re-
corder and PC as well as perform various editing functions.
1. Download voice data files from the recorder to PC.
2. Upload voice data files to the recorder from PC.
3. Upload date/time and settings to the recorder from PC.
4. Voice data file player allows playback of recordings using a PC.
5. Integrated recording editor with waveform display.
6. Copy recordings as well as cut and paste parts of recordings.
7. Convert voice data file format files to WAV file format.
8. Convert WAV file format files to voice data file format.
Software Installation
G
Using the Docking Station
F
Minimum Computer Hardware Requirements Minimum
Computer: IBM PC/AT compatible PC
OS: Microsoft Windows 98SE/Me/2000 Professional/
XP Professional, Home Edition
CPU: Intel Pentium 166 MHZ processor or higher
RAM: 64MB or more
Free hard disk space: 10MB or more
Drive: CD
‑
ROM drive
Sound card: Installed
Audio output: Speakers connected
Display: 1024 x 768 pixels, 256 colors or more
USB port: One free port
File Manager Installation
1. Insert File Manager CD into PC CD-ROM drive. In a few seconds, the
installation wizard will appear and guide you through the installation.
2. If the installation wizard does not start, click on the setup.exe file found
on the CD to start installing USB driver and program files.
3. A
DVTR-680 File Manager Software
directory will be created in your
Program Files
directory. All installed files are in this directory.
4. Click
on
“Finish”
to complete installation. Refer to the
“Help File”
in-
cluded on the DVTR-680 installation CD for additional information.
USB Driver Installation
1. Connect the recorder (directly or via the docking station) to an available
USB port on PC. The
“add new hardware wizard”
should start.
2. The PC should detect the recorder as a USB device when connected for
the first time.
3. If your PC has sound capability, a double beep will be heard each time
the recorder is connected or disconnected from the computer.
4. Click
“Next”
on PC screen to proceed with installation. Select
“Search
for the best driver for your device. (Recommended)”
.
5. Click
“Next”
to specify a location. Enter the drive letter of the CD ROM
3. If the file is too large to insert a recording,
LARGE FILE
will appear in
display. Large files cannot be edited in the recorder; please use the FMS
software.
4. Press
STOP
button to cancel or press
ENTER/INDEX
button to confirm.
5.
“WAIT . . .”
will appear in display while file is being moved.
Using an Earphone
For private listening, use the supplied ear bud type earphone.
IMPORTANT:
To protect your hearing, follow these guidelines when you use
earphones.
1.
Plug the ear bud into recorder
EAR
jack. The internal speaker will be
automatically muted.
2. Set
-
VOLUME
button to lowest setting before beginning to listen. Then
adjust volume to a comfortable level.
3. Do not listen at extremely high volume levels. Extended high-volume
listening can lead to permanent hearing loss.
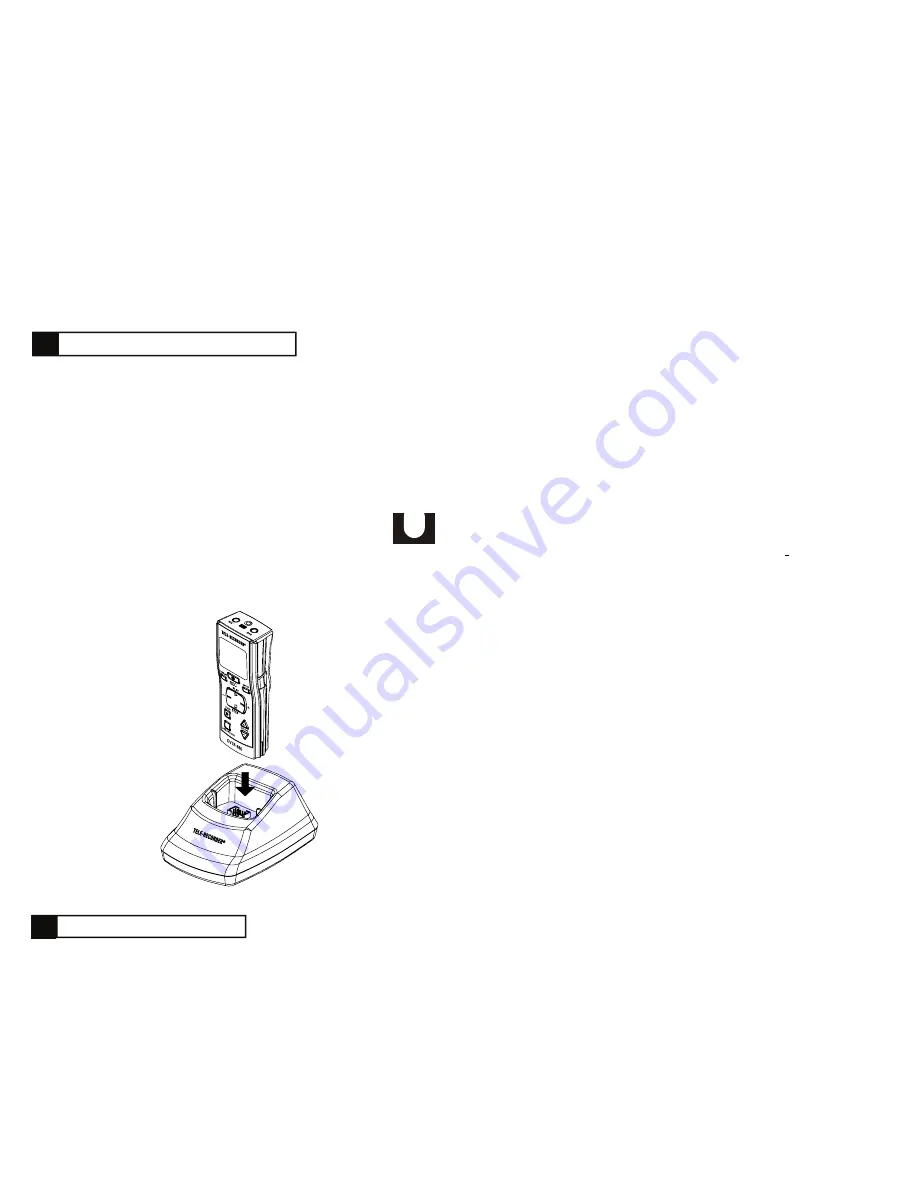
The recorder must be inserted in the docking station to record from the tele-
phone line or communicate with your PC.
1. Take care when inserting the recorder into the docking station.
2. Notice that there are guide slots in the docking station. The guides mate
with groves on both sides of the recorder.
3. Align the recorder grooves with the docking station slots to provide the
correct starting angle when inserting the recorder.
4. Do not try to force the recorder into docking station. Improper insertion
can cause damage to the connector pins located in the docking station.
5. When the recorder is properly inserted, the docking icon
will appear in the display during idle mode.


