


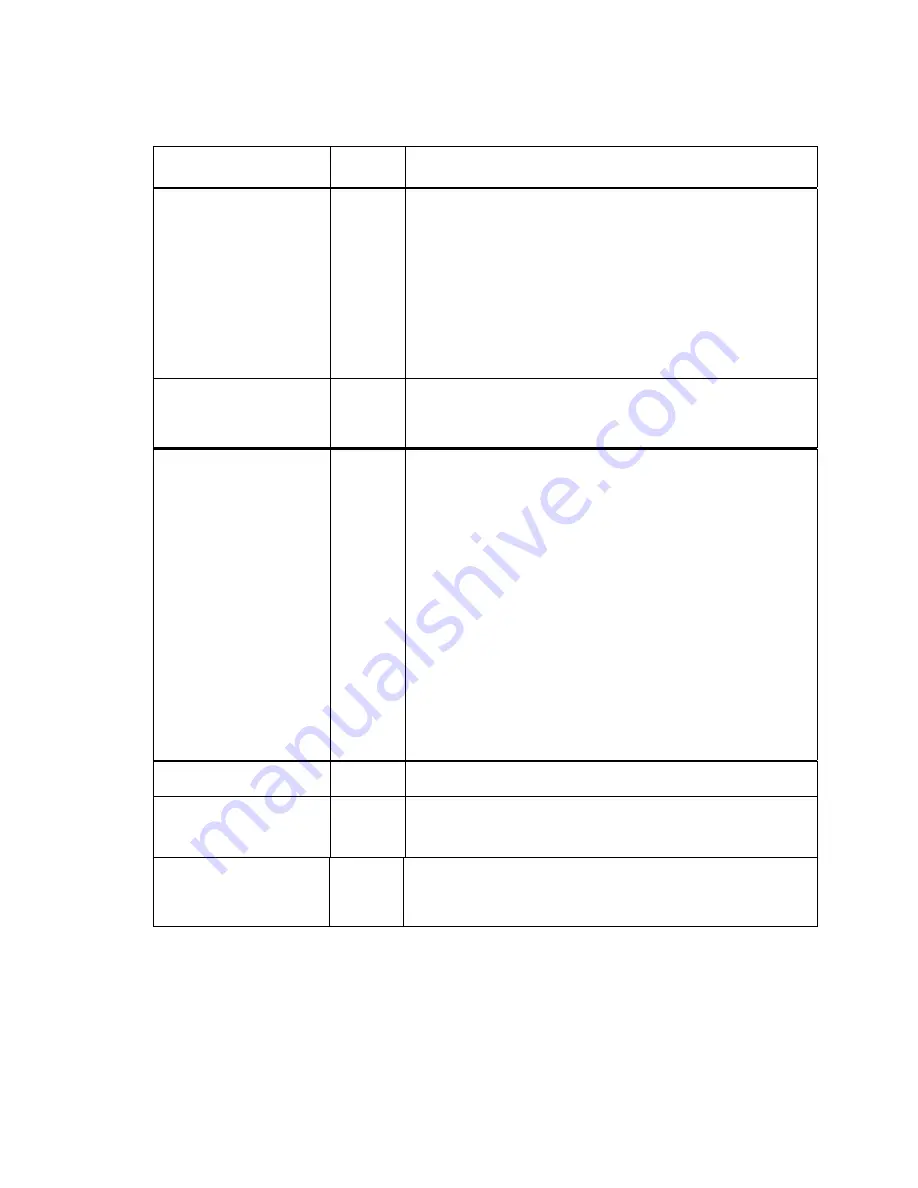
Menu 10: System Control
Displayed
Function
Values
Description Of Features
Reset Printer NVM
Pressing the Enter key will reset all profiles to their factory
defaults. This will also set top of form to the current
position.
To clear the printer buffer and all features set in RAM, turn the
printer OFF.
To reset the physical top of form , park and load the paper.
The LCD will momentarily display "Resetting NVRAM" and
after reset is complete "NVRAM Reset" when the Enter key
is pressed.
To properly reset the NVRAM, remove paper before turning off
the printer
Reset Key Lock
Pressing the Enter key will reset all Key Lock features to factory
defaults.
The LCD will momentarily display Key Lock Reset when the
Enter key is pressed.
Key Lock Functions
Off Line
Load/FF
Setup
Adj Up
Adj Down
Tear Off
Line Feed
Profile
Park/Path
Unlock
Lock
Use the Value
keys to scroll through the available key list.
If the Enter key is pressed, the Values "lock" or "unlock" will
toggle, respectively. The selected values are automatically
saved.
This feature can be set or reset from any profile.
Any Key Functions necessary to clear an error, such as Paper
Out, Carriage Jam, etc., are functional immediately,
regardless if that key has been turned off or delayed.
The Key Function displayed will be active when pressed.
The Key Function displayed will be inactive. The user will not
be able to activate the function. Pressing an inactive key
causes the LCD to display "KEY LOCKED".
In order to enter Setup Mode if setup is locked, the printer must
be on line and the following keystrokes must be entered
consecutively:
a.
Press Profile
b.
Press Park/Path
c.
Open the Keypad Door
Reset Quick List
Resets the list of features accessed by the Quick Access key to
the default features.
Add Quick FTR
Use Value
keys to select feature to add to Quick Access key.
Press Enter key.
This feature can now be accessed using Quick Access key.
Delete Quick FTR
Use Value
keys to select feature to delete to Quick Access
key. Press Enter key.
This feature will no longer be accessible from the Quick Access
key.
Summary of Contents for Documax A6300 Series
Page 1: ...Documax A6300 Series User s Manual Part No 107052 Rev B ...
Page 9: ...THIS PAGE INTENTIONALLY LEFT BLANK vi ...
Page 21: ...Figure 1 4 Install Power Cord 1 10 ...
Page 23: ...Figure 1 5 Open Access Cover Both Options ...
Page 30: ...Figure 1 11 Self Test Sample 1 19 ...
Page 41: ...3 1 ...
Page 45: ...Figure 3 3 Forms Loading 3 5 ...
Page 49: ...3 8 Figure 3 7 Loading Cut Sheet Form ...
Page 52: ...3 11 ...
Page 54: ...Figure 3 9 Set First Print Line 3 13 ...
Page 56: ...Figure 3 10 Printer Located Under Countertop 3 15 ...
Page 59: ...Figure 3 11 Manually Move Form Thickness Adjustment Knob 3 18 3 8 Heavy Forms Adjustment ...
Page 62: ...Figure 3 12 Main And Alternate Paper Paths Cut Sheet Not Shown 3 21 ...
Page 70: ...THIS PAGE INTENTIONALLY LEFT BLANK 3 29 ...
Page 75: ...Diagnostic Tests 4 5 Self Test ...
Page 86: ...Print Zero as 0 Ø Prints Zero without a slash Prints Zero with a slash 4 15 ...
Page 87: ......
Page 90: ...4 17 ...
Page 97: ...THIS PAGE LEFT INTENTIONALLY BLANK 4 23 ...
Page 99: ...Figure 5 1 Cleaning The Printer 5 2 ...
Page 141: ...D 5 Appendix E Ribbon Life Monitor ...
Page 148: ...THIS PAGE INTENTIONALLY LEFT BLANK F 4 ...
Page 150: ...G 2 7 Bit ASCII Character Set G 2 ...
Page 151: ...7 Bit ASCII Character Set Cont d ...
Page 152: ...G 3 IBM Code Page 437 Symbol Set G 3 ...
Page 153: ...IBM Code Page 437 Symbol Set Cont d G 4 ...
Page 154: ...G 4 IBM Code Page 850 Symbol Set G 5 ...
Page 155: ...IBM Code Page 850 Symbol Set Cont d G 6 ...
Page 156: ...G 5 Epson Italic Symbol Set G 7 ...
Page 157: ...Epson Italic Symbol Set Cont d G 8 G 9 ...
Page 158: ...G 6 Epson Graphics Symbol Set ...
Page 159: ...Epson Graphics Symbol Set Con t G 10 ...
Page 160: ...G 7 Epson Italic Graphics Symbol Set G 11 ...
Page 161: ...Epson Italic Graphics Symbol Set Cont d G 12 ...
Page 162: ...G 8 DEC Supplemental Symbol Set G 12 G 13 ...
Page 163: ...DEC Supplemental Symbol Set Cont d ...
Page 164: ...G 9 Nationality Overlay Character Set G 15 G 14 ...
Page 180: ...H 18 THIS PAGE INTENTIONALLY LEFT BLANK H 19 ...


