background image


A d d i t i o n a l   I n f o r m a t i o n  

17


Wireless Configuration Example #2 


II.  Setting up the Datamax Printer on a Wireless network, no security and Static IP addresses 


1.  Starting with the printer in the default configuration.  To reset the printer’s communication settings: 


;

 Note:  

Non-display printer users should skip this reset procedure and proceed to Step 2. 


a.   Turn on the printer and press the 

MENU BUTTON

b. Using 

the 

DOWN BUTTON

 scroll to ‘COMMMUNICATIONS’ and press the 

ENTER KEY

c. Using 

the 

DOWN BUTTON

 scroll to ‘NIC ADAPTER’ and press the 

ENTER KEY

d. Using 

the 

DOWN BUTTON

 scroll to ‘SET FACTORY DEFAULTS’ and press the 

ENTER KEY

.  When prompted press the 

YES KEY

.  The printer with then reset and return to Ready Mode. 


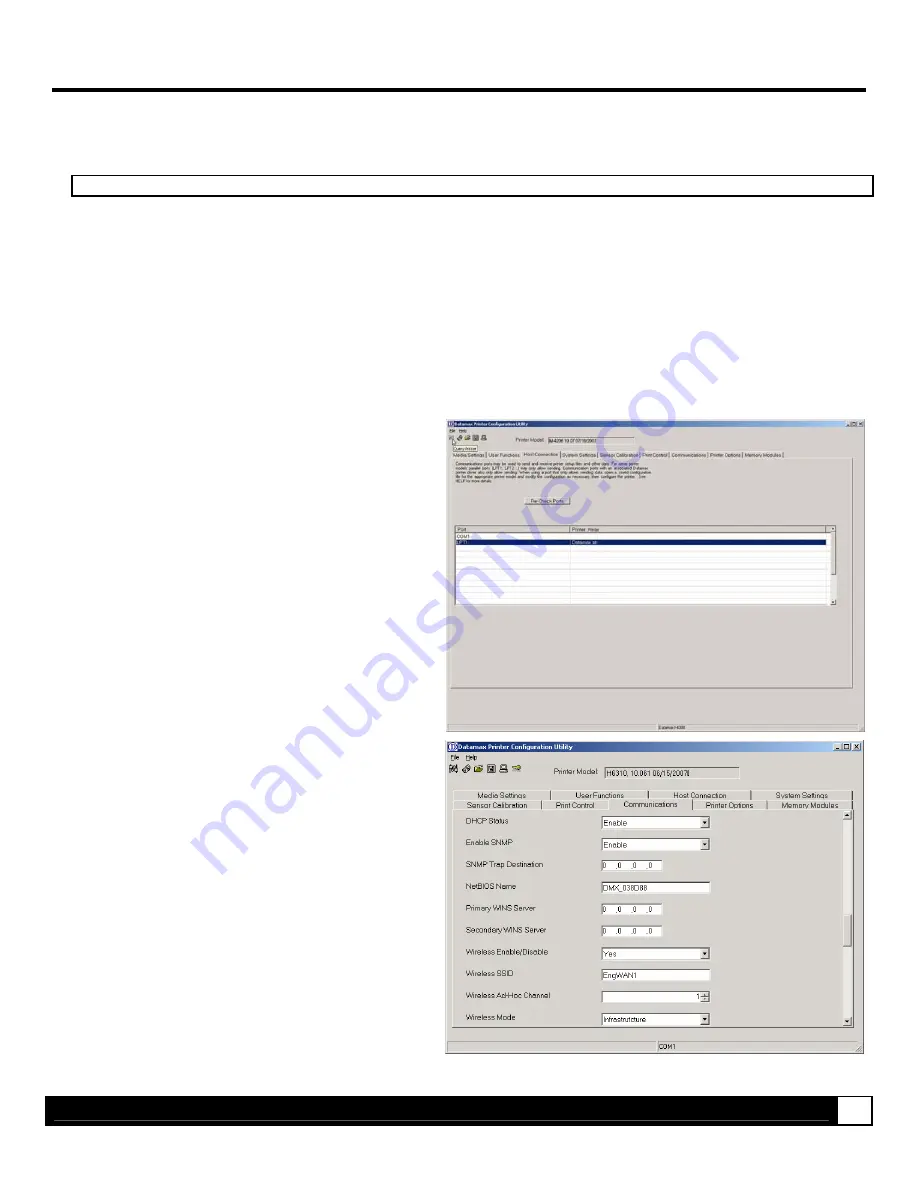
2.  Using DMXConfig program connect to the printer. Download the latest version from the Datamax FTP site at: 

ftp://ftp.datamaxcorp.com/dmxConfig/


Once you have downloaded and installed the DMXConfig utility: 


1.  Connect the host to the printer with a serial or 

parallel cable. 

 
2.  Turn on the printer. 
 
3.  Launch the DMXConfig utility. 
 
4.  Query the printer by using the Query Printer 

toolbar button (top-left). This will connect to the 
printer and get the current printer settings. 


5.  Next select the Communications tab, scroll 

down to the network parameters and modify the 
following settings: 


IP Address = 10.12.0.204 
Subnet Mask = 255.255.0.0 
Gateway Address = 10.12.254.254 
Wireless SSID = EngWAN1 
Wireless Mode = Infrastructure 
Wireless IP Address = 10.12.0.217 
 

Note: The IP address’s listed above are for 
example only, be sure to use address that are in 
range with your network. 


6.  Send the settings to the printer using the 

Configure Printer toolbar button. 

 
7.  The printer will reset and will connect to your 

network. You may now use the assigned IP 
address, 

(10.12.0.204 used in this example)

 to 

communicate with the printer. 


Summary of Contents for M-Class Mark II M-4206

Page 1: ...8 Phone 407 578 8007 Fax 407 578 8377 customercare datamaxcorp com Datamax International Phone 44 1279 772200 rbyrne datamaxcorp com Datamax Latin America Phone 407 523 5520 tdelgado datamaxcorp com D...

Page 2: ......

Page 3: ...sociated with an Access Point or Ad hoc peer DATA is a green indicator that flashes when there is data transmitted between the printer and Host access point USB Host Ports The USB Host Ports accept ex...

Page 4: ...ter setup via a direct connection to the host computers serial and parallel connection This is a vital tool for the use and configuration of wired and wireless printer setup DMXConfig Features Allows...

Page 5: ...ration Utility DMXConfig section for more information 4 Query the printer by using the Query Printer toolbar button top left This will connect to the printer and get the current printer settings 5 Nex...

Page 6: ...the printer and get the current printer settings 5 Next select the Communications tab scroll down to the network parameters and locate the DHCP Status menu item Click on the drop down box next to the...

Page 7: ...he ENTER KEY 4 Using the DOWN BUTTON scroll to SET FACTORY DEFAULTS and press the ENTER KEY When prompted press the YES KEY The printer with then reset and return to Ready Mode At this point it is rec...

Page 8: ...2 168 10 20 2 Power on the printer 3 The default SSID is the MAC address of the printer The printer s MAC address can be found on the label affixed to the backplate of the wireless card on the Wireles...

Page 9: ...ch the DMXConfig utility 4 Query the printer by using the Query Printer toolbar button top left This will connect to the printer and get the current printer settings 5 Next select the Communications t...

Page 10: ...ction of these settings see the corresponding function in the Operator s Manual The WiFi Configuration page contains many items associated with the setup of the wireless card as well as wireless secur...

Page 11: ...l used during Infrastructure mode Default is US Wireless Security Settings Wireless Security Mode Configures the security settings Disable security is disabled default wep64 64 bit key length sometime...

Page 12: ...seconds the DHCP should attempt to acquire an IP address before using the fallback IP address if wl dhcp fb is on An integer with a range of 1 255 Default is 150 DHCP Fallback IP Address Displays the...

Page 13: ...ke sure that Local Printer is selected and then click Next 3 Select on Create a new port and then select Standard TCP IP Port from the drop down menu Click Next 4 Click Next 5 In the Printer Name or I...

Page 14: ...ame field Next select whether or not to set this printer as your default printer Then Click Next 14 Select whether or not to share this printer on your network Then Click Next 15 Select No then Click...

Page 15: ...ormat PLG A file containing a group of hidden encrypted or normal files Datamax specific format SFL SFP Industry standard portrait and landscape bit mapped font formats The label name should contain t...

Page 16: ...ial temperature range Note 1 Temperatures above 80 C reduce wireless performance Module operates from 40 C cold start CAUTION The Communications Card is designed to prevent damage to sensitive compone...

Page 17: ...2 Using DMXConfig program connect to the printer Download the latest version from the Datamax FTP site at ftp ftp datamaxcorp com dmxConfig Once you have downloaded and installed the DMXConfig utility...

Page 18: ...ion Once the previous steps have been successfully completed you may now use the IP Address to Install a printer driver and start printing from your Windows applications See section Installing the Pri...

Page 19: ...TP site at ftp ftp datamaxcorp com dmxConfig Once you have downloaded and installed the DMXConfig utility 1 Connect the host to the printer with a serial or parallel cable 2 Turn on the printer 3 Laun...

Page 20: ......

Reviews: