


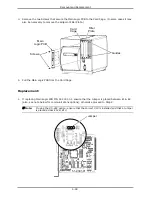


Removal and Replacement
4-21
3.
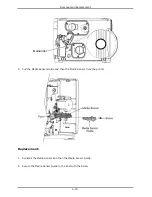
Raise the lock then reconnect the cable to the Media Sensor.
4.
Reinstall the Cover Assembly; see Section 4.1.
5. Perform calibration; see Section 2.1.2.
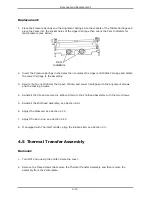
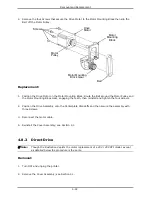
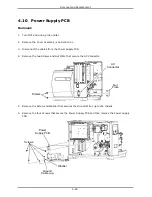
4.8 Drive Motor Assembly
Proceed with removal and replacement of the Drive Motor Assembly depending upon the type.
4.8.1
Belt Drive
Removal:
1. Turn OFF and unplug the printer.
2. Remove the Cover Assembly; see Section 4.1.
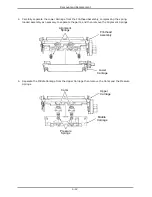
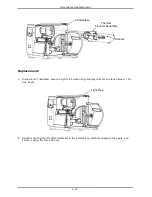
3.
Disconnect the motor cable then remove the three Screws that secure the Drive Assembly to the
Centerplate Standoffs.
Screws
Drive
Assembly
Centerplate
Standoffs
Summary of Contents for I-Class
Page 1: ...I Maintenance Manual...
Page 4: ...ii...
Page 5: ...i 1 Overview 1 0 Introduction 1 1 1 About the Printer 2...
Page 6: ...ii...
Page 38: ...ii...
Page 56: ...ii 4 11 Main Logic PCB 27 4 12 Backplane PCB 29...


