


Troubleshooting
3-3
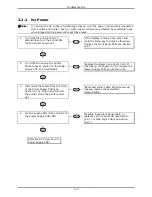
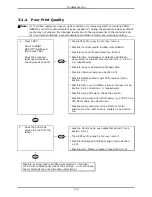
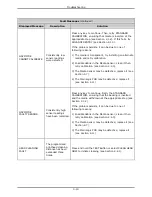
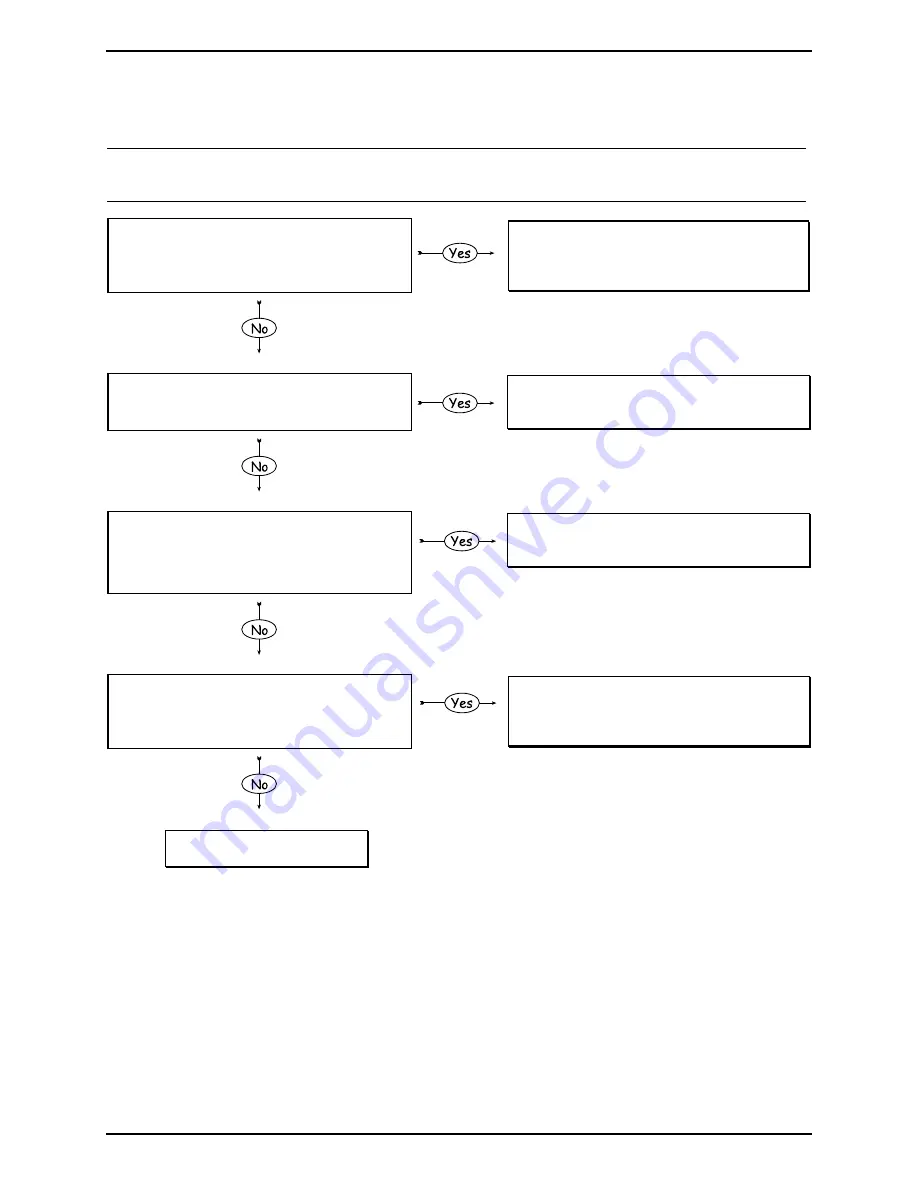
3.2.2
No Power
Note: (1) Ensure the AC outlet is functioning properly, with the power cord securely connected
to the outlet and printer; and, (2) some printer circuits are protected by resettable fuses,
when tripped cycling power will reset those fuses.
1.
Turn OFF the printer. Wait 30
seconds then turn the printer ON.
Did the printer power up?
If the display remains dark, press and
hold the Menu key to adjust; otherwise,
replace the Front Panel PCB; see Section
4.2.1.
2.
Turn OFF and unplug the printer.
Check fuses F1 and F2 on the Power
Supply PCB. Is a fuse blown?
Replace the fuse(s); see Section 4.9. If
the fuse(s) continue(s) to fail, replace the
Power Supply PCB; see Section 4.10.
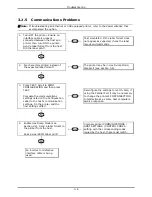
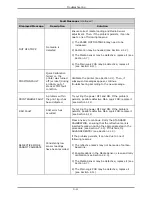
3.
Disconnect the cables from J2 and J6
of the Power Supply PCB (see
Section 4.10). Plug in and turn ON
the printer. Does the printer power
up?
Reconnect either cable. When power-up
ceases, replace the associated
component(s).
4.
Are two green LEDs (DS1 and DS2 of
the Power Supply PCB) ON?
Possible loose Front Panel cable; or,
defective Front Panel PCB (see Section
4.2.1) or Main Logic PCB (see Section
4.11).
Defective AC Power Cord or
Power Supply PCB.
Summary of Contents for I-Class
Page 1: ...I Maintenance Manual...
Page 4: ...ii...
Page 5: ...i 1 Overview 1 0 Introduction 1 1 1 About the Printer 2...
Page 6: ...ii...
Page 38: ...ii...
Page 56: ...ii 4 11 Main Logic PCB 27 4 12 Backplane PCB 29...


